UNIT 2
Hardware and Software
TABLE OF CONTENTS
2.1 | Computer Peripherals: Cables, Buses, Device drivers |
2.2 | Installation of devices: keyboard, mouse, scanner, printer, web-camera, speakers and many more |
2.3 | Plug-and-play devices |
2.4 | Expansion slots |
2.5 | System software |
2.6 | Program Language Translators |
2.7 | Application software |
2.8 | Programming Language Paradigms: Imperative, Object-Oriented and Logic languages |
2.9 | Basics of Popular Operating Systems (Windows and Linux) |
2.10 | The User Interface |
2.11 | Using Mouse and Organizing Desktop components |
2.12 | Running an Application |
2.13 | File , Folders and Directory management features |
2.14 | Using Help |
2.15 | Creating Short cuts |
2.16 | Configuring Operating System: Windows and Ubuntu |
2.17 | BIOS |
2.18 | System Utilities and Antivirus software |
Cables
With so many types of cables, it’s hard to find a singular source of information that highlights the important differences between them all. Here’s an overview of the most common computer cable types you’ll encounter when dealing with computers.
1. VGA Cable
Also known as D-sub cable, analog video cable
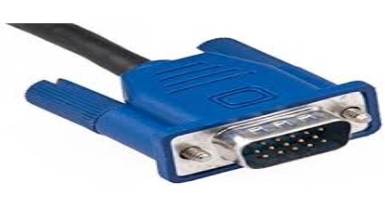
Connect one end to: computer monitor, television (PC input port)
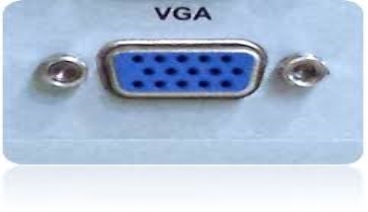
Connect other end to: VGA port on computer (see image below)
2. DVI Cable
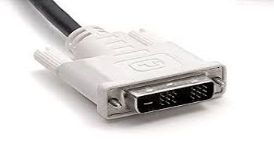
Connect one end to: computer monitor
Connect other end to: DVI port on computer (see image below)
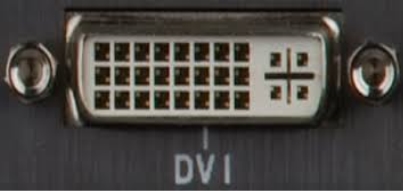
However there are 2 types of DVI, DVI-I and DVI-D.
DVI-D does not have the extra pins around the long pin, this is also a pure digital signal over DVI-I.
3. HDMI Cable
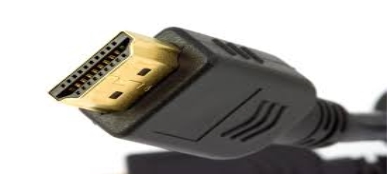
Connect one end to: computer monitor, television
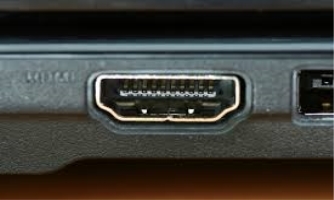
Connect other end to: HDMI port on computer (see image below)
Note: If you're hooking up a television to your computer, then we would recommend that you use a HDMI cable as your PC cable connection since it is able to transmit both display and sound - So you can not only use your TV screen as a monitor, but also make use of your TV speakers to play PC audio.
4. PS/2 Cable
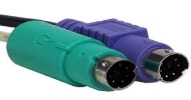
Connect one end to: PS/2 keyboard, PS/2 mouse
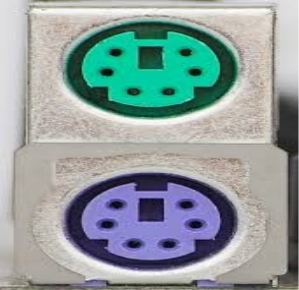
Connect other end to: PS/2 ports on computer (see image below)
- Purple PS/2 port: keyboard
- Green PS/2 port: mouse
5. Ethernet Cable
Also known as RJ-45 cable
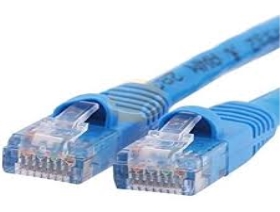
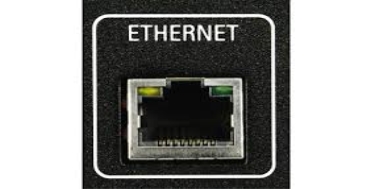
Connect one end to: router, network switch
Connect other end to: Ethernet port on computer (see image below)
6. 3.5mm Audio Cable
Also known as phone connector (since 3.5mm jacks are often found on mobile phones too)
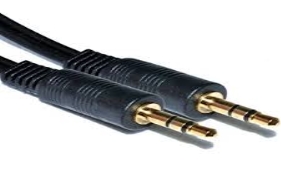
Connect one end to: computer speakers, 3.5mm headphones, 3.5mm microphone
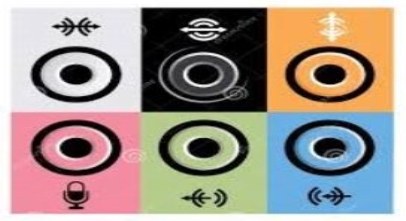
Connect other end to: audio ports on computer (see image below use Green socket)
- Green audio port: computer speakers or headphones
- Pink audio port: microphone
- Blue audio port: MP3 player, CD player, DVD player, turntable, electric guitar etc (line-in port to play and record sounds from the above devices)
7. USB Cable
For USB computer cable connections, there are two popular formats: USB 2.0 and the newer USB 3.0
How to tell USB 2.0 and 3.0 cables apart: USB 3.0 cables have a blue tip, and sometimes you can find a SS "Super Speed" label on it.
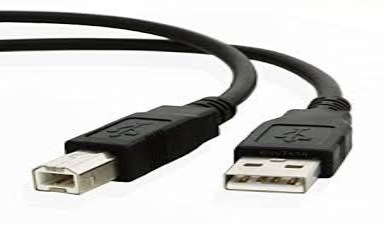
Since USB was intended to be the one computer cable connection to replace them all, it's no surprise that the possible uses for a USB port are quite mind-blowing. For this computer cable guide, we have listed its more common uses below:
Connect one end to: USB device
- Storage devices: USB flash drive, external hard drive, external optical drive
- Input devices: USB keyboard (wired and wireless), USB mouse (wired and wireless), webcam, scanner, gamepad
- Output devices: printer, all-in-one office machine, USB speaker
- Wireless adapters: network (Wi-Fi) adapter, bluetooth adapter, 3G adapter
- Data (and charging) cable for mobile devices such as mobile phone, tablet, MP3 player
Connect other end to: USB ports on computer (see image below)
How to tell USB 2.0 and 3.0 ports apart: USB 2.0 ports have black tips while USB 3.0 ports come with blue tips. See image below:
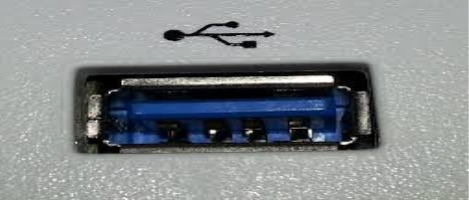
USB 3.0 is backwards-compatible... Meaning that you can connect a USB 2.0 device to a USB 3.0 port and vice versa (but the USB 3.0 devices hooked up to a USB 2.0 port will perform at lowered rates)
There are also USB cables which connect new external backup drives (see below), these are described as USB-A to Micro-B
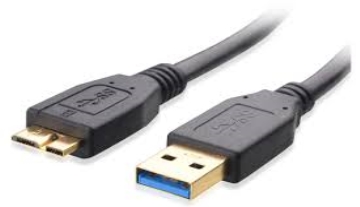
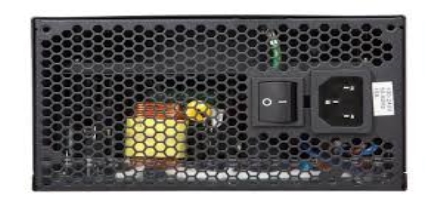
8. Computer Power Cord (Kettle Plug)
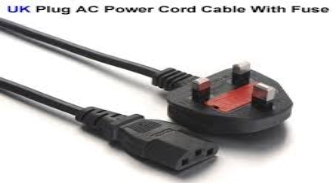
Connect one end to: AC power socket
Connect other end to: power supply unit (see image below), computer monitor
Note: Always turn off your power supply unit (with the 1-0 switch at the back) before connecting a power cord to it.
9. Thunderbolt/USB-C
Mostly seen on laptops and Apple Macs these cables are high speed and are capable of carrying Data, video and other information.
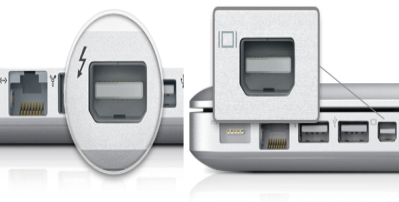
There are 2 current types of Thunderbolt, the older version Thunderbolt 2 is seen below but this can also be confused with Mini Display ports as they look identical and only visual difference is the picture beside the port. Thunderbolt 2 (left) has a lightning symbol and carries Data and video.
The Mini Display Port (right) will only carry Video.

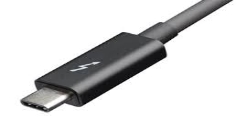
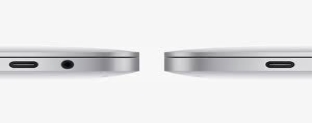
And Thunderbolt 3 also had known as USB-C on Apple Macs.
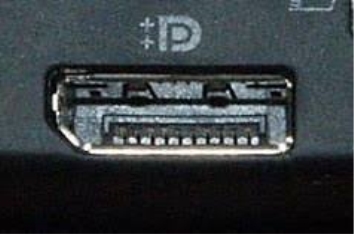
10. Display Port

Display Port is the best to use if you require a fast, high-resolution image.
The cable has better quality over HDMI and is the best option if you have this interface.
Buses
Inside computers, there are many internal components. In order for these components to communicate with each other, they make use of wires that are known as a ‘bus’.
A bus is a common pathway through which information flows from one computer component to another. This pathway is used for communication purpose and it is established between two or more computer components. We are going to check different computer bus architectures that are found in computers.
Different Types of Computer Buses
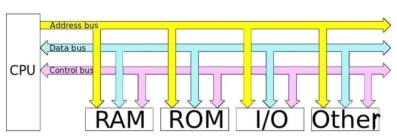
The Computer Buses
Functions of Buses in Computers
Summary of functions of buses in computers
1.Data sharing - All types of buses found in a computer transfer data between the computer peripherals connected to it.
The buses transfer or send data either in the serial or parallel method of data transfer. This allows for the exchange of 1, 2, 4 or even 8 bytes of data at a time. (A byte is a group of 8 bits). Buses are classified depending on how many bits they can move at the same time, which means that we have 8-bit, 16-bit, 32-bit or even 64-bit buses.
2. Addressing - A bus has address lines, which match those of the processor. This allows data to be sent to or from specific memory locations.
3. Power - A bus supplies power to various peripherals connected to it.
4. Timing - The bus provides a system clock signal to synchronize the peripherals attached to it with the rest of the system.
The expansion bus facilitates easy connection of more or additional components and devices on a computer such as a TV card or sound card.
Bus Terminologies
Computers have two major types of buses:
1. System bus:- This is the bus that connects the CPU to the main memory on the motherboard. The system bus is also called the front-side bus, memory bus, local bus, or host bus.
2. A number of I/O Buses, (I/O is an acronym for input/output), connecting various peripheral devices to the CPU. These devices connect to the system bus via a ‘bridge’ implemented in the processors' chipset. Other names for the I/O bus include “expansion bus", "external bus” or “host bus”.
Expansion Bus Types
These are some of the common expansion bus types that have ever been used in computers:
- ISA - Industry Standard Architecture
- EISA - Extended Industry Standard Architecture
- MCA - Micro Channel Architecture
- VESA - Video Electronics Standards Association
- PCI - Peripheral Component Interconnect
- PCI Express (PCI-X)
- PCMCIA - Personal Computer Memory Card Industry Association (Also called PC bus)
- AGP - Accelerated Graphics Port
- SCSI - Small Computer Systems Interface.
The 8 Bit and 16 Bit ISA Buses
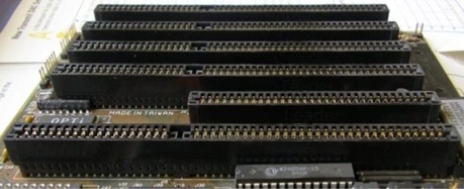
8 Bit and 16 Bit ISA Buses
ISA Bus
This is the most common type of early expansion bus, which was designed for use in the original IBM PC. The IBM PC-XT used an 8-bit bus design. This means that the data transfers take place in 8-bit chunks (i.e. one byte at a time) across the bus. The ISA bus ran at a clock speed of 4.77 MHz.
For the 80286-based IBM PC-AT, an improved bus design, which could transfer 16-bits of data at a time, was announced. The 16-bit version of the ISA bus is sometimes known as the AT bus. (AT-Advanced Technology)
The improved AT bus also provided a total of 24 address lines, which allowed 16MB of memory to be addressed. The AT bus was backward compatible with its 8-bit predecessor and allowed 8-bit cards to be used in 16-bit expansion slots.
When it first appeared the 8-bit ISA bus ran at a speed of 4.77MHZ – the same speed as the processor. Improvements done over the years eventually made the AT bus ran at a clock speed of 8MHz.
Comparison Between 8 and 16 Bit ISA Bus
8-Bit ISA card (XT-Bus) | 16-Bit ISA (AT –Bus card) |
8-bit data interface | 16-bit data interface |
4.77 MHZ bus | 8-MHZ bus |
62-pin connector | 62-pin connector |
| 36-pin AT extension connection |
MCA (Micro Channel Architecture)
IBM developed this bus as a replacement for ISA when they designed the PS/2 PC launched in 1987.
The bus offered a number of technical improvements over the ISA bus. For instance, the MCA ran at a faster speed of 10MHz and supported either 16-bit or 32-bit data. It also supported bus mastering - a technology that placed a mini-processor on each expansion card. These mini-processors controlled much of the data transfer allowing the CPU to do other tasks.
One advantage of MCA was that the plug-in cards were software configurable; this means that they required minimal intervention by the user when configuring.
The MCA expansion bus did not support ISA cards and IBM decided to charge other manufacturers royalties for use of the technology. This made it unpopular and it is now obsolete technology.
The EISA Bus

The EISA Bus Slots (on the left) Where EISA Cards Were Connected
EISA (Extended Industry Standard Architecture)
This is a bus technology developed by a group of manufactures as an alternative to MCA. The bus architecture was designed to use a 32-bit data path and provided 32 address lines giving access to 4GB of memory.
Like the MCA, EISA offered a disk-based setup for the cards, but it still ran at 8MHz in order for it to be compatible with ISA.
The EISA expansion slots are twice as deep as an ISA slot. If an ISA card is placed in an EISA slot it will use only the top row of connectors, however, a full EISA card uses both rows. It offered bus mastering.
EISA cards were relatively expensive and were normally found on high-end workstations and network servers.
VESA Bus
It was also known as the Local bus or the VESA-Local bus. VESA (Video Electronics Standards Association) was invented to help standardize PCs video specifications, thus solving the problem of proprietary technology where different manufacturers were attempting to develop their own buses.
The VL Bus provided 32-bit data path and ran at 25 or 33 MHZ. It ran at the same clock frequency as the host CPU. But this became a problem as processor speeds increased because, the faster the peripherals are required to run, the more expensive they are to manufacture.
It was difficult to implement the VL-Bus on newer chips such as the 486s and the new Pentiums and so eventually the VL-Bus was superseded by PCI.
VESA slots had an extra set of connectors and thus the cards were larger. The VESA design was backward compatible with the older ISA cards.
Features of the VESA local bus card:-
- 32-bit interface
- 62/36-pin connector
- 90+20 pin VESA local bus extension
Peripheral Component Interconnect
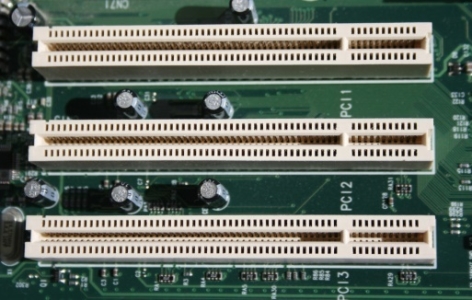
Peripheral Component Interconnect (PCI) is one of the latest developments in bus architecture and is the current standard for PC expansion cards. Intel developed and launched it as the expansion bus for the Pentium processor in 1993. It is a local bus like VESA, that is, it connects the CPU, memory, and peripherals to a wider, faster data pathway.
PCI supports both 32-bit and 64-bit data width; it is compatible with 486s and Pentiums. The bus data width is equal to the processor, such as a 32-bit processor would have a 32 bit PCI bus, and operates at 33MHz.
PCI was used in developing Plug and Play (PnP) and all PCI cards support PnP. This means a user can plug a new card into the computer, power it on and it will “self-identify” and “self-specify” and start working without manual configuration using jumpers.
Unlike VESA, PCI supports bus mastering that is, the bus has some processing capability and thus the CPU spends less time processing data. Most PCI cards are designed for 5v, but there are also 3v and dual-voltage cards. Keying slots used help to differentiate 3v and 5v cards and also to make sure that a 3v card is not slotted into a 5v socket and vice versa.
The PCI Slots
Accelerated Graphics Port
The need for high quality and very fast performance of video on computers led to the development of the Accelerated Graphics Port (AGP). The AGP Port connects to the CPU and operates at the speed of the processor bus. This means that video information is sent more quickly to the card for processing.
The AGP uses the main PC memory to hold 3D images. In effect, this gives the AGP video card an unlimited amount of video memory. To speed up the data transfer, Intel designed the port as a direct path to the PC’s main memory.
Data transfer rate ranges from 264 Mbps to 528mbps, 800 Mbps up to 1.5 Gbps. AGP connector is identified by its brown colour.
Personal Computer Memory Card Industry Association (PC Card)
The Personal Computer Memory Card Industry Association was founded to give a standard bus for laptop computers. So it is basically used in the small computers.
Small Computer System Interface
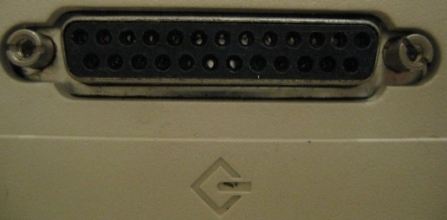
Short for Small Computer System Interface, a parallel interface standard used by Apple Macintosh computers, PCs and Unix systems for attaching peripheral devices to a computer.
The SCSI Port
Universal Serial Bus (USB)
This is an external bus standard that supports data transfer rates of 12 Mbps. A single USB port connects up to 127 peripheral devices, such as mice, modems, and keyboards. The USB also supports hot plugging or insertion (ability to connect a device without turning the PC off) and plug and play (You connect a device and start using it without configuration).
We have two versions of USB:-
USB 1x
First released in 1996, the original USB 1.0 standard offered data rates of 1.5 Mbps. The USB 1.1 standard followed with two data rates: 12 Mbps for devices such as disk drives that need high-speed throughput and 1.5 Mbps for devices such as joysticks that need much less bandwidth.
USB 2x
In 2002 a newer specification USB 2.0, also called Hi-Speed USB 2.0, was introduced. It increased the data transfer rate for PC to a USB device to 480 Mbps, which is 40 times faster than the USB 1.1 specification. With the increased bandwidth, high throughput peripherals such as digital cameras, CD burners, and video equipment could now be connected with USB.
IEEE 1394
The IEEE 1394 is a very fast external serial bus interface standard that supports data transfer rates of up to 400Mbps (in 1394a) and 800Mbps (in 1394b). This makes it ideal for devices that need to transfer high levels of data in real-time, such as video devices. It was developed by Apple with the name firewire.
A single 1394 port can connect up 63 external devices.
- It supports Plug and play
- Supports hot plugging, and
- Provides power to peripheral devices.
The IEEE 1394 Expansion Card

Device drivers
Device Driver in computing refers to a special kind of software program or a specific type of software application which controls a specific hardware device that enables different hardware devices for communication with the computer’s Operating System
A device driver communicates with the computer hardware by computer subsystem or computer bus connected to the hardware.
Device Drivers are very essential for a computer system to work properly because without device driver the particular hardware fails to work accordingly means it fails in doing a particular function/action for which it has been created.
In a very common way most term it as only a Driver also when someone says Hardware Driver that also refers to this Device Driver.
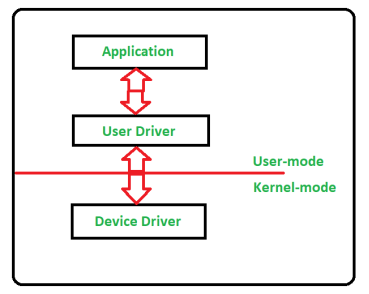
Working of Device Driver:
Device Drivers depend upon the Operating System’s instruction to access the device and performing any particular action. After the action they also show their reactions by delivering output or status/message from hardware device to the Operating system. For Example a printer driver tells the printer in which format to print after getting instruction from OS, similarly A sound card driver is there due to which 1’s and 0’s data of MP3 file is converted to audio signals and you enjoy the music. Card reader, controller, modem, network card, sound card, printer, video card, USB devices, RAM, Speakers etc need Device Drivers to operate.
The following figure illustrates the interaction between user, OS, Device driver and the devices:
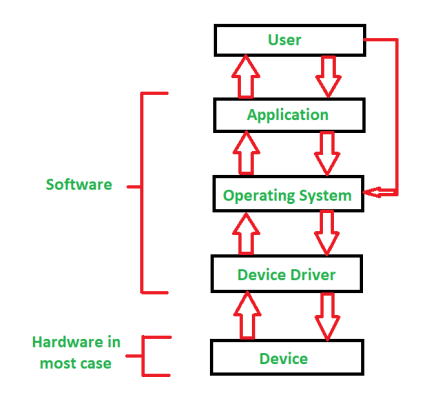
Types of Device Driver:
For almost every device associated with the computer system there exist Device Driver for the particular hardware. But it can be broadly classified into two types i.e.,
- Kernel-mode Device Driver –
This Kernel-mode device driver includes some generic hardwares which loads with operating System as part the OS these are BIOS, motherboard, processor and some other hardwares which are part of kernel software. These includes the minimum system requirement device drivers for each operating system. - User-mode Device Driver –
Other than the devices which are brought by kernel for working of the system the user also bring some devices for use during the using of a system that devices needs device drivers to functions those drivers falls under User mode device driver. For example user needs any plug and play action that comes under this.
Virtual Device Driver:
There are also virtual device drivers(VxD), which manages the virtual device. Sometimes we use same hardware virtually at that time virtual driver controls/manages the data flow from different application used by different users to the same hardware.
It is essential for a computer to have the required device drivers for all its parts to keep the system running efficiently. Many device drivers are provided by manufactures from beginning and also we can later include any required device driver for our system.
The peripheral devices are those devices which are connected to the computer and it helps the computer function. These devices contain both the input devices, which are used to give command to the computer and the output devices, which help computer showing the result to the user. The computer works with many peripheral devices so it's important to know that how much these devices can be installed in the computer and how can a persona configure them. Following are the devices which are used by the computer and the ways they can be configured;
Input devices:
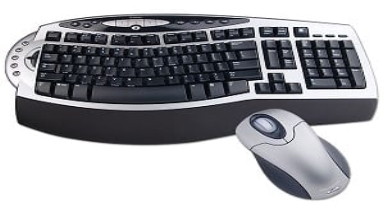
The device which are connected to computer and they are used to send the data to the computer internally, are known as the input devices. Following are some important input devices;
Mouse: Mouse is the one of the most common device that one would find in a desktop. It is normally plugged with the USB connection. It would be connected through the PS/2 port which is located on the back of the computer. In older system, one might find the serial port which was used to move the move around.
The old mouse contained ball inside of it which helped it move. But nor the trend has changed the mouse that one uses contains some LED light. They are called the laser mouse. The LED light now emits out of the mouse sensing that where the mouse is being moved. The installation of mouse is easy, one can just plug the mouse and the drivers would be searched by windows itself. The mouse can be configured from the control panel where the speed of it can be improved.
Keyboard: it is the famous device that is being used today and it is connected through a USB connection at the back of the computer. Old keyboards used to have the Mini DIN PS/2 connection with them; one would have to go through the manufacturer's website to know that what are the drivers for the keyboard and then can get them installed when he connects the keyboard with the computer.
Touch screen: Touch screen is becoming common as well. They are normally used on the mobile phones and other smart devices. Also, the tablets also contain this feature. Now it is even common to find a computer's large screen which works with the touch screen system. It makes it very easy to type and navigate and one can bring the keyboard on the screen and type it there as well hence one doesn't have to install the keyboard. The configurations and the installation of the touch screen are also done in a display when it is bought.
Scanner: At a time, the fax machines were widely used by the people and till now, they use it. But now the tables have turned and people tend to use the scanners. The scanners have the ability to turn the paper's image into a digital one hence sending the data from one place to another while keeping the same paper with us is now an easy task and the data can be sent more easily through the internet. The scanners are now used a lot and one can simply scan a paper and save it in any format he wants to.
Barcode reader: If one goes to some super market or the retail environment, one would see the barcode. It's a machine that is used to read the code which is printed at the back of the products. The connection of the bar code is normally made through the USB connection. Some old versions of the bar codes also use the PS.2 connections to get connected to the computer. The barcodes use the laser technology to read the barcode. The light comes and goes when the code is exposed to the barcode reader. This eye can directly damage one's eye as well so one has to be careful while using this machine. The barcode contains a specific driver when it is connected, the driver is detected by the windows and hence it can work properly.
KVM: If one is working in an environment where there is a single display but there are many different computers connected to it, the one is using the KVM. KVM means the keyboard, video and the mouse. Here if one wants to move to another device, he just has to push a single button to get to other device. This set can be centralized and the KVM can be used to switch between all the computing devices.
Microphone: the putting of voice in our computer is very common. It is done by the chat or it is even done for the voice reorganization software's which are available in the market. Microphones on not only at the headset, but they can be found separately and are there in the laptops as well. They also have the specific drivers and the configuration can be made through the control panel.
Biometric devices: these devices are used as the security tools. They are mostly used on some portable devices which tend to go away from one. If one tries to use the laptop, he might find there is a finger print reader there and hence it is protected since only the administrator who has set it up can log in to the computer.
Game pads: Game pad is the wonderful thing for the gamers. It allows the gamers to have some control over the gaming experience.
Joysticks: it is the gaming input which is widely used. It is a stick which has many buttons on it.
Digitizer: the digitalizing pad has some specialized pins that allow the user to draw on it very carefully and accurately. They are for those who have got some artistic abilities and they are installed with the driver.
Multimedia devices:
Multimedia devices have become so common these days and now they are an important part of our lives. Following are a few devices which are as follows;
Digital cameras: the digital cameras are the standalone cameras which are used by the individuals. These days almost everyone has got a digital camera and they are even embedded into the mobile phone where they can be used to take picture. The digital cameras when connected to the PC for transfer of pictures require the driver to get installed and that driver comes with the accessories.
Microphone: if one wants to do some conferences or the voice chat, he would be meeting the microphone. They are available as the separated ones as well which can be easily used. They are normally connected through some USB connection and there is the digital connector which is associated with it to provide the high quality.
Webcam: Having a video is now a great need of the everyday life. Now it is very common to find some built in cameras into the displays which are being used these days. Specially, they are so common in the laptop and if they are not present, it is pretty common to get it connected and it is done pretty cheap amount. One can also enjoy the live video if it is plugged through the 802.11 wireless connections which go into the USB connection in the computer.
Camcorder: Most of the video conference has to be recoded and hence one needs the camcorders. They are normally done for some live videos. Normally those people, who upload videos on the video sharing websites like YouTube etc., use this tool to record the videos and then can upload them on the PC, were after editing, they can upload it on the website. They are not only into the digital cameras but they can be found easily on every laptop and almost every mobile phone so one can record anything anytime without any hustle. The video is stored in the flash memory. There is mostly having the large storage capacities in the digital cameras so that the videos can be recorded no matter how big they are. For transferring the videos off the camera, one would need a Firewire, it is a kind of direct HDMI connection and it can be used to display the video immediately on some display.
MIDI enabled devices: MIDI stands for the Musical Instrument Digital Interface. It is actually a device which is musical one and can digitalize all of the information and can transfer it to the computer in some really standard way. Many of the application which contains these capabilities of the music use this midi as the standard format so that the information can be getting in and out of the computer. It is common to get these devices plugged into the computers with the help of some Ethernet cables and even the USB cables. While on the different side there in instrument is coated, the large din connections are used to get connected between the commuter and the device.
Output devices:
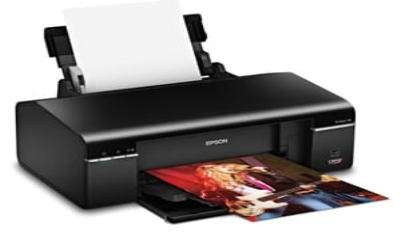
Output devices are those devices which do not send the data into the computer, in fact through these devices, the computer communicates with the user. They contain the devices like displays, printers etc. Since they are very vital part of the computer system, so one should have enough knowledge about them. Some of these output devices are as follows;
Printers: if one has the data in the computer, it is obvious that he has to take it out of the computer. There are several ways for it and one of them is the painters. These printers are available not only in the office environment and in some retail environment, but at the homes as well. One might need the printer to take out the prints of the important information he finds on the internet or the assignment which he creates. At office, many important documents are sent and received in the digitalized format and they have to be converted to the hard copy so they can be read easily. At the shops, one might find the painters which are used for printing out the receipts which are handed over to the customers. Hence printers are used in every aspect of the busy life. Printers have various types and the laser printers are the most famous type since they print really good. For printers there is much software and one must install the appropriate drivers to get them work. The configuration of the pinner can be done manually once it is connected to the computer.
Speakers: many of the features which are used by us are mainly related to the audio. Doesn't matter whether one listens to the podcasts or plays music, He would need the audio to be heard. Even while watching the movie or some educational video, hearing the voice is really important part and for that purpose, one needs the speakers. The laptop contains the right left speakers which are located at these both sides. There is also a subwoofer which can be used for the mixing of the voice. Also, one can have some advanced computer speaker which can be plugged into the computer externally for the sake of better quality of the sound. The laptops have various options which ate provided to user so that he can hear the sound with different options.
Display devices: one of the most integral parts of the PC is the display devices which are used. The human beings need to see that what's going on the operating system and to get in touch with the interface, they must have some display device which can show them the appropriate amount of data. Normally the display devices re pretty thin and one has many options for the display devices and they vary in prices range as well. These device can be both non touchable and the touchscreen. These display devices are not just connected to the computers; instead they are connected to the mobile phones as well. Also the Tablets contain some display devices as well. These displays show us what is exactly going on there and how we can control the computer.
Hence, the computer is made up of many parts and each part plays some really vital role so one should know all the parts of the computer so that he can get the knowledge about how they work, how they are installed and how they can be configured once they are connected to the computer/laptops.
Plug and play also referred as PnP, is an attractive phrase used for devices that work or recognized instantly whenever they are connected to computer. The major advantage of PnP device is that a user does not have to install the drivers manually and moreover the computer will itself take care of the device without manual intervention. When the device is connected it is automatically detected or recognized by the computer, new drivers will be loaded for the hardware instantly for the first time use.
Consider for example that you connect a plug and play device to one of the USB port of your computer; thus you may notice that as soon as you connect the device it will become available within few seconds after plug-in. Besides this when you compare the plug-and-play device with non-plug-and-play device, you may notice that the device will take a very lengthy procedure for setting up the device on your computer. Perhaps in Windows based computer a plug-and-play device was first introduced in Windows 95 and retained the same for all its later versions.
The role of plug-and-play devices in growing in demand nowadays as every user wants some kind of comfortability to easily access the device. Example of some plug-and-play devices are USB devices, internal or external hard disks, video cards, monitor and many other.
At times there are situations where system cannot configure and load a PnP device, thus in this kind of situation you can make use of device manger, DOS drivers loaded with CONFIG.SYS and AUTOEXEC.BAT configuration files and finally by using both DOS and operating system. But even after performing above mentioned configuration methods the devices may not be configured due to some complex operating system environment or due to some uncertainties with the computer.
At times a plug-and-play device like USB device will end up in software or hardware conflict due to which it may fail to work; this failure may result in device corruption leading to data loss. Thus if you have come across any such scenario then you can make use of Remo Recover (Windows / Mac) application which can easily perform data recovery after USB flash drive not recognized by your Windows or Mac operating system.
Expansion slots are specific slots on a PC motherboard that facilitate the placement of expansion cards. They are located at the back of the computer, they allow more ports to be add to the computer. Example USB 2.0/USB 3.0, HDMI
There are many different types of motherboard expansion slots, but they all have one thing in common: They allow you to plug expansion cards into your computer and increase its functionality. While motherboards often come with on-board sound, wired networking, and video, plugging in a dedicated expansion card will result in this card being used instead of the motherboard’s built-in hardware and can increase your computer’s gaming, video playback, or sound performance. Expansion cards can also provide new functionality, such as allowing your computer to capture TV signals or access a wireless network.
PCI Express
PCI Express Motherboard Expansion Slot PCI Express (or PCIe) is the newest standard for expansion cards on personal computers. PCI Express is meant to replace older standards like PCI and AGP, mentioned below. PCIe provides significantly more bandwidth, allowing for higher performance video cards and network cards. Video cards in particular are the most common consumer use of these slots, since they need high bandwidth for maximum 3D gaming and graphics performance. PCI Express slots have different versions and numbers of lanes.
PCI
PCI Motherboard Expansion Slots PCI (Peripheral Component Interconnect) is not to be confused with PCI Express, which is meant to replace it. Unlike PCI Express, PCI is an older standard which provides less bandwidth for expansion cards. In spite of the fact that the standard was created in 1993, new motherboards still ship with PCI slots for compatibility purposes.
AGP
AGP Motherboard Expansion Slot The AGP (Accelerated Graphics Port) expansion slot standard was introduced when video cards needed more bandwidth for performance than was provided by PCI. As suggested by the title, AGP slots are used for video cards. However, AGP has been largely phased out in favour of the PCI Express expansion slot standard. Unlike AGP, PCI Express provides higher bandwidth for other types of expansion cards that could use it, such as some newer, high-performance sound and network cards.
Express Card & PC Card (or PCMCIA)
PCMCIA Motherboard Expansion Slot These standards are designed to be used with portable computers such as laptops. Express Card is the successor to PC Card (also known as PCMCIA), and, like PCI over PCIe, has more bandwidth. Unlike PCI, these types of cards are hot-pluggable (which means you can plug them in while your laptop is running, without shutting it down first).
ISA
ISA Motherboard Expansion Slot ISA (Industry Standard Architecture) is another type of expansion slot you may have heard of. It was the predecessor to PCI and you’ll only find it on much older computers.
Software is a part of computer system that contains data or set of instructions. It is considered as set of programs, which is then executed to perform a well-defined function. A program consists of a set of instructions which are used to perform a specific task in an orderly manner.
There are two types of software −
- System Software
- Application Software
System Software
The system software is a group of programs designed to operate, control, perform and extend the processing capabilities of the computer itself. System software is generally prepared by the computer manufacturers. These software products contain mainly programs which are written in low-level languages, understandable language where they interact with the hardware at a very basic level. It is very cumbersome to write a program in the machine language. System software acts as the interface between the hardware and the end users.
Some examples of system software are Operating System, Compilers, Interpreter, Assemblers, etc.

Here is a list of some of the most prominent features of a system software −
- Close to the system
- Very fast in speed
- Complicated to design
- Difficult to understand
- Less interactive
- Smaller in size
- Difficult to manipulate
- Generally written in low-level language i.e machine language
Application Software
Application software products are specially designed to satisfy the needs of the user to perform the functions properly. All software applications prepared in the computer lab can come under the category of Application software.
Application software may consist of a single program, such as Microsoft's notepad. It is used to write and edit a simple text. It may also consist of a series of programs, often called a software package, which work together to perform a specific task, such as a spreadsheet package.
Examples of Application software are the following −
- Payroll Software
- Student Record Software
- Inventory Management Software
- Income Tax Software
- Railways Reservation Software
- Microsoft Office Suite Software
- Microsoft Word
- Microsoft Excel
- Microsoft PowerPoint

Features of application software are as follows −
- Close to the user
- Easy to design
- More interactive
- Slow in speed
- Generally written in high-level language
- Easy to understand
- Easy to manipulate and use
- Bigger in size and requires large storage capacity.
A translator is a programming language processor that converts a computer program from one language to another. It takes a program written in source code and converts it into machine code. It discovers and identifies the error during translation.
Purpose of Translator
It translates high-level language program into a machine language program that the central processing unit (CPU) can understand. It also detects errors in the program.
Different Types of Translators
There are 3 different types of translators as follows:
Compiler
A compiler is a translator used to convert high-level programming language to low-level programming language. It converts the whole program in one session and reports errors detected after the conversion. Compiler takes time to do its work as it translates high-level code to lower-level code all at once and then saves it to memory.
A compiler is processor-dependent and platform-dependent. But it has been addressed by a special compiler, a cross-compiler and a source-to-source compiler. Before choosing a compiler, user has to identify first the Instruction Set Architecture (ISA), the operating system (OS) and the programming language that will be used to ensure that it will be compatible.
Interpreter
Just like a compiler, is a translator used to convert high-level programming language to low-level programming language. It converts the program one at a time and reports errors detected at once, while doing the conversion. With this, it is easier to detect errors than in a compiler. An interpreter is faster than a compiler as it immediately executes the code upon reading the code.
It is often used as a debugging tool for software development as it can execute a single line of code at a time. An interpreter is also more portable than a compiler as it is not processor-dependent, you can work between hardware architectures.
Assembler
An assembler is is a translator used to translate assembly language to machine language. It is like a compiler for the assembly language but interactive like an interpreter. Assembly language is difficult to understand as it is a low-level programming language. An assembler translates a low-level language, an assembly language to an even lower-level language, which is the machine code. The machine code can be directly understood by the CPU.
Examples of Translators
Here are some examples of translators per type:
Translator | Examples |
Compiler | Microsoft Visual Studio |
Interpreter | OCaml |
Assembler | Fortran Assembly Program (FAP) |
Advantages and Disadvantages of Translators
Here are some advantages of the Compiler:
- The whole program is validated so there are no system errors.
- The executable file is enhanced by the compiler, so it runs faster.
- User do not have to run the program on the same machine it was created.
Here are some disadvantages of the Compiler:
- It is slow to execute as you have to finish the whole program.
- It is not easy to debug as errors are shown at the end of the execution.
- Hardware specific, it works on specific machine language and architecture.
Here are some advantages of the Interpreter:
- You discover errors before you complete the program, so you learn from your mistakes.
- Program can be run before it is completed so you get partial results immediately.
- You can work on small parts of the program and link them later into a whole program.
Here are some disadvantages of the Interpreter:
- There’s a possibility of syntax errors on unverified scripts.
- Program is not enhanced and may encounter data errors.
- It may be slow because of the interpretation in every execution.
Here are some advantages of the Assembler:
- The symbolic programming is easier to understand thus time-saving for the programmer.
- It is easier to fix errors and alter program instructions.
- Efficiency in execution just like machine level language.
Here are some disadvantages of the Assembler:
- It is machine dependent, cannot be used in other architecture.
- A small change in design can invalidate the whole program.
- It is difficult to maintain.
The software is a kind of programs that enable a user to perform some specific task or used to operate a computer. It directs all the peripheral devices on a computer system – what to do and how to perform work. Without Software, we can’t operate hardware and perform any calculations. A computer system can be divided into three components: the hardware, the software and the users. The software can be further divided into mainly two parts: Application software and System Software. Bare use of hardware is not easy, so to make it easy software is created.
System Software: System Software (a type of computer program) provides a platform to run computer’s hardware and computer application to utilise system resources and solve their computation problem. It is written in a low-level language, like assembly language so it can easily interact with hardware with basic level. It controls working of peripheral devices. System software act as a scheduler for the execution of the processes and arrange the sequence according to their priority and I/O devices requirement and creation of the process. The best-known example of system software is the operating system (OS).It responsible for manages all the other programs on a computer.
Application Software: Applications software is capable of dealing with user inputs and helps the user to complete the task. It is also called end-user programs or only an app. It resides above system software. First user deal with system software after that he/she deals with application software. The end user uses applications software for a specific purpose. It programmed for simple as well as complex tasks. It either be installed or access online. It can be a single program or a group of small programs that referred to as an application suite. Some examples of Application Software are Word processing software, Spreadsheets Software, Presentation, Graphics, CAD/CAM, Sending email etc.
Types of Application Software: According to the need of users it is categorized into following types.
1) Presentation Software: Presentation program is a program to show the information in the form of slides. We can add text, graphics video and images to slides to make them more informative.
The software has three components:
1) Text editor for inputting and formatting text.
2) Inserting graphics, text, video and other multimedia files.
3) Slideshow to display the information.
Presentation software helps the presenter to present their ideas with ease and visual information easy to understand.
Example of presentation software: Microsoft’s PowerPoint and Apple’s Keynote.
2) Spreadsheet Software: Spreadsheet software is used to perform manipulate and calculations. In spreadsheet software data is stored in intersection row and column. The intersection of row and column is known as a cell. The cell labelled with the row and column label like A1, A2 etc. While entering data into the cell, we can also define the data value like text, date, time, number. It provides many formula and function to perform calculations like arithmetic operations, logical operations, text operation etc. It provides charts, graphs to display data graphically.
For example Microsoft Excel, lotus 1-2-3 for windows and number for MAC OS.
3) Database Software: Database is a collection of data related to any applications. Today is environment every application has some database where data regarding users stored. For this purpose, we used database software. When we operate the application data is accessed from the database, and after manipulation, it gets back stored in the database.
Database Management System (DBMS) software tool used for storing, modifying extracting and searching for information within a database. MySQL, MS Access, Microsoft SQL Server and Oracle is the example of database application Software.
4) Multimedia Software: Multimedia is a combination of text, graphics, audio and Multimedia software used in the editing of video, audio and text. Multimedia software used in the growth of business, educations, information, remote system and entertainment.
Entertainment: This area deal with the general public, media and telecommunication. With the growth entertainment mode, many application is available for mobile phone as well as the system. Like Music and video entertainment app, navigation app, social networking application, news and weather application, educational apps and e-book reader’s app for preparation of any type of exams.
5) Simulation Software: Simulation is an imitation of real world and environment. The simulation creates a physical environment of the real world to represent the similar behaviour, function and key nature of the selected topic. Simulation is technology for education, engineering, testing, training, video games and for scientific modelling of natural systems to gain insight into their functioning. The simulation used in the area of the real world where the real system cannot be accessible or may be dangerous or unacceptable. Area of technology flight, economics, automobiles, Robotics, digital lifecycle, Space Shuttle Navigation, weather.
6) Word Processing Software: Word Processing software is used to manipulate, format the text, to create memos, letters, faxes and documents. Processing Software is used to format and beautify the text. It provides a list of features. Like thesaurus, the option provides synonyms, antonyms and related words for chosen word or phrase. Find and replace feature enables users to scan and replace selected words or phrases in the document. Font option provides font colour, font style, font effect, font size to modify the txt. Word Art option to modify or animated titles, hyphens, columns and text boxes in documents. Grammar and Spelling check option available for checking errors. Many more option is listed here in software.
For example Microsoft Word, Lotus Word Pro, Word pad and Corel WordPerfect.
Paradigm can also be termed as method to solve some problem or do some task. Programming paradigm is an approach to solve problem using some programming language or also we can say it is a method to solve a problem using tools and techniques that are available to us following some approach. There are lots for programming language that are known but all of them need to follow some strategy when they are implemented and this methodology/strategy is paradigms. Apart from varieties of programming language there are lots of paradigms to fulfil each and every demand. They are discussed below:
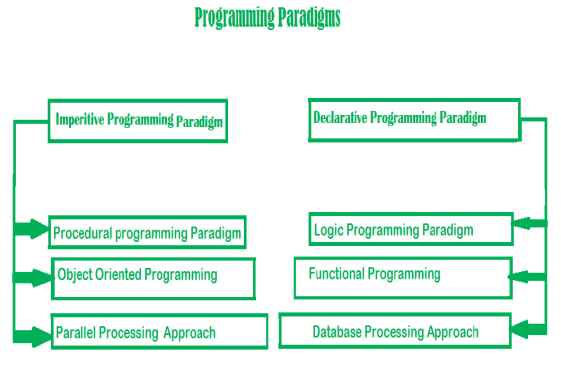
1. Imperative programming paradigm:
It is one of the oldest programming paradigm. It features close relation relation to machine architecture. It is based on Von Neumann architecture. It works by changing the program state through assignment statements. It performs step by step task by changing state. The main focus is on how to achieve the goal. The paradigm consists of several statements and after execution of all the result is stored.
Advantage:
- Very simple to implement
- It contains loops, variables etc.
Disadvantage:
- Complex problem cannot be solved
- Less efficient and less productive
- Parallel programming is not possible
Examples of Imperative programming paradigm:
C : developed by Dennis Ritchie and Ken Thompson
Fortan : developed by John Backus for IBM
Basic : developed by John G Kemeny and Thomas E Kurtz
// average of five number in C
Int marks[5] = { 12, 32, 45, 13, 19 } int sum = 0; Floataverage = 0.0; For(int i = 0; i< 5; i++) { Sum = sum + marks[i]; } Average = sum / 5; |
Imperative programming is divided into three broad categories: Procedural, OOP and parallel processing. These paradigms are as follows:
- Procedural programming paradigm –
This paradigm emphasizes on procedure in terms of under lying machine model. There is no difference in between procedural and imperative approach. It has the ability to reuse the code and it was boon at that time when it was in use because of its reusability.
Examples of Procedural programming paradigm:
C: developed by Dennis Ritchie and Ken Thompson
C++: developed by Bjarne Stroustrup
Java: developed by James Gosling at Sun Microsystems
ColdFusion: developed by J JAllaire
Pascal: developed by Niklaus Wirth
#include <iostream> Using name space std; Int main() { Int i, fact = 1, num; Cout<< "Enter any Number: "; Cin>> number; For(i = 1; i<= num; i++) { Fact = fact * i; } Cout<< "Factorial of "<<num<< " is: "<< fact <<endl; Return0; } |
Then comes OOP,
2. Object oriented programming –
The program is written as a collection of classes and object which are meant for communication. The smallest and basic entity is object and all kind of computation is performed on the objects only. More emphasis is on data rather procedure. It can handle almost all kind of real life problems which are today in scenario.
Advantages:
- Data security
- Inheritance
- Code reusability
- Flexible and abstraction is also present
Examples of Object Oriented programming paradigm:
Simula: first OOP language
Java: developed by James Gosling at Sun Microsystems
C++: developed by Bjarne Stroustrup
Objective-C: designed by Brad Cox
Visual Basic .NET: developed by Microsoft
Python: developed by Guido van Rossum
Ruby: developed by Yukihiro Matsumoto
Smalltalk: developed by Alan Kay, Dan Ingalls, Adele Goldberg
Importjava.io.*;
ClassGFG { Public static void main(String[] args) { System.out.println("GfG!"); Signup s1 = newSignup(); s1.create(22, "riya", "riya2@gmail.com", 'F', 89002); } }
ClassSignup { Intuserid; String name; String emailid; Charsex; Longmob;
Public void create(int user id, String name, String email id, char sex, long mob) { System.out.println("Welcome to GeeksforGeeks\nLets create your account\n"); This.userid = 132; This.name = "Radha"; This.emailid = "radha.89@gmail.com"; This.sex = 'F'; This.mob = 900558981; System.out.println("your account has been created"); } }
|
3. Parallel processing approach –
Parallel processing is the processing of program instructions by dividing them among multiple processors. A parallel processing system posses many numbers of processor with the objective of running a program in less time by dividing them. This approach seems to be like divide and conquer. Examples are NESL (one of the oldest one) and C/C++ also supports because of some library
Function.
4. Declarative programming paradigm:
It is divided as Logic, Functional, Database. In computer science the declarative programming is a style of building programs that expresses logic of computation without talking about its control flow. It often considers programs as theories of some logic.It may simplify writing parallel programs. The focus is on what needs to be done rather how it should be done basically emphasize on what code code is actually doing. It just declare the result we want rather how it has be produced. This is the only difference between imperative (how to do) and declarative (what to do) programming paradigms. Getting into deeper we would see logic, functional and database.
5. Logic programming paradigms –
It can be termed as abstract model of computation. It would solve logical problems like puzzles, series etc. In logic programming we have a knowledge base which we know before and along with the question and knowledge base which is given to machine, it produces result. In normal programming languages, such concept of knowledge base is not available but while using the concept of artificial intelligence, machine learning we have some models like Perception model which is using the same mechanism.
In logical programming the main emphasize is on knowledge base and the problem. The execution of the program is very much like proof of mathematical statement, e.g., Prolog
Sum of two number in prolog:
Predicatessumoftwonumber(integer, integer)
Clauses
Sum(0, 0).
Sum(n, r):-
n1=n-1,
Sum(n1, r1),
r=r1+n
6. Functional programming paradigms –
The functional programming paradigms has its roots in mathematics and it is language independent. The key principal of this paradigms is the execution of series of mathematical functions. The central model for the abstraction is the function which are meant for some specific computation and not the data structure. Data are loosely coupled to functions.The function hide their implementation. Function can be replaced with their values without changing the meaning of the program. Some of the languages like perl, javascript mostly uses this paradigm.
Examples of Functional programming paradigm:
JavaScript: developed by Brendan Eich
Haskwell : developed by Lennart Augustsson, Dave Barton
Scala : developed by Martin Odersky
Erlang : developed by Joe Armstrong, Robert Virding
Lisp : developed by John Mccarthy
ML : developed by Robin Milner
Clojure : developed by Rich Hickey
The next kind of approach is of Database.
7. Database/Data driven programming approach –
This programming methodology is based on data and its movement. Program statements are defined by data rather than hard-coding a series of steps. A database program is the heart of a business information system and provides file creation, data entry, update, query and reporting functions. There are several programming languages that are developed mostly for database application. For example SQL. It is applied to streams of structured data, for filtering, transforming, aggregating (such as computing statistics), or calling other programs.
So it has its own wide application.
CREATE DATABASE database Address;
CREATE TABLE Addr (
PersonID int,
LastName varchar(200),
FirstName varchar(200),
Address varchar(200),
City varchar(200),
State varchar(200)
);
We shall discuss about the basic of Operating Systems in this section −
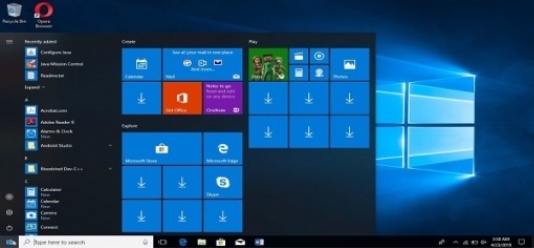
Windows Operating System
Windows operating system is developed by Microsoft Corporation. It provides Graphical User Interface (GUI), multitasking capability to users. It also provides virtual memory management and several peripheral devices. According to statistics, about 90% of computers have migrated to Windows operating system.
Versions of Windows Operating System
Windows Server Version | Code Name | Launch Date | Kernel Version | CPU Speed | Min Disk | Min Memory |
Windows for Workgroups 3.1 | Sparta | Oct-92 | 3.1 | 25 MHz | 10.5 MB | 3 MB |
Windows for Workgroups 3.1 | Snowball | Nov-93 | 3.11 | 25 MHz | 10.5 MB | 3 MB |
Windows for NT 3.1 Advanced Server | NT OS/2 | Aug-93 | NT 3.10 | 25 MHz | 90 MB | 16 MB |
Windows for NT 3.5 Server | Daytona | Sep-94 | NT 3.5 | 25 MHz | 90 MB | 16 MB |
Windows for NT 3.51 Server | Daytona | Jun-95 | NT 3.51 | 25 MHz | 90 MB | 16 MB |
Windows for NT 4 Server | Cairo | Jul-96 | NT 4.0 | 33 MHz | 150 MB | 32 MB |
Windows 2000 Server | Janus | Feb-00 | NT 5.0 | 133 MHz | 1000 MB | 128 MB |
Windows Server 2003 | Whistler | Apr-03 | NT 5.2 | 400 MHz | 1500 MB | 512 MB |
Windows Server 2003 R2 | R2 | Mar-06 | NT 5.2 | 400 MHz | 1500 MB | 512 MB |
Windows Server 2008 | Longhorn | Feb-08 | NT 6.0 | 1000MHz | 20,000MB | 512 MB |
Windows Server 2008 R2 | Server 7 | Oct-09 | NT 6.1 | 1400MHz | 32,000MB | 512 MB |
Windows Server 2012 | Server 8 | Sep-12 | NT 6.2 | 1400MHz | 32,000MB | 512 MB |
Windows Server 2012 R2 | Blue | Oct-13 | NT 6.3 | 1400MHz | 32,000MB | 512 MB |
Windows Server 2016 | Redstone | Sep-16 | NT 10.0 | 1400MHz | 32,000MB | 512 MB |
Linux Operating System
Linux is a multitasking operating system that supports various users and numerous tasks. It is open source, i.e., code for Linux is available for free of cost. Linux can run on any computer and support almost any type of application. Linux uses command-line interface. It also supports windows based GUI environment, called "shells". The most popular Linux vendors are Red Hat and Novell. Some of the Linux versions include Ubuntu, Fedora, Linux Mint, etc.
User interface is the front-end application view to which user interacts in order to use the software. User can manipulate and control the software as well as hardware by means of user interface. Today, user interface is found at almost every place where digital technology exists, right from computers, mobile phones, cars, music players, airplanes, ships etc.
User interface is part of software and is designed such a way that it is expected to provide the user insight of the software. UI provides fundamental platform for human-computer interaction.
UI can be graphical, text-based, audio-video based, depending upon the underlying hardware and software combination. UI can be hardware or software or a combination of both.
The software becomes more popular if its user interface is:
- Attractive
- Simple to use
- Responsive in short time
- Clear to understand
- Consistent on all interfacing screens
UI is broadly divided into two categories:
- Command Line Interface
- Graphical User Interface
Command Line Interface (CLI)
CLI has been a great tool of interaction with computers until the video display monitors came into existence. CLI is first choice of many technical users and programmers. CLI is minimum interface software can provide to its users.
CLI provides a command prompt, the place where the user types the command and feeds to the system. The user needs to remember the syntax of command and its use. Earlier CLI were not programmed to handle the user errors effectively.
A command is a text-based reference to set of instructions, which are expected to be executed by the system. There are methods like macros, scripts that make it easy for the user to operate.
CLI uses less amount of computer resource as compared to GUI.
CLI Elements
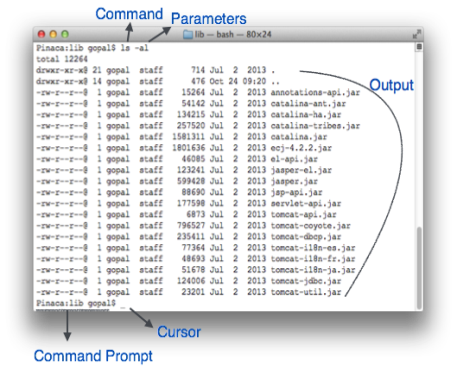
A text-based command line interface can have the following elements:
- Command Prompt - It is text-based notifier that is mostly shows the context in which the user is working. It is generated by the software system.
- Cursor - It is a small horizontal line or a vertical bar of the height of line, to represent position of character while typing. Cursor is mostly found in blinking state. It moves as the user writes or deletes something.
- Command - A command is an executable instruction. It may have one or more parameters. Output on command execution is shown inline on the screen. When output is produced, command prompt is displayed on the next line.
Graphical User Interface
Graphical User Interface provides the user graphical means to interact with the system. GUI can be combination of both hardware and software. Using GUI, user interprets the software.
Typically, GUI is more resource consuming than that of CLI. With advancing technology, the programmers and designers create complex GUI designs that work with more efficiency, accuracy and speed.
GUI Elements
GUI provides a set of components to interact with software or hardware.
Every graphical component provides a way to work with the system. A GUI system has following elements such as:
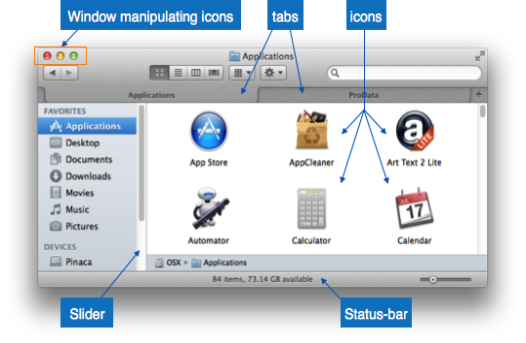
- Window - An area where contents of application are displayed. Contents in a window can be displayed in the form of icons or lists, if the window represents file structure. It is easier for a user to navigate in the file system in an exploring window. Windows can be minimized, resized or maximized to the size of screen. They can be moved anywhere on the screen. A window may contain another window of the same application, called child window.
- Tabs - If an application allows executing multiple instances of itself, they appear on the screen as separate windows. Tabbed Document Interface has come up to open multiple documents in the same window. This interface also helps in viewing preference panel in application. All modern web-browsers use this feature.
- Menu - Menu is an array of standard commands, grouped together and placed at a visible place (usually top) inside the application window. The menu can be programmed to appear or hide on mouse clicks.
- Icon - An icon is small picture representing an associated application. When these icons are clicked or double clicked, the application window is opened. Icon displays application and programs installed on a system in the form of small pictures.
- Cursor - Interacting devices such as mouse, touch pad, digital pen are represented in GUI as cursors. On screen cursor follows the instructions from hardware in almost real-time. Cursors are also named pointers in GUI systems. They are used to select menus, windows and other application features.
Application specific GUI components
A GUI of an application contains one or more of the listed GUI elements:
- Application Window - Most application windows uses the constructs supplied by operating systems but many use their own customer created windows to contain the contents of application.
- Dialogue Box - It is a child window that contains message for the user and request for some action to be taken. For Example: Application generate a dialogue to get confirmation from user to delete a file.
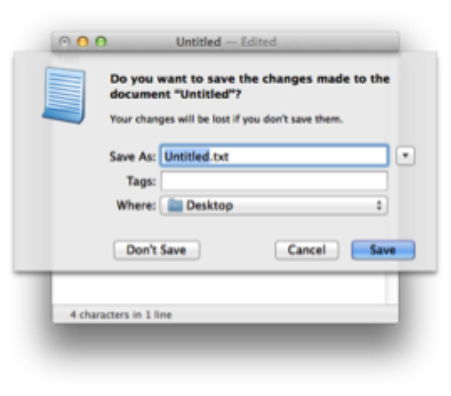
- Text-Box - Provides an area for user to type and enter text-based data.
- Buttons - They imitate real life buttons and are used to submit inputs to the software.
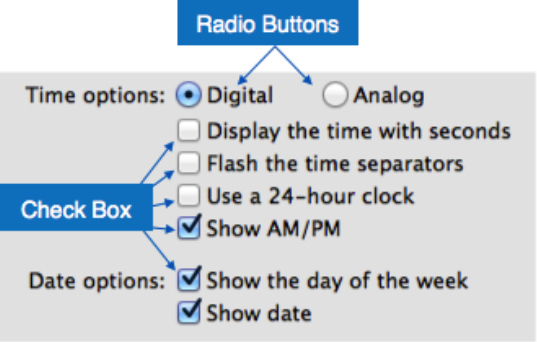
- Radio-button - Displays available options for selection. Only one can be selected among all offered.
- Check-box - Functions similar to list-box. When an option is selected, the box is marked as checked. Multiple options represented by check boxes can be selected.
- List-box - Provides list of available items for selection. More than one item can be selected.
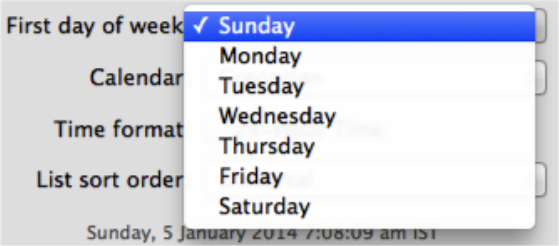
Other impressive GUI components are:
- Sliders
- Combo-box
- Data-grid
- Drop-down list
User Interface Design Activities
There are a number of activities performed for designing user interface. The process of GUI design and implementation is alike SDLC. Any model can be used for GUI implementation among Waterfall, Iterative or Spiral Model.
A model used for GUI design and development should fulfill these GUI specific steps.
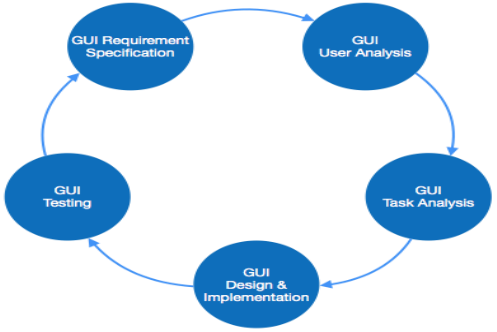
- GUI Requirement Gathering - The designers may like to have list of all functional and non-functional requirements of GUI. This can be taken from user and their existing software solution.
- User Analysis - The designer studies who is going to use the software GUI. The target audience matters as the design details change according to the knowledge and competency level of the user. If user is technical savvy, advanced and complex GUI can be incorporated. For a novice user, more information is included on how-to of software.
- Task Analysis - Designers have to analyze what task is to be done by the software solution. Here in GUI, it does not matter how it will be done. Tasks can be represented in hierarchical manner taking one major task and dividing it further into smaller sub-tasks. Tasks provide goals for GUI presentation. Flow of information among sub-tasks determines the flow of GUI contents in the software.
- GUI Design & implementation - Designers after having information about requirements, tasks and user environment, design the GUI and implements into code and embed the GUI with working or dummy software in the background. It is then self-tested by the developers.
- Testing - GUI testing can be done in various ways. Organization can have in-house inspection, direct involvement of users and release of beta version are few of them. Testing may include usability, compatibility, user acceptance etc.
GUI Implementation Tools
There are several tools available using which the designers can create entire GUI on a mouse click. Some tools can be embedded into the software environment (IDE).
GUI implementation tools provide powerful array of GUI controls. For software customization, designers can change the code accordingly.
There are different segments of GUI tools according to their different use and platform.
Example
Mobile GUI, Computer GUI, Touch-Screen GUI etc. Here is a list of few tools which come handy to build GUI:
- FLUID
- AppInventor (Android)
- Lucid Chart
- Wave maker
- Visual Studio
User Interface Golden rules
The following rules are mentioned to be the golden rules for GUI design, described by Shneiderman and Plaisant in their book (Designing the User Interface).
- Strive for consistency - Consistent sequences of actions should be required in similar situations. Identical terminology should be used in prompts, menus, and help screens. Consistent commands should be employed throughout.
- Enable frequent users to use short-cuts - The user’s desire to reduce the number of interactions increases with the frequency of use. Abbreviations, function keys, hidden commands, and macro facilities are very helpful to an expert user.
- Offer informative feedback - For every operator action, there should be some system feedback. For frequent and minor actions, the response must be modest, while for infrequent and major actions, the response must be more substantial.
- Design dialog to yield closure - Sequences of actions should be organized into groups with a beginning, middle, and end. The informative feedback at the completion of a group of actions gives the operators the satisfaction of accomplishment, a sense of relief, the signal to drop contingency plans and options from their minds, and this indicates that the way ahead is clear to prepare for the next group of actions.
- Offer simple error handling - As much as possible, design the system so the user will not make a serious error. If an error is made, the system should be able to detect it and offer simple, comprehensible mechanisms for handling the error.
- Permit easy reversal of actions - This feature relieves anxiety, since the user knows that errors can be undone. Easy reversal of actions encourages exploration of unfamiliar options. The units of reversibility may be a single action, a data entry, or a complete group of actions.
- Support internal locus of control - Experienced operators strongly desire the sense that they are in charge of the system and that the system responds to their actions. Design the system to make users the initiators of actions rather than the responders.
- Reduce short-term memory load - The limitation of human information processing in short-term memory requires the displays to be kept simple, multiple page displays be consolidated, window-motion frequency be reduced, and sufficient training time be allotted for codes, mnemonics, and sequences of actions.
Definition: Is a collection of entities (hardware, software and livewire) that are designed to receive process, manage and present information in a meaningful format.
COMPONENTS OF COMPUTER SYSTEM
- Computer hardware - Are physical parts/ intangible parts of a computer. Eg Input devices, output devices, central processing unit and storage devices
- Computer software - also known as programs or applications. They are classified into two classes namely - system software and application software
- Live ware - is the computer user. Also kwon as orgwareor the human ware. The user commands the computer system to execute on instructions.
a) COMPUTER HARDWARE
Hardware refers to the physical, tangible computer equipment and devices, which provide support for major functions such as input, processing (internal storage, computation and control), output, secondary storage (for data and programs), and communication.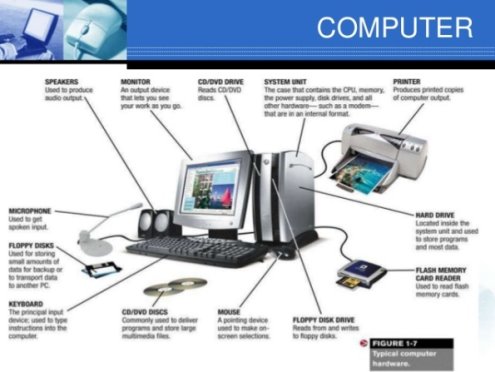
HARDWARE CATEGORIES (Functional Parts)
A computer system is a set of integrated devices that input, output, process, and store data and information. Computer systems are currently built around at least one digital processing device. There are five main hardware components in a computer system: Input, Processing, Storage, Output and Communication devices.
- INPUT DEVICES
Are devices used for entering data or instructions to the central processing unit. Are classified according to the method they use to enter data.
a)KEYING DEVICES
Are devices used to enter data into the computer using a set of Keys eg Keyboard, key-to- storage and keypad.
i) The keyboard
Keyboard (similar to a typewriter) is the main input device of a computer . It contains three types of keys-- alphanumeric keys, special keys and function keys.
Alphanumeric keys are used to type all alphabets, numbers and special symbols like $, %, @, A etc. Special keys such as <Shift>, <Ctrl>, <Alt>, <Home>, <Scroll Lock> etc. are used for special functions. Function keys such as <Fl>, <F2>, <F3> etc. are used to give special commands depending upon the software used e.g.F5 reloads a page of an internet browser. The function of each and every key can be well understood only after working on a PC. When any key is pressed, an electronic signal is produced. This signal is detected by a keyboard encoder that sends a binary code corresponding to the key pressed to the CPU. There are many types of keyboards but 101 keys keyboard is the most popular one.
How the keys are organized
The keys on your keyboard can be divided into several groups based on function:
- Typing (alphanumeric) keys. These keys include the same letter, number, punctuation, and symbol keys found on a traditional typewriter.
- Special (Control) keys. These keys are used alone or in combination with other keys to perform certain actions. The most frequently used control keys are CTRL, ALT, the Windows key, and ESC.
- Function keys. The function keys are used to perform specific tasks. They are labelled as F1, F2, F3, and so on, up to F12. The functionality of these keys differs from program to program.
- Cursor Movement (Navigation) keys. These keys are used for moving around in documents or WebPages and editing text. They include the arrow keys, HOME, END, PAGE UP, PAGE DOWN, DELETE, and INSERT and ARROW KEYS.
- Numeric keypad. The numeric keypad is handy for entering numbers quickly. The keys are grouped together in a block like a conventional calculator or adding machine.

B. POINTING DEVICES
Are devices that enter data and instructions into the computer using a pointer that appears on the screen. The items to be entered are selected by either pointing to or clicking on them.e.g mice, joystick, touch sensitive screen, trackballs
i) THE MOUSE
A mouse is a small device used to point to and select items on your computer screen. Although mice come in many shapes, the typical mouse does look a bit like an actual mouse. It's small, oblong, and connected to the system unit by a long wire that resembles a tail and the connector which can either be PS/2 or USB. Some newer mice are wireless.
A mouse usually has two buttons: a primary button (usually the left button) and a secondary button. Many mice also have a wheel between the two buttons, which allows you to scroll smoothly through screens of information.
When you move the mouse with your hand, a pointer on your screen moves in the same direction. (The pointer's appearance might change depending on where it's positioned on your screen.) When you want to select an item, you point to the item and then click (press and release) the primary button. Pointing and clicking with your mouse is the main way to interact with your computer. There are several types of mice: Mechanical mouse, optical mouse, optical-mechanical mouse and laser mouse.
Basic parts
A mouse typically has two buttons: a primary button (usually the left button) and a secondary button (usually the right button). The primary button is the one you will use most often. Most mice also include a scroll wheel between the buttons to help you scroll through documents and WebPages more easily. On some mice, the scroll wheel can be pressed to act as a third button. Advanced mice might have additional buttons that can perform other functions.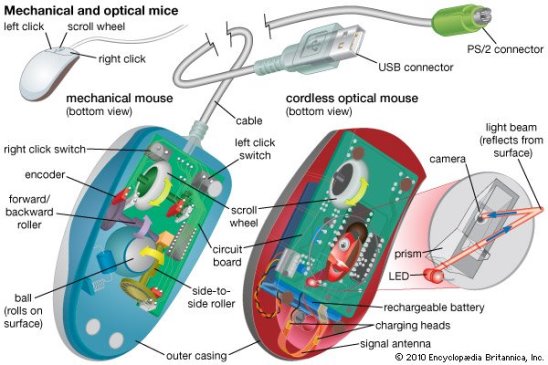
Holding and moving the mouse
Place your mouse beside your keyboard on a clean, smooth surface, such as a mouse pad. Hold the mouse gently with your index finger resting on the primary button and you thumb resting on the side. To move the mouse, slide it slowly in any direction. Don't twist it—keep the front of the mouse aimed away from you. As you move the mouse, a pointer (see picture) on your screen moves in the same direction. If you run out of room to move your mouse on your desk or mouse pad, just pick up the mouse and bring it back closer to you.
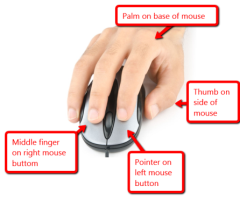
Pointing to an object often reveals a descriptive message about it.The pointer can change depending on what you're pointing at. For example, when you point to a link in your web browser, the pointer changes from an arrow to a hand with a pointing finger .
Most mouse actions combine pointing with pressing one of the mouse buttons. There are four basic ways to use your mouse buttons: clicking, double-clicking, right-clicking, and dragging.
Clicking (single-clicking)
To click an item, point to the item on the screen, and then press and release the primary button (usually the left button).
Clicking is most often used to select (mark) an item or open a menu. This is sometimes called single-clicking or left-clicking.
Double-clicking
To double-click an item, point to the item on the screen, and then click twice quickly. If the two clicks are spaced too far apart, they might be interpreted as two individual clicks rather than as one double-click.
Double-clicking is most often used to open items on your desktop. For example, you can start a program or open a folder by double-clicking its icon on the desktop.
Right-clicking
To right-click an item, point to the item on the screen, and then press and release the secondary button (usually the right button).
Right-clicking an item usually displays a list of things you can do with the item. For example, when you right-click the Recycle Bin on your desktop, Windows displays a menu allowing you to open it, empty it, delete it, or see its properties. If you are unsure of what to do with something, right-click it.
C) SCANNING DEVICES
Are devices that capture an object or a document directly from the source. They are classified according to the technology used to capture data e.g. Scanners and Document readers.
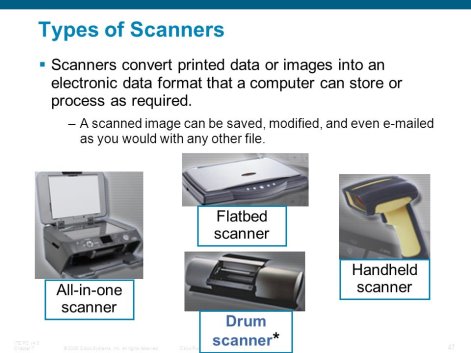
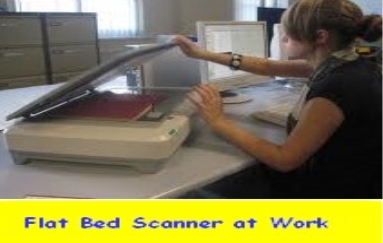
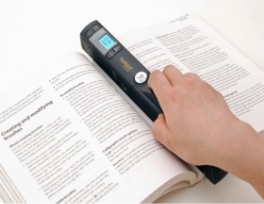
i) Scanners
Used to capture a source document and converts it into an electronic form.
Example are – Flat Bed and Hand Held scanners.
ii) Document readers
Are documents that reads data directly from source document and convey them as input in the form of electronic signal. e
Types of Document Readers
i) Optical Mar Reader (OMR)
ii) Barcode readers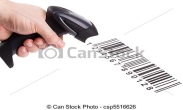
iii) Optical Character Readers
b) Magnetic Readers
Reads data using magnetic ink.t uses principle of magnetism to sense data which have been written using magnetised ink.
THE CENTRAL PROCESSING UNIT ( C P U)
Is the brain or the heart of a computer. Is also known as processor and consist of three units namely -
i) Control Unit ( C U)
ii) Arithmetic logic Unit ( A L U)
iii) Main Memory unit ( M M U)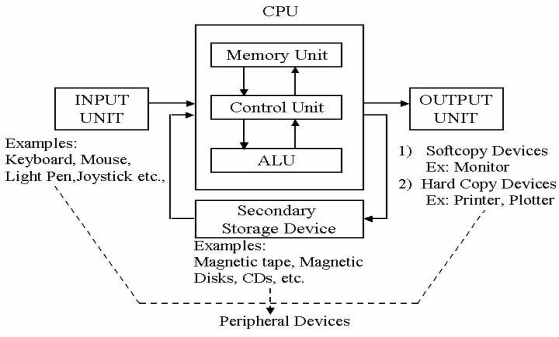
The system unit is the core of a computer system. Usually it's a rectangular box placed on or underneath your desk. Inside this box are many electronic components that process data. The most important of these components is the central processing unit (CPU), or microprocessor, which acts as the "brain" of your computer. Another component is random access memory (RAM), which temporarily stores information that the CPU uses while the computer is on. The information stored in RAM is erased when the computer is turned off.
Almost every other part of your computer connects to the system unit using cables. The cables plug into specific ports (openings), typically on the back of the system unit. Hardware that is not part of the system unit is sometimes called a peripheral device. Peripheral devices can be external such as a mouse, keyboard, printer, monitor, external Zip drive or scanner or internal, such as a CD-ROM drive, CD-R drive or internal modem. Internal peripheral devices are often referred to as integrated peripherals. There are two types according to shape: tower and desktop.
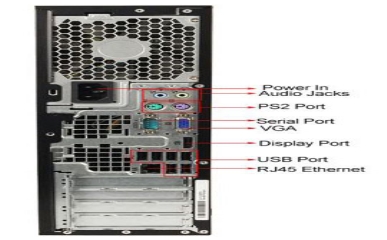

Tower System Unit Desktop System Unit
A motherboard (mainboard, system board, planar board or logic board) is the main printed circuit board found in computers and other expandable systems. It holds many of the crucial electronic components of the system, such as the central processing unit (CPU) and memory, and provides connectors for other peripherals.
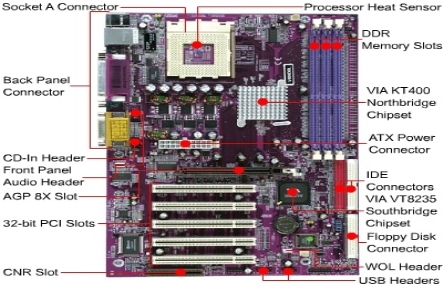
Motherboard
TYPES OF PROCESSORS
I) Compels Instruction Set Computers (CISC)
ii) Reduced Instruction Set Computers (RISC)
FUNCTIONS OF CENTRAL PROCESSING UNIT
- Process data
- Control sequence of operations within the computers
- It gives command to all parts of a computer
- It control the use of the main memory in storing of data and instructions
- it provides temporary storage (RAM) and permanent storage(ROM) of data
THE CONTROL UNIT
Is the centre of operations for the computer system, it directs the activities of the computer system.
Functions of Control Unit
There are countless desktop applications, and they fall into several categories. Some are more full featured (like Microsoft Word), while others may only do one or two things (like a clock or calendar app). Below are just a few types of applications you might use.
- Word processors: A word processor allows you to write a letter, design a flyer, and create many other types of documents. The most well-known word processor is Microsoft Word.
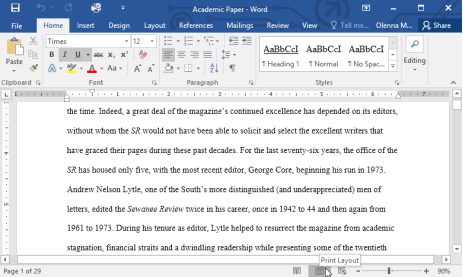
- Web browsers: A web browser is the tool you use to access the Internet. Most computers come with a web browser pre-installed, but you can also download a different one if you prefer. Examples of browsers include Internet Explorer, MozillaFirefox, Google Chrome, and Safari.
- Media players: If you want to listen to MP3s or watch movies you've downloaded, you'll need to use a media player. Windows Media Player and iTunes are popular media players.
- Games: There are many types of games you can play on your computer. They range from card games like Solitaire to action games like Halo. Many action games require a lot of computing power, so they may not work unless you have a newer computer.
Files management is one of the most reliable features of any Operating system in the Computing World. The OS manages files and folders and their paths so that we can easily access them when we have huge data. Managing files can have three of the following major parts.
- Managing File Storage
- Manipulating files and folders
- Protecting files
Let us have look on each of them one by one.
Managing File Storage
Different files are stored in different locations on the hard drives of any system. In today’s Operating systems, these files can be placed and accessed easily. Managing file storage can have the following sections.
- Folders and Paths: Folders and paths of the folders are arranged in a hierarchical way in which root drive like drive ‘C’ is at top level and then it has folders and sub folders at the middle level and our desired file/folder at low/current level. In windows OS, the path of the folder is shown in the address bar.
- File Management Tools: Every OS has its own tool for managing files like Windows has “File Explorer Utility tool”, MacOS has “finder utility tool” and Linux has “files utility tool” for file management.
- File Structure: File structure looks like a hierarchical tree. In windows environment, it has navigation pane, Quick Access, Recently used folders etc for quickly accessing the folder or file.
- File/folder Properties: It actually dictates the Metadata which is ‘data about data’. In the properties of any file, it includes basic file attributes like (read only, hidden, Archive) and Advanced file attributes like(indexing, compression, encryption). It also includes file size, date created, modified, file name and many more detailed properties.
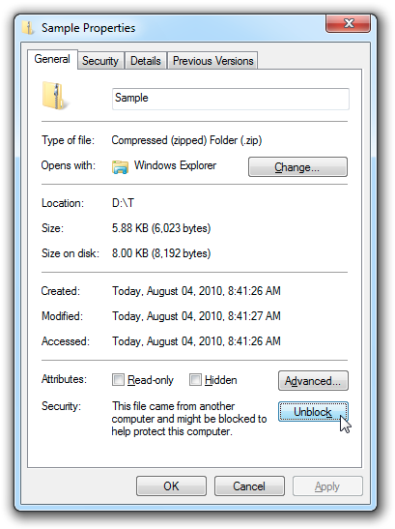
Figure: File properties in windows
Manipulating File
Manipulating file means to do some actions on the data files which we create in various applications. For example, we might need to edit, rename, copy, move, or even delete a file. The following points summarize the most common file manipulations in Windows.
- Opening, Editing and Saving files
- Moving, Cutting, Copying
- Deleting, Restoring
- Renaming and Creating Shortcuts
- Selecting multiple files
- Searching, Sorting
- Displaying files and changing views
The following figure shows simple manipulating of a file.
Protecting Files
Protecting files is necessary in any computer system. We can protect our files from snooping by other people who use our computer. We secure our files from unauthorized users and provide protection for the data which contains confidential information. There are basically two ways of protecting files. One is through files and folders permission in properties section and the other is Backing up and Restoring Data through different approach.
1. Files and Folders Permission
To set a folder’s permissions, right-click the folder in File Explorer, choose Properties, and then click the Security tab. On the Security tab, we can view permissions for specific users or groups of users. The Administrators group, for example, includes all user accounts with Administrator permissions. Similarly, we can edit their privileges through the clicking edit icon. The following figure shows the folder’s permission in windows environment.
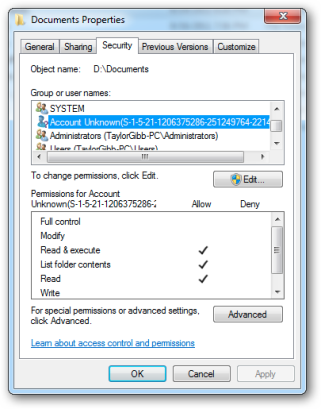
Figure: Folder’s permission through Security Tab in windows
2. Backing Up and Restoring Data
Backing up means to store data on the back end so that if we lose our data then we can easily restore our data from the back end. The back end can be external hard drives, cloud storage and many more. There are two ways which are mostly used for backing and restoring data in today’s era and these are:
- Via Backup utility Software: Software like storage craft, shadow protect, backup utility in windows 7, file history in windows8 and later are used for backing up data and then restoring it. Similarly, online storage like One drive, Google Drive etc are also used for backing up data and then restoring it when we lost it.
- Via manually copying our data to external drives: Using external drives like hard drives, optical disks, solid state flash memories etc to store our data for back up.
The following figures show online storages and external drives as a back up media.
Figure: Online storages as back up media
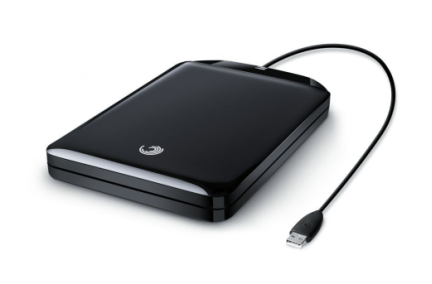
Figure: External Hard drive for Back up Storage
How to use your computer's built-in help
Everyone needs to look for help sometimes. Luckily, when you want help with a computer program, it’s usually easy to find. Most programs have a help feature somewhere, and learning how to use it can make a big difference. You may not find everything you need, but your computer’s built-in help is a great place to start.
Different programs integrate help features in different ways. Some are like interactive manuals included with the program that you can open with a menu, while others are just links to the developer’s support website. But they’re always designed with the same thing in mind: to help you learn the features of the program and to solve problems yourself.
How to access built-in help
Most programs have one of two ways to access built-in help. For example, Adobe Photoshop Elements has a Help menu with a variety of options. Many of these options open Adobe’s support page in your web browser, while others access features within the program itself.
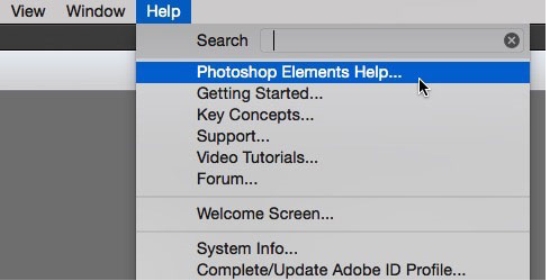
Other programs have a help button, usually near the top-right corner of the window. For example, Microsoft Office 2013 has a small question mark icon that opens the help file.

Features of a help file
Help files can be organized in a variety of ways, including as a table of contents, FAQ, or searchable database.
A search box is all you’ll see when you open the help screen in Office 2013. Much like a search engine, you type keywords in the search bar, and it will display topics relevant to the keywords you entered.
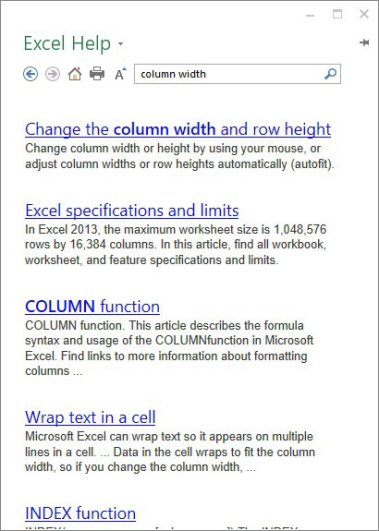
The table of contents for Mozilla’s support page is a broad list of categories. Clicking any of these hyperlinks will lead to a list of narrower topics and specific help articles. There’s also a search bar at the top-right.
Although built-in help can be useful, it may not always have the information you want. If you can’t find what you’re looking for or don’t understand what you've found, you can usually ask someone you know, do a Google search, or contact support staff. It can take a little extra time and effort, but learning how to find solutions on your own is a valuable skill—and you’ll get better at it with practice.
Desktop shortcuts are icons that reside on your computer’s desktop and provide a shortcut to opening a software program or file. These handy little icons give you quick access to items you use on a frequent basis.
Your computer usually comes with some shortcuts, such as the Recycle Bin and a browser shortcut, but you can also add or delete shortcuts. Click a desktop shortcut to launch an associated program
To create a new shortcut, choose Start→All Programs and locate the program in the list of programs that appears. Right-click an item and choose Send To→Desktop (Create Shortcut). The shortcut appears on the desktop. Double-click the icon to open the application.
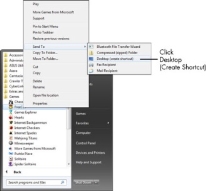
Here are a few tips to keep in mind when working with shortcuts:
- Occasionally, Windows 7 offers to delete desktop icons that you haven’t used in a long time. Let it. The desktop should be reserved for frequently used programs, files, and folders. You can always re-create shortcuts easily if you need them again.
- To clean up your desktop manually, right-click the desktop and choose Personalize. Click the Change Desktop Icons link to the left. In the Desktop Icon Setting dialog box that appears, click the Restore Default button, which returns to the original desktop shortcuts set up on your computer.
- You can create a shortcut for a brand-new item by right-clicking the desktop, choosing New, and then choosing an item to place there, such as a text document, bitmap image, or contact. Then double-click the shortcut that appears and begin working on the file in the associated application.
As a matter of fact, it has come to the realization of many that an operating system is a very important aspect when it comes to the running and functioning of any computer device. This is due to the fact that, it is the operating system which controls every activity occurring in a computer. For an OS to run on a device, it must be installed and configured to run in the device. Windows installation is quite an easy activity which takes a maximum of one hour. With installation entailing putting the operating system in the device, configuration on the other hand means making all the necessary system settings so that the installed operating system can function properly with all hardware and other software components.
Boot methods:
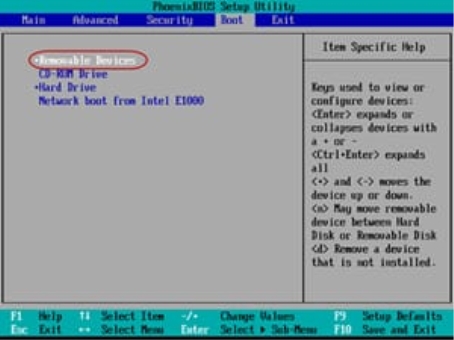
Here are the several boot methods which are available to one
USB: One should know that with the absence of a CD or DVD, one might prefer to use a USB drive as a boot media. However, so as to boot from a USB, one should create a bootable USB version through the help of some programs. After that, one should now copy the operating system on the USB flash drive ready to commence installation. This is quite advantageous since it gives an allowance for updating any information in the flash drive especially if there are many computers to be installed with the OS where updating them is required.
CD-ROM: One should understand that many at times, the windows installation media is normally stored in a CD-ROM. In such a scenario, the computer onto which one are installing the OS must possess an in-built CD-ROM reader or it can be external in cases where it is not in-built.
DVD: One might find out that the DVD boot method is quite similar to that of a CD-ROM. This is due to the fact that the specific computer must have a DVD-ROM reader. If the reader is absent, then it automatically means one cannot install an OS stored on such media.
PXE: The Preboot Execution Environment is a capability that is present in most computers which allows for automatic installation of an operating system whose files are on a network drive. In this case, physical media is not required.
Type of installations
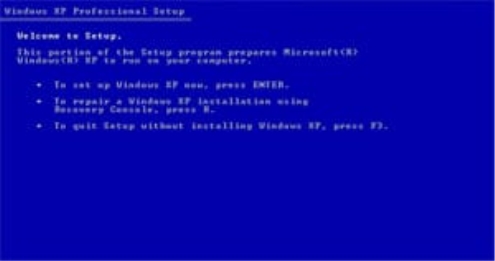
Creating image: One should know that this task basically requires the installer to come up with a windows operating system that is a cloned by taking an existing OS version and make sector copies of everything on the computer.
Unattended installation: Unattended installation is one that is quite common in large organizations. This is a type of installation where the IT expert or installer must not be present so as to respond to the numerous prompts that come during the installation. In this case, one should create a unattend.xml file which will undergo the whole process owing to the fact that it already has all the answers to all questions and responses to all prompts. One should customize the xml file in one's windows installation media and the installation will run all by itself without the intervention of any individual.
Upgrade: In-place upgrade is a type of OS installation where the installation begins with the presence of the previous operating system. Once it identifies the existence of an existing operating system, it automatically makes an upgrade to the latest version without altering any applications or files present.
Clean install: Clean installation is a kind of OS installation that is far much different from in-place upgrade. This is because clean installation means erasing of every file in the computer. In this case, it calls for backup of the important files so as to avoid losing them. An external hard disk can serve this purpose well or even a cloud backup. Such an installation erases all documents and all configured personal settings. One should therefore move such items to a separate drive prior to installation so as to avert losing them.
Repair installation: A repair installation is one that normally takes place in instances where the Operating system files are corrupted or damaged probably because of a bad hard drive section, a virus or Trojan attack among many others. Once the windows installation starts up, one should see some options prompting for a repair installation. Here, one installs the operating system files again without making any configuration changes or hard drive modifications. Such an installation simply means repairing operating system files present on the windows version.
Multiboot: At times, one may desire to install a new operating system version without having to do away with the old or existing operating system. In such a case, one should be in a position to support a Multiboot configuration also known as dual boot configuration. In this configuration, one should have two different operating systems in two distinct hard drive partitions. With this kind of configuration, there is always a prompt that one should see on start-up asking one which operating system one would like to run either the new one or old one. For instance, one can have windows seven and windows eight both in one's computer. In case one wants to change over to the other operating system, one should just restart one's computer.
Remote network installation: Remote network installation is another magnificent way of installing an OS. This especially comes into place where physical media is not required during the installation. One should put all one's windows installation files and configurations in a network drive. The Pre-boot Execution Environment allows one's system to run onto the network and access all the installation files on the network drive. In this kind of installation, one should have a single centralized server to undertake all the installation.
Image deployment: This simply involves cloning the particular OS image to another PC if there is need for the machine to be deployed. On start-up, one should realize that the windows information is similar to that of the old system and hence one must not go through the installation program when bringing up a computer onto the network.
Partitioning:
Hard drive partitioning is a prompt that one should come across when installing any windows operating system especially if it is a first time installation. Presently, most of the available computers run a Master Boot Record Partition Table which supports four partitions on one hard disk. The newer Globally Unique Identifier partition table supports 128 partitions.
Dynamic: A dynamic disk partition is one that has the capability to deny addition of any new drive in addition to spanning of data from the basic partition into the newly installed drive. This dynamic disk partition can be supported by several Windows operating systems.
Basic: A basic disk partition is an idea of Microsoft. This either has a Disk Operating System or Windows installed on it. It can bear primary and logical partitions with logical drives also inclusive.
Primary: A primary partition is basically a partition that one's operating system can boot from. A primary partition allows performance of Multiboot capability where one of the partitions is designed as the active partition which automatically launches once the computer is powered on.
Extended: Extended partitions come into use when one wants to have more than four partitions in a disk. One can also create more partitions on the extended partition. Extended partitions are not as flexible as primary partitions since one can't boot from them.
Logical: Logical partitions are basically partitions that are created inside of an extended partition. An OS cannot boot from such partitions.
File system types/formatting
File systems must be created so that any information can be written on a particular drive. The file system one prefers to use should be one that the operating system can understand. One should choose a file system that can be easy for an operating system to read and write files. Some operating systems can read from multiple file systems while others can only read from specific file systems.
FAT
File Allocation Table was among the pioneer file systems for personal computers which have been on constant update throughout years.
FAT32
FAT32 is considered an update or rather advancement of the FAT. It began with Windows 2000 and now in all later versions. It allowed for one to have volume sizes of almost two terabytes with files of a four gigabytes maximum size.
NTFS
NTFS is a file system type that has more improvements compared to FAT32. This file system allows for file compression and encryption utilities without having to use specific software. It is a utility built to function with the file system and operate with the OS. It also has data recovery features and additional security in addition to many improvements regarding this file system. It has many versions with version 1.0 being the first.
CDFS
The Compact Disk File System is one that is present in operating systems that allow the reading of compact disks or DVD-ROMS. It can be used on Microsoft windows, UNIX, Linux and Macintosh systems being an ISO standard number 9660. It simplifies the task of writing information on a CD.
Quick format vs. Full format
Quick formatting is a specific type of formatting that occurs very fast. It generally erases data from the drive, formats it with the specified file system without going through the drive to check for bad errors. Quick format is an option only available for Windows XP installation and not Windows Vista and 7.
Full format on the other hand involves putting on the new file system meaning that it wipes data and puts the file system in place. Contrary to quick format, this one goes through all sectors in the entire storage device so as to make sure that data can be readily written on it.
Load alternate third party drivers when necessary
Loading of alternate third party drivers may be a consideration when installing an OS. This occurs where the disk controllers in the computer lack drivers built in the installation programs thus making them inaccessible by the installation program. In such case, an option to install a third party driver may be available and hence one should have the driver available so as to access disks inside the system
Workgroup vs. Domain setup
When installing an operating system, there are some networking configurations that must be made. There is always a prompt asking whether the machine should be part of a workgroup or domain. In the domain setup, it means that the machine will be in an Active Directory domain most probably in a business. A workgroup setup on the other hand mainly arises when one's base of operation is mainly at home where one runs all one's activities.
Time/date/region/language settings
During Windows installation, there is a prompt to ensure that one's date, time and region are set. This is due to the fact that there are different time zones and regions and therefore one should make sure one is properly conversant with all these aspects. Make sure one is aware of the time zone one's country is in. If the installation is on a home-based machine, the time should be the same but if the machine is office-based, one may need to double check especially if the machine is used in different offices. Language settings must also be adjusted with the Windows operating system giving a wide range of languages to choose from. For instance, do not choose English if one are not conversant with it.
Driver installation, software and windows updates
For a windows configuration to be complete, it must be accompanied by loading and running of some extra drivers. Some of the drivers one may install include Graphics drivers, Chipset drivers, and Wireless LAN drivers among many others. Windows updates must also be properly configured and set. This allows the operating system to be always updated. For windows operating system, it recommends a computer user to adjust settings in such a manner that the operating system can automatically check for updates and install them. This keeps the machine up to date with the latest version of drivers and security patches.
Factory recovery partition
Creation of a factory recovery partition can be an additional activity that one should undertake so as to ensure that a recovery partition has been created by the operating system during its installation. One can also build one by one's self if need be. Through creation of this recovery partition, the user of the specific machine gets the option of resetting everything back to its default factory state created after building a special type of recovery partition for Windows.
Basically, prior to installation and configuration of an operating system, there are some important aspects that one must keep in mind. This is because these are aspects that are very important when it comes to the OS running and operation. So making sure that those tasks are done can improve the rate of the success that one would have while installing the configuring the operation system.
Ubuntu
Installing an operating system is not an easy task. For most people, this is something they will never have done. The vast majority of people buy computers with the operating system already installed, so they never have to manually run through the system setup. The process can be intimidating, but we will try to make it as simple as possible.
Terminology
Let’s start with the phrases we will use in this tutorial. Some of the terms can seem vague at this point, but they will make more sense as we go along.
The setup of a new operating system is broadly called installation. The installation has several stages:
- You need to download the installation media (think an exe file in Windows for an application setup). The installation media will usually come in the form of ISO files. For instance, if you download Ubuntu, then you will find a file called something like ubuntu-18.04.3-desktop-amd64.iso in your download folder location.
- You need to copy the contents of the installation media to an external device, DVD or thumb drive. This is done with a dedicated tool, which will correctly prepare the external device for use, and store the contents of the installation media on it.
- You need to boot (start) the external device on your computer. Typically, this means connecting the external media (placing a DVD into the tray or inserting a thumb drive into a USB port). Next, you need to instruct your computer to boot from the external media. Some computers are configured to do this automatically. In other cases, you will need to access your computer’s setup (usually by pressing F2 or Del keys early on when the computer is powered on or rebooted), and then change a setting called boot order. We will cover this in more detail later on.
- Once the computer correctly identifies the external media, it will boot the operating system on this media. What this means, Ubuntu will now start. Do not worry; the installation will not begin right away. If left with no user interaction, Ubuntu will launch into the live mode, which means your underlying hardware (disks) will not be touched, and you can safely test and experiment with Ubuntu before you decide to make any changes.
- In the live environment, you can play around to get the sense of how Ubuntu works, try applications, and verify your hardware is correctly initialized. Once you’re happy and confident with the overall look & feel, you can proceed to install the operating system.
- The actual installation is the next step. At this point, the operating system will warn you that changes are going to be written to your hard disk, so you can back out if you are unsure or do not want to proceed, for any reason. Once the installation completes, the next time you reboot your computer, it will start Ubuntu.
Phrase | Windows | Linux |
Installation media | ISO file | ISO file |
Boot sequence | The startup of a computer | The startup of a computer |
Live session | N/A | A session in which the operating system runs in memory only and does not touch the hard disks; it is great for non-destructive testing of the operating system and software |
Installation | Copy of the installation media to hard drive and user setup | Copy of the installation media to hard drive and user setup |
Partitioning | The installation sub-step during which the hard disk is configured | The installation sub-step during which the hard disk is configured |
Partition | A logical slice of the hard disk. In Windows, these are identified by drive letters, like C:\, D:\ | Partitions in Linux use the following notation: |
Filesystem | The logical structure used to store files on a drive. By default, Windows uses NTFS. | By default, Linux uses Ext4. Linux supports many other filesystems, and can also read/write Windows filesystems. |
Mountpoint | The logical endpoint by which the filesystem on a particular partition is made accessible to the user. Synonymous with how partitions are shown to the user through Window Explorer (C:\, D:\, etc). | In Linux, there is a single tree that contains all mount points to all filesystems. |
Formatting | The process of initialization of a partition with a new filesystem. This is a destructive process. | The process of initialization of a partition with a new filesystem. This is a destructive process. |
Installation types
There are multiple ways operating systems can be configured – this is not unique to Ubuntu; this is true for all operating systems out there.
- A Single operating system on a computer – the most typical and common scenario. A hard disk contains a single operating system. It is relatively simple to configure and maintain. Most Windows 7 users will have PCs or laptops set up this way.
- Dual boot – This is a configuration where there are two operating systems installed on the same computer. Each operating system could reside on a separate hard disk, or they could both be installed on one hard disk, on different partitions. In a dual-boot setup, usually there will be a menu displayed early on in the boot sequence of the computer, allowing the user to choose which operating system they want to run. On physical systems, only one operating system can run at one time. A dual-boot setup could be Windows 7 and Ubuntu, side by side. You can then alternate between the two and use them as you see fit, with a reboot in between each use.
- Multi boot – Like dual-boot, but there are three or more operating systems.
- Virtualization – This is a concept that allows one to run an entire operating system on top of another operating system. This is done using a dedicated piece of software called hypervisor. The hypervisor software runs on your host operating system, and it allows you to create virtual machines that emulate hardware. You can then install a guest operating system on top of this emulated hardware, and use them side by side. Virtualization isn’t trivial, but it is a good way to test new operating systems without trying them on your physical hardware.
This way, you can practice using Linux, get comfortable with the installation steps before you do anything on your actual PC or laptop.
If you decide to install Ubuntu, the sequence of steps will be slightly different based on your choice of the configuration (single boot, dual boot, etc).
If you want to replace Windows 7 with Ubuntu, you will need to:
- Format your C:\ drive (with the Linux Ext4 filesystem) as part of the Ubuntu setup. This will delete all your data on that particular hard disk or partition, so you must have a data backup in place first.
- Install Ubuntu on the newly formatted partition.
If you want to dual-boot Windows with Ubuntu – even as a transition step until you get accustomed to using Ubuntu, you will need to choose one of the two options below:
- Allow Ubuntu installer to configure things automatically – most likely, it will be able to set up the two operating systems side by side.
- Alternatively, you will need to change the hard disk and/or partition layout so there’s at least one new partition that can accommodate the installation of Ubuntu. This may require changing the size of existing partitions (shrinking) to create space for a new partition. In some cases, this may not be possible, or you may not have sufficient disk space. The management of partitions can be done in the Ubuntu live session using a tool called Gparted partition manager (available by default in Ubuntu). You will need to be comfortable with the Linux hard disk and partition notation to use this software. You also must be careful, because most operations are destructive, so if you delete or format partitions, you could lose your data or render your computer unbootable. Then, you can install Ubuntu on the newly created and formatted partition.
Practice: Ubuntu installation as a virtual machine
Please note: This scenario will not actually migrate you from Windows 7 to Ubuntu. However, it is a very useful exercise, as it will help you get familiar and comfortable with the new operating system, so you can then commit to a setup on physical hardware – and actually replace Windows 7.
Let’s start with the simplest and safest of scenarios – we will install Virtual Box, a free virtualization software, create an Ubuntu virtual machine template, and then run through the installation.
- Download Ubuntu ISO. You can either download the LTS image, which comes with five years of support, or one of the interim releases, which have a 9-month support timeframe and ship with some of the newer features and applications than what you get by default in an LTS version. It’s a trade-off between stability and support on one end and using the latest software on the other.
- Download Virtual Box and install it in Windows. You are not limited to where you install the software. This can be done in any version of Windows, or even other operating systems.
- Start Virtual Box, and create a new Ubuntu virtual machine.
- Create a virtual hard disk for Ubuntu.
- Create a virtual optical storage device (this will be the virtual DVD drive). We will “run” the ISO file from it. Effectively, when the virtual machine starts, it will treat the optical storage device with the ISO attached to it as though you had copied the ISO contents to a DVD or a USB thumb drive, and booted this on a physical computer.
Follow the guided wizard to install Ubuntu. Pay attention to the hard disk setup.
Virtual Box configuration
Run the downloaded Virtual Box setup exe, and follow the instructions. The one part where you need to pay attention is the configuration of network adapters. By design, virtualization products create virtual machines (computers), with their own virtual hardware, including network. You will need to approve the installation of Virtual Box network drivers (signed by Oracle).
New virtual machine setup
Once Virtual Box is installed and configured, start the application. Click on the new button. You will now be asked several questions. You will need to provide the name for your virtual machine (VM). You can use anything, like John or Jane, but it is best to use the exact operating system version. If you type in Ubuntu, Virtual Box will automatically detect what you’re trying to do.
The next step is decided how much RAM you want to give your VM. Then, you need to configure a virtual hard disk. Once these steps are complete, the VM is ready to start. However, we also need to attach the Ubuntu ISO to it.
Click on Settings.In the new window, click on Storage. In the right panel, there will be multiple Storage Devices listed – think hard disks and DVD trays on a physical computer. You will have your hard disk there (in the .vdi format), and an empty IDE controller with a virtual optical drive attached to it. Select it, and then, from the drop down menu, select Choose a disk file… and navigate to where you downloaded the Ubuntu ISO (called something like ubuntu-18.04.3-desktop-amd64.iso). After you complete this step, you can start the VM, and it should boot from the “external” media (in this case the virtual DVD tray).
Once you start the virtual machine, you will see Ubuntu launch.
Ubuntu installation wizard
The installation process is done with a step-by-step wizard. The first step is just a Welcome note and installer language selection.
Keyboard layout
The second step is to choose your keyboard layout. You can always add more layouts (and languages) after the installation.
Connect to the Internet
The optional third step is network. If you’re using a desktop and have a wired connection, you probably won’t see this step in the installer. If you’re on a laptop with a wireless connection, the installer will ask you if you want to connect to an access point. This is not mandatory, but it does allow you to install updates before you get to the desktop. Alternatively, you can connect to the network from the top taskbar (panel), via a drop-down menu in the right corner.
Updates and other software
The fourth step is to decide what setup you like. Most people want the normal installation, which comes with a complete desktop and a set of productivity applications. You can also choose to install third-party software, graphics drivers and media codecs (last checkbox). This is recommended, as it will give you access to a wider range of applications and use cases.
Installation type
In the virtual machine, your hard disk will contain no data. This is why the installer will notify you that it cannot detect any operating systems. It also makes the first option – Erase disk and install Ubuntu – perfectly safe to run.
Time zone and user setup
The installation will begin now in the background. You will be able to configure your time zone and your user. The choice of the time zone will determine your language locale. For instance, if you’ve selected English (US) as your keyboard layout and choose London, UK as your time zone, Ubuntu will be configured with British English as the desktop interface language. You will be able to change this after the installation if you like.
The user setup is self-explanatory – choose your name, computer name and your password. You can auto-login into the desktop, or have the system ask you for your credentials to allow you to login.
Ubuntu installation on a physical machine with an existing Windows 7 operating system
Here, we will configure a dual-boot setup. Once again, we are not getting rid of Windows 7 just yet. But this scenario allows us to test Ubuntu on physical hardware without altering the Windows 7 data. This way we will gain additional knowledge and practice ahead of the actual migration.
After you have mastered this step, you can then re-run the installation and replace Windows 7 with Ubuntu (on the same PC or a different computer, if you like). Alternatively, you can simply reuse the Windows 7 partition(s) inside Ubuntu as additional storage space.
- Download Ubuntu ISO.
- Download UNetbootin and burn the Ubuntu ISO to a DVD, or download unetbootin and use it to copy the Ubuntu ISO to a USB thumb drive.
- Insert the installation media into the computer (DVD tray or USB port), access the BIOS of your computer, choose the installation media, and boot it. This will launch the Ubuntu live session.
Prepare external media
Launch the UNetbootin tool. You have two options available: 1) download Ubuntu from the tool directly and then copy it to the USB drive 2) load a previously downloaded ISO image. Either option will work fine. Since we’ve downloaded the ISO already, check the Disk image button, locate the ISO file on your disk.
Boot Ubuntu
Once the USB drive is ready, insert it into your computer, and power it on. Some computers are automatically configured to boot from external media first. In that case, you won’t need to do anything. Other computers require a manual change to the start-up order. This is done by editing the BIOS boot menu. Each hardware manufacturer uses its own BIOS implementation, so there is no uniform way to do this. Typically, you will need to press a key (F2 or Del or alike) to access BIOS, and then you will need to change the Boot order or Boot options so that your system starts from the external device containing the Ubuntu operating system.
Ubuntu installation wizard (physical hardware)
The first four steps in the installer are identical to the virtual machine. The real difference is whether there is any information stored on the hard disk(s). In a virtual machine, the hard disk was empty, and it did not contain any partitions (like a new computer). On a computer that has Windows 7 installed, the installer will show different options.
Installation type
Most likely, the installer will inform you it has found Windows 7 and will suggest installing Ubuntu alongside it. Effectively, the installer will try to find the most suitable partition, allow you to shrink it, create a new partition in the free space after the resizing, and install Ubuntu on it.
Alternatively, if you do not care about anything on your hard disk – or feel comfortable with completely removing Windows 7 – you can use the second option, erase everything, and setup Ubuntu as the only operating system. If you have safely backed up your data from Windows 7, you can use this option. If you’re not sure, the best way is to start with the dual-boot option, and then eventually fully replace Windows 7 once you’re confident with using Ubuntu.
If you select the first option (Ubuntu alongside Windows 7), the next step in the installer allows you to allocate drive space. You can drag the divider to decide how much you want to resize the Windows partition – Ubuntu will be installed in the remainder.
If you are familiar with the concepts of disk and partition management, you can also use the last option – Something else, where you can make changes manually to partitions as you see fit. These are non-trivial steps, and not recommended for new users.
Advanced: Manual partitioning
If you do not want to use the dual-boot option, or the installer cannot set it up automatically for you, you will need to manually configure the partitions. In the Ubuntu desktop, click on Activities, type Gparted in the search box, launch the application. It will scan your hard disks and show you a table of results.
The image above is from a laptop with a Windows 7 installation. It has a single 500GB hard disk, shown as /dev/sda (465.76 GiB). It has a total of eight partitions:
- /dev/sda1 is the Windows hidden system/boot partition.
- /dev/sda2 is the actual C:\ drive – this is not immediately obvious from this list, but you can deduce it from the rest of the information, and also by comparing size to what it should be in Windows 7.
- /dev/sda3 is a special type of partition. Without going into too many technical details, it is an extended partition – a special type of primary partition that can nest logical partitions. On computer systems that use the ms-dos type of partition table, there is a limitation of four (primary) partitions. To work around this limitation, you can create the extended one to span a large part of the hard disk space, and then create logical partitions inside it. Newer systems using the gpt type do not have this limitation.
- /dev/sda5 is the first logical partition. There is no /dev/sda4, and logical partitions will always be numbered 5 and above. This partition has NTFS filesystem and even carries a label – Games, so you know what type of data it contains. The label can help you prevent damage by trying to modify partitions that contain important data.
- /dev/sda6, /dev/sda7 and /dev/sda8 are logical partitions, with labels, containing additional user data.
From the data presented by GParted, we do not have sufficient free space, so we will need to change the partition layout. We can either delete one of the non-C:\ partitions, or resize them. The last partition, dev/sds8 (labeled Downloads) looks like a good candidate. It is a large partition, and most likely contains less critical data. Click on a partition and select Resize from the menu. Gparted will attempt to run this operating, and if successful, you will have free space available to set up Ubuntu.
In the Ubuntu alongside Windows 7 option, the installer automatically selected/dev/sda8 as the candidate for the installation.If your computer only has one partition (essentially the C:\ drive), you will need to resize it. This means you do need sufficient free space, and you must safely back up your data, as hard disk operations can be risky.
User setup
The remaining steps in the installation are identical. After the setup completes, and you restart your computer, you will see a text menu on startup, and you can select which operating system to boot into – Ubuntu or Windows 7.
Our installation setup is now complete.
Stands for "Basic Input/output System." Most people don't need to ever mess with the BIOS on a computer, but it can be helpful to know what it is. The BIOS is a program pre-installed on Windows-based computers (not on Macs) that the computer uses to start up. The CPU accesses the BIOS even before the operating system is loaded. The BIOS then checks all your hardware connections and locates all your devices. If everything is OK, the BIOS loads the operating system into the computer's memory and finishes the boot-up process.
Since the BIOS manage the hard drives, it can't reside on one, and since it is available before the computer boots up, it can't live in the RAM. So where can these amazing, yet elusive BIOS be found? It is actually located in the ROM (Read-Only Memory) of the computer. More specifically, it resides in an erasable programmable read-only memory (EPROM) chip. So, as soon as you turn your computer on, the CPU accesses the EPROM and gives control to the BIOS.
The BIOS also is used after the computer has booted up. It acts as an intermediary between the CPU and the I/O (input/output) devices. Because of the BIOS, your programs and your operating system don't have to know exact details (like hardware addresses) about the I/O devices attached to your PC. When device details change, only the BIOS needs to be updated. You can make these changes by entering the BIOS when your system starts up. To access the BIOS, hold down the or key as soon as your computer begins to start up.
What is utility software?
These software analyse and maintain a computer. These software are focused on how OS works on that basis it perform task to enable smooth functioning of computer. These software may come along with OS like windows defender, windows disk cleanup tool.
Antivirus, backup software, file manager, disk compression tool all are utility software.
Some of popular utility software are described below:
Antivirus: It is used to protect a computer from the virus. It detects a virus and notifies the user and take action to secure the computer. The virus are kept in different location called vault where it has different file system due to which virus effect it. User can itself instruct antivirus to delete malicious program, put it in vault or even ignore it. These days most come in GUI form.
The first antivirus program appeared in 1987 with the introduction of an antivirus program from G Data Software for the Atari ST. Later in the same year, Virus Scan was introduced by John McAfee, which later became the McAfee antivirus program.
Examples: Windows Defender, AVG, AVAST, MCAFEE etc.
File Management Tool:
The software is used to manage files stored in a file system. It can be used to create, group file. Like Windows File Explorer is a file management tool.
File system (like FAT32, NTFS) should not be confused with File management tool former is a data structure used to store file in a OS while later is used to perform task on file stored in the file System.
Some example of File management Tool are:
File Manager in Windows.
macOS Finder.
Directory Opus.
Dolphin in KDE.
Compression Tool:
These tool are used to reduce the size of a file based on the selected algorithm.
Most operating systems include tools for compressing and uncompressing files.Linux has tools for both .tar.gz and .zip. Other compressed files, like .7z and .rar, require a third-party compression utility to be installed.
Some Examples are:
WinAce
WinZip
WinRAR
7-Zip
PKZIP
DISK MANAGEMENT TOOL:
Disk Management is utility first introduced in Window XP as a replacement of the fdisk command.It enables us to view or managed the disk drives installed in their computer and the partition associated with those drives.
Disk Management is used to manage the drives installed in a computer- like hard disk drives, and flash drives. It can be used to partition drives, assign drive letters and much more.
Some Disk Management tools are:-
• Mini Tool Partition Wizard
• Paragon Partition Manager
• Ease USPartitin Master
• SMART Monitering Tools
• AOMEI Partition Assistant
DISK CLEANUP TOOL :
It is computer utility maintenance which is included in Microsoft Windows. It allows user to remove files that are no longer needed or that can be safely deleted. Removing unnecessary files, including temporary files, can help to improve the functioning and increase the free space of the computer. Running Disk Cleanup at least once a month is an excellent maintenance task.
Disk Cleanup tool can delete temporary internet files, old check disk files, compress old files and offline WebPages. Disk cleanup also allows you to empty the Recycle Bin, delete temporary files, and delete Thumbnails.
Some Disk Cleanup software are :-
• Iolo System mechanic
• IObit Advanced systemCare
• Piriform CCleaner
• Razer Cortex
DISK DEFRAGMENTER:
It is a utility in Microsoft Windows designed to increase access speed by rearranging file stored on a disk to ocuppy contiguous storage locations, a technique is called
Defragmentation.
Defragmenting a disk minimizes head travel, which reduces the time it takes to read files from and write files to the disk.
The defragmenter will search your harddrive partition and move data from one location to other location, so that the files stored there are one contiguous piece, istead of being throughout multiple locations on the harddrives partition.
Some Disk Defragmenter are:-
• Auslogics Disk Defrag
• MyDefrag
• Perfect disk
• Deflaggler
Text Books:
1. Computer Basics by IGNOU.
2. Suresh K Basendrea: Computers Today
3. Pradeep K. Sinha, Priti Sinha, “Computer Fundamentals”. BPB Publications.
4. Rajaraman, V., “Fundamental of Computers”. Prentice Hall India, New Delhi
5. Sanders Donald H Computers Today