UNIT 3
Basic Computer Literacy
TABLE OF CONTENTS
3.1 | Word Processing Basics (MS Word / LibreOffice Writer): Opening and Closing of documents, Text creation and Manipulation, Formatting of text, Table handling, Spell check, Language setting and thesaurus, Printing of word document |
3.2 | Using Spread Sheets (MS Excel / Libre Office Calc) Basic operations of Spreadsheets, Manipulation of cells, Formulas and Functions, Editing of Spread Sheet, Printing of Spread Sheet |
3.3 | Basics of presentation software (MS PowerPoint / LibreOffice Impress) Preparation and Presentation of Slides,Slide Show |
3.4 | How to make an effective presentation: Working with Presentation Tools (Create, Edit, Move, Delete, Resize, Format text object) |
3.5 | Working with Graphics tools (Creating Tables, Organization Charts, Hyperlinks),Saving, editing and closing presentation, Taking printouts of presentation / handouts |
We will understand how to start a Word 2010 application in simple steps. Assuming you have Microsoft Office 2010 installed in your PC, to start the Word application, follows these steps –
Step 1− Click the Start button.

Step 2− Click the All Programs option from the menu.
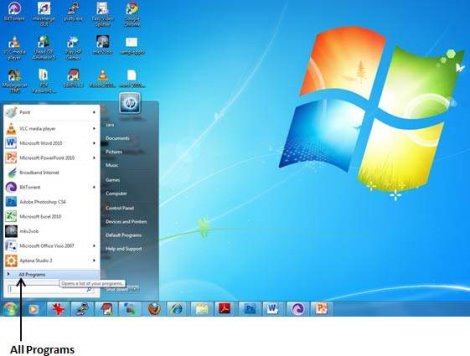
Step 3− Search for Microsoft Office from the submenu and click it.
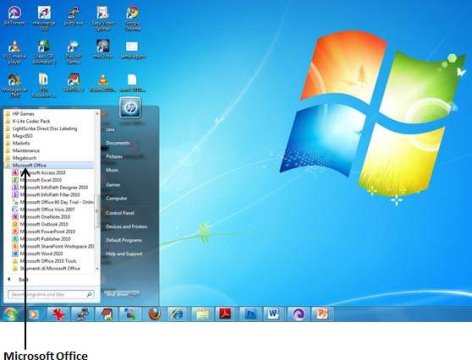
Step 4− Search for Microsoft Word 2010 from the submenu and click it.

This will launch the Microsoft Word 2010 application and you will see the following window.
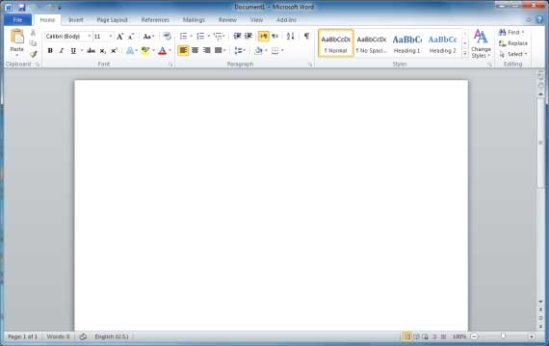
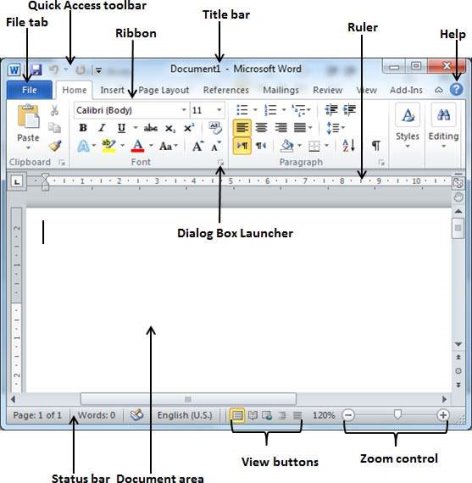
Following is the basic window which you get when you start the Word application. Let us understand the various important parts of this window.
File Tab
The File tab replaces the Office button from Word 2007. You can click it to check the Backstage view. This is where you come when you need to open or save files, create new documents, print a document, and do other file-related operations.
Quick Access Toolbar
This you will find just above the File tab. This is a convenient resting place for the most frequently used commands in Word. You can customize this toolbar based on your comfort.
Ribbon

Ribbon contains commands organized in three components –
- Tabs−These appear across the top of the Ribbon and contain groups of related commands. Home, Insert, Page Layout is examples of ribbon tabs.
- Groups−They organize related commands; each group name appears below the group on the Ribbon. For example, group of commands related to fonts or group of commands related to alignment, etc.
- Commands− Commands appear within each group as mentioned above.
Title bar
This lies in the middle and at the top of the window. Title bar shows the program and document titles.
Rulers
Word has two rulers - a horizontal ruler and a vertical ruler. The horizontal ruler appears just beneath the Ribbon and is used to set margins and tab stops. The vertical ruler appears on the left edge of the Word window and is used to gauge the vertical position of elements on the page.
Help
The Help Icon can be used to get word related help anytime you like. This provides nice tutorial on various subjects related to word.
Zoom Control
Zoom control lets you zoom in for a closer look at your text. The zoom control consists of a slider that you can slide left or right to zoom in or out; you can click the + buttons to increase or decrease the zoom factor.
View Buttons
The group of five buttons located to the left of the Zoom control, near the bottom of the screen, lets you switch through the Word's various document views.
- Print Layout view−This displays pages exactly as they will appear when printed.
- Full Screen Reading view−This gives a full screen view of the document.
- Web Layout view−This shows how a document appears when viewed by a Web browser, such as Internet Explorer.
- Outline view−This lets you work with outlines established using Word’s standard heading styles.
- Draft view−This formats text as it appears on the printed page with a few exceptions. For example, headers and footers aren't shown. Most people prefer this mode.
Document Area
This is the area where you type. The flashing vertical bar is called the insertion point and it represents the location where text will appear when you type.
Status Bar
This displays the document information as well as the insertion point location. From left to right, this bar contains the total number of pages and words in the document, language, etc.
You can configure the status bar by right-clicking anywhere on it and by selecting or deselecting options from the provided list.
Dialog Box Launcher
This appears as very small arrow in the lower-right corner of many groups on the Ribbon. Clicking this button opens a dialog box or task pane that provides more options about the group.
The Backstage view was introduced in Word 2010. This acts as the central place for managing your documents. The backstage view helps in creating new documents, saving and opening documents, printing and sharing documents, and so on.
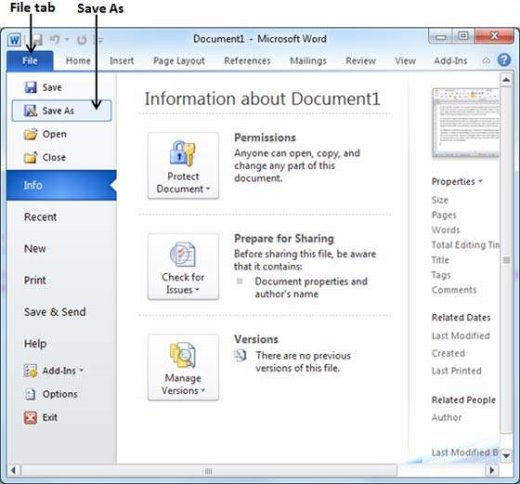
Getting to the Backstage View is easy: Just click the File tab, located in the upper-left corner of the Word Ribbon. If you already do not have any opened document, then you will see a window listing down all the recently opened documents as follows −
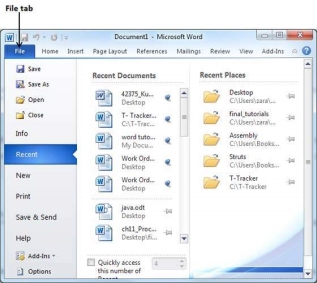
If you already have an opened document, then it will display a window showing detail about the opened document as shown below. Backstage view shows three columns when you select most of the available options in the first column.
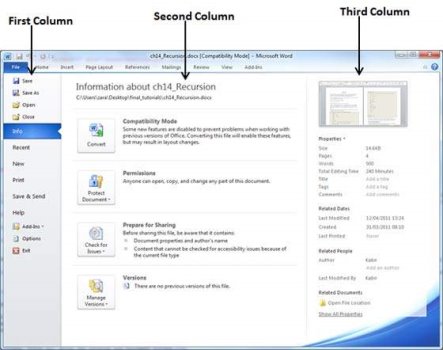
The first column of the backstage view will have following options –
S.No | Option & Description |
1 | Save If an existing document is opened, it will be saved as is, otherwise it will display a dialogue box asking for the document name. |
2 | Save As A dialogue box will be displayed asking for document name and document type, by default it will save in word 2010 format with extension .docx. |
3 | Open This option is used to open an existing word document. |
4 | Close This option is used to close an open document. |
5 | Info This option displays information about the opened document. |
6 | Recent This option lists down all the recently opened documents |
7 | New This option is used to open a new document. |
8 | This option is used to print an open document. |
9 | Save & Send This option will save an open document and will display options to send the document using email, etc. |
10 | Help This option is used to get the required help about Word 2010. |
11 | Options This option is used to set various option related to Word 2010. |
12 | Exit Use this option to close the document and exit. |
Document Information
When you click the Info option available in the first column, it displays the following information in the second column of the backstage view –
- Compatibility Mode− If the document is not a native Word 2007/2010 document, a Convert button appears here, enabling you to easily update its format. Otherwise, this category does not appear.
- Permissions−You can use this option to protect your word document. You can set a password so that nobody can open your document, or you can lock the document so that nobody can edit your document.
- Prepare for Sharing−This section highlights important information you should know about your document before you send it to others, such as a record of the edits you made as you developed the document.
- Versions− If the document has been saved several times, you may be able to access the previous versions of it from this section.
Document Properties
When you click the Info option available in the first column, it displays various properties in the third column of the backstage view. These properties include the document size, the number of pages in the document, the total number of words in the document, the name of the author etc.
You can also edit various properties by clicking on the property value and if the property is editable, then it will display a text box where you can add your text like title, tags, comments, Author.
Exit Backstage View
It is simple to exit from the Backstage View. Either click on the File tab or press the Esc button on the keyboard to go back to the working mode of Word.
We assume you know that when you start Word, it displays a new document by default as shown below −
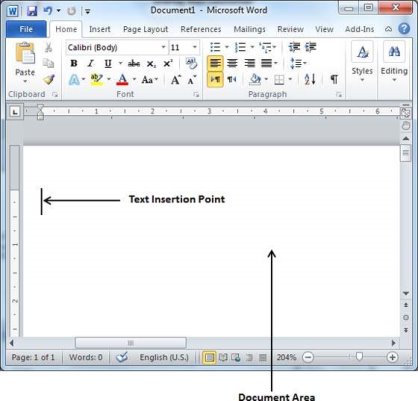
Document area is the area where you type your text. The flashing vertical bar is called the insertion point and it represents the location where the text will appear when you type. Keep the cursor at the text insertion point and start typing the text. We typed only two words "Hello Word" as shown below. The text appears to the left of the insertion point as you type –
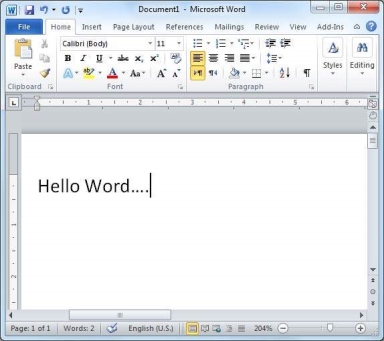
The following are the two important points that will help you while typing −
- You do not need to press Enter to start a new line. As the insertion point reaches the end of the line, Word automatically starts a new one. You will need to press Enter, to add a new paragraph.
- When you want to add more than one space between words, use the Tab key instead of the spacebar. This way you can properly align text by using the proportional fonts.
Saving New Document
Once you are done with typing in your new Word document, it is time to save your document to avoid losing work you have done on a Word document. Following are the steps to save an edited Word document −
Step 1− Click the File tab and select the Save As option.
Step 2− Select a folder where you will like to save the document, Enter the file name which you want to give to your document and Select the Save As option, by default it is the .docx format.
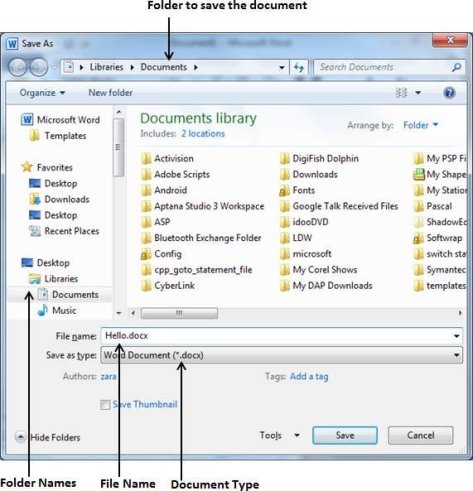
Step 3−Finally, click on the Save button and your document will be saved with the entered name in the selected folder.
Saving New Changes
There may be an instance when you open an existing document and edit it partially or completely, or an instance where you may like to save the changes in between editing of the document. If you want to save this document with the same name, then you can use either of the following simple options −
- Just press the Ctrl + S keys to save the changes.
- Optionally you can click on the floppy icon available at the top left corner and just above the File tab. This option will also help you save the changes.
- You can also use the third method to save the changes, which is the Save option available just above the Save As option as shown in the above screenshot.
If your document is new and it was never saved so far, then with either of the three options, Word will display a dialogue box to let you select a folder, and enter the document name as explained in case of saving new document.
Opening New Document
A new, blank document always opens when you start Microsoft Word. Suppose you want to start another new document while you are working on another document, or you closed an already opened document and want to start a new document. Here are the steps to open a new document −
Step 1− Click the File tab and select the New option.
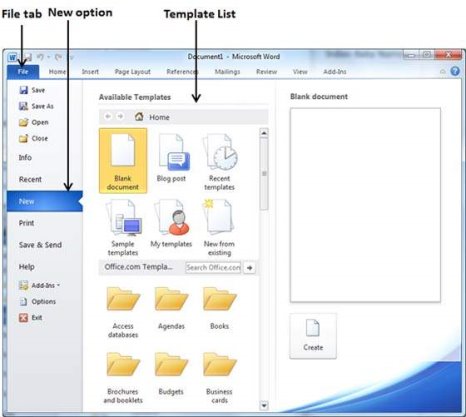
Step 2− When you select the New option from the first column, it will display a list of templates in the second column. Double-click on the Blank document; this is the first option in the template list. We will discuss the other templates available in the list in the following chapters.
You should have your blank document as shown below. The document is now
Ready for you to start typing your text.
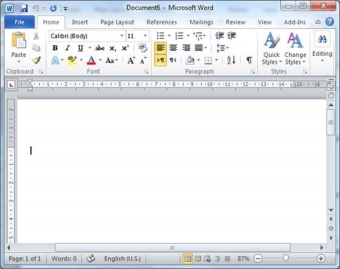
You can use a shortcut to open a blank document anytime. Try using the Ctrl + N keys and you will see a new blank document similar to the one in the above screenshot.
Opening Existing Document
There may be a situation when you open an existing document and edit it partially or completely. Follow the steps given below to open an existing document −
Step 1− Click the File tab and select the Open option.
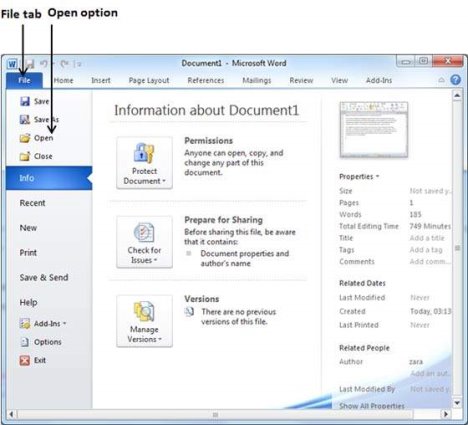
Step 2−This will display the following file Open dialog box. This lets you navigate through different folders and files, and also lets you select a file which you want to open.
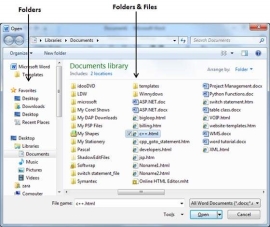
Step 3−Finally, locate and select a file which you want to open and click the small triangle available on the Open button to open the file. You will have different options to open the file, but simply use the Open option.
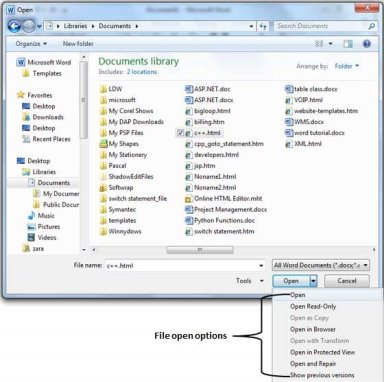
This will open your selected file. You can use the Open Read-Onlyoption if you are willing just to read the file and you have no intention to modify, i.e., edit the file. Other options can be used for advanced usage.
Closing a Document
Closing a document removes it from your computer screen and if you had other documents open, Word displays the last document you used otherwise, you see a blank Word window. Here are simple steps to close an opened document −
Step 1− Click the File tab and select the Close option.
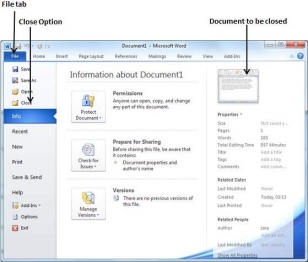
Step 2− When you select the Close option and if the document is not saved before closing, it will display the following Warning box asking whether the document should be saved or not.
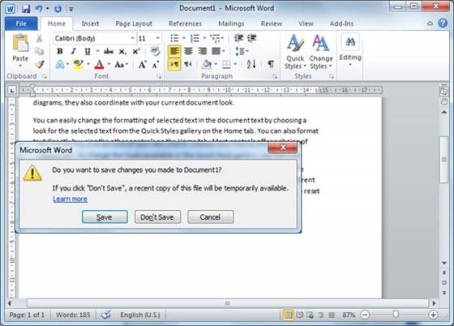
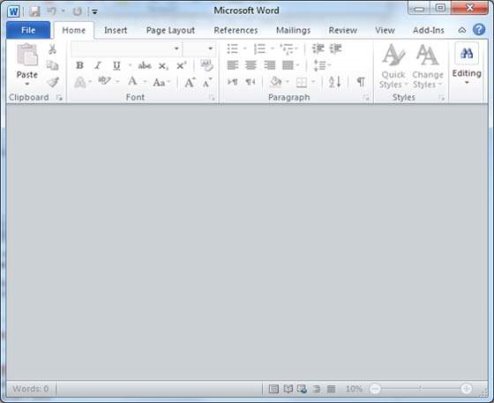
Step 3−To save the changes, click Save, otherwise click Don't Save. To go back to the document, click Cancel. This will close the document and if you have other documents open, Word displays the last document you used, otherwise, you see a blank Word window as shown below −
Insert and Add Text
First we will see how inserted text will be added into the existing content without replacing any existing content.
Step 1− Click the location where you wish to insert text; you can also use the keyboard arrows to locate the place where the text needs to be inserted.
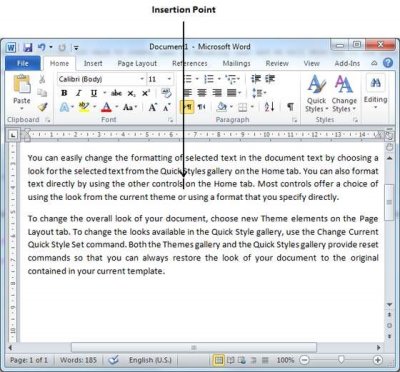
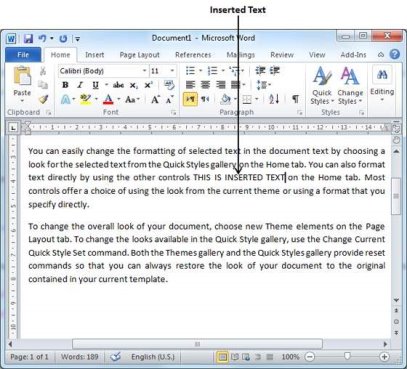
Step 2− Start typing the text that needs to be inserted. Word inserts the text to the left of the insertion point, moving the existing text to the right
Insert and Replace Text
In the Insertion mode, text will be added into the existing content but same time it will over write all the content which comes in its way.
Step 1− Right-click the status bar and select the Overtype option from the displayed menu.
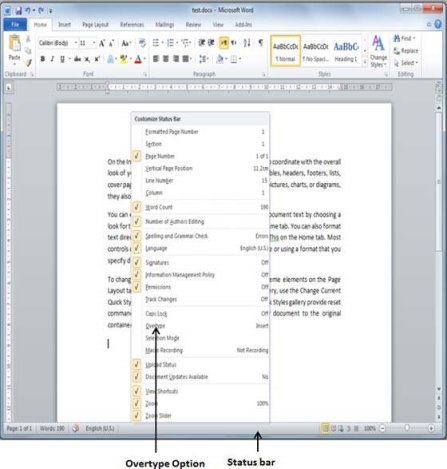
When you select the Overtype option, the status bar will show the insert mode as shown below −
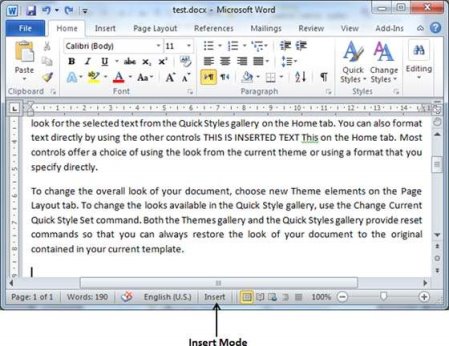
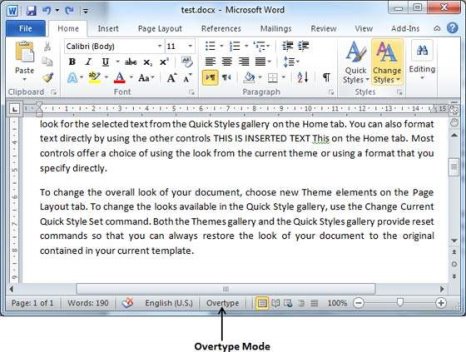
Step 2− Click on the Insert text available at the status bar and it will switch to the Overtype mode as shown below −
Step 3− Now click the location where the text needs to be inserted or you can use the keyboard arrows to locate the place where the text needs to be inserted.
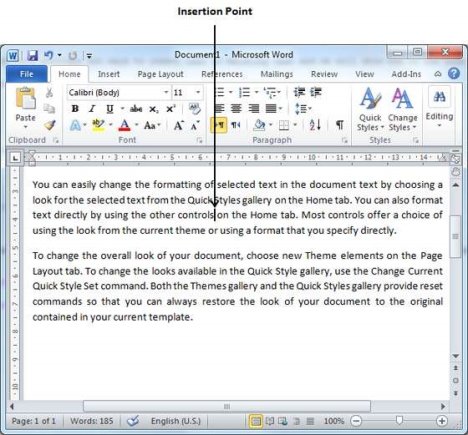
Step 4− Start typing the text that needs to be inserted. Word will replace the existing text with the newly typed text without moving the position of the exiting test.
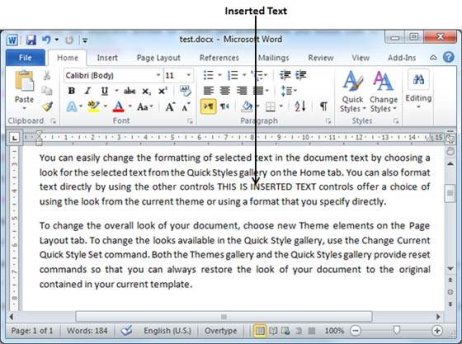
Note− Microsoft Word 2010 disabled the functionality of the Insert key and it does nothing, so you will have to follow-up with the above mentioned procedure to turn-on or turn-off the Insert mode.
Delete Text
It is very common to delete text and retype the content in your Word document. You might type something you did not want to type or there is something extra which is not required in the document. Regardless of the reason, Word offers you various ways of deleting the text in partial or complete content of the document.
Using Backspace & Delete Keys
The most basic deletion technique is to delete characters one at a time by pressing either the backspace key or the delete key. Following table describes how you can delete single character or a whole word by using either of these two keys −
S.No | Keys & Deletion Methods |
1 | Backspace Keep the insertion point just after the character you want to delete and press the Backspace key. Word deletes the character immediately to the left of the insertion point. |
2 | Ctrl + Backspace Keep the insertion point just after the word you want to delete and press Ctrl + Backspace key. Word deletes the whole word immediately to the left of the insertion point. |
3 | Delete Keep the insertion point just before the character you want to delete and press the Delete key. Word deletes the character immediately to the right of the insertion point. |
4 | Ctrl + Delete Keep the insertion point just before the word you want to delete and press Ctrl + Delete key. Word deletes the word immediately to the right of the insertion point. |
Using Selection Method
You have learnt how to select various parts of a Word document. You can make use of that learning to delete those selected parts as described in the following table –
S.No | Component Selection & Delete Methods |
1 | Deleting text between two points Click at the start of the block of text, hold down the Shift key, and click at the end of the block to select the portion of text and finally press either the Backspace key or the Delete key. |
2 | Deleting a single word Double-click anywhere on the word you want to delete and finally press either the Backspace key or the Delete key. |
3 | Deleting a paragraph Triple-click anywhere on the paragraph you want to delete and finally press either the Backspace key or the Delete key. |
4 | Deleting a sentence Hold down the Ctrl key and click anywhere in the sentence you want to delete and finally press either the Backspace or the Delete key. |
5 | Deleting a column of text Hold down the Alt key, click and hold the mouse button, and drag over the column you want to delete and finally press either the Backspace key or the Delete key. |
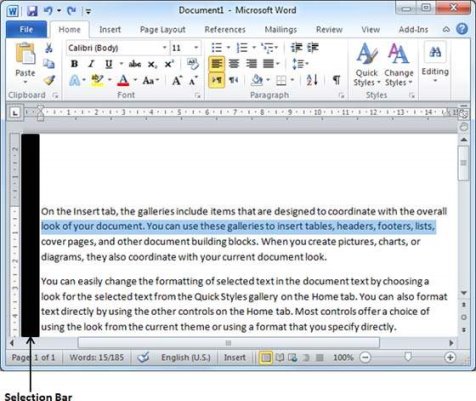
6 | Deleting a line Bring your mouse in the selection bar area and click in front of the line you want to delete and finally press either the Backspace key or the Delete key. |
7 | Deleting entire document content Press Ctrl + A keys to delete the entire document and finally press either the Backspace key or the Delete key. |
Note−The black shaded area in the following screen shot is called the selection bar. When you bring your cursor in this area, it turns into a rightward-pointing arrow.
Spell Check
Microsoft Word provides a decent Spelling and Grammar Checker which enables you to search for and correct all spelling and grammar mistakes in your document. Word is intelligent enough to identify misspelled or misused, as well as grammar errors and underlines them as follows.
- A red underline beneath spelling errors.
- A green underline beneath grammar errors.
- A blue line under correctly spelled but misused words.
Check Spelling and Grammar using Review tab
Here is the simple procedure to find out the spelling mistakes and fix them −
Step 1− Click the Review tab and then click the Spelling & Grammar button.
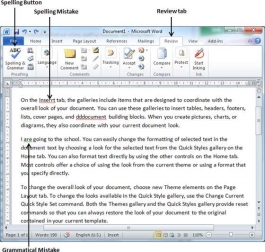
Step 2− A Spelling and Grammar dialog box will appear and will display the wrong spellings or errors in grammar. You will also get suggestions to correct as shown below −
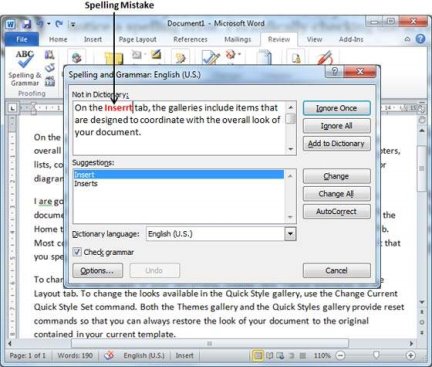
Now you have following options to fix the spelling mistakes −
- Ignore− If you are willing to ignore a word, then click this button and Word ignores the word throughout the document.
- Ignore All− Like Ignore, but this ignores all occurrences of the same misspelling, not just once but throughout the document.
- Add to Dictionary− Choose Add to Dictionary to add the word to the Word spelling dictionary.
- Change−This will change the wrong word using the suggested correct word.
- Change All− Like Change, but this changes all occurrences of the same misspelling, not just once but throughout the document.
- AutoCorrect− If you select a suggestion, Word creates an AutoCorrect entry that automatically corrects this spelling error from now on.
Following are the different options in case you have grammatical mistake −
- Next Sentence−You can click Next Sentence to direct the grammar checker to skip ahead to the next sentence.
- Explain−The grammar checker displays a description of the rule that caused the sentence to be flagged as a possible error.
- Options−This will open the Word Options dialog box to allow you to change the behavior of the grammar checker or spelling options.
- Undo−This will undo the last grammar changed.
Step 3− Select one of the given suggestions you want to use and click the Change option to fix the spelling or grammar mistake and repeat the step to fix all the spelling or grammar mistake.
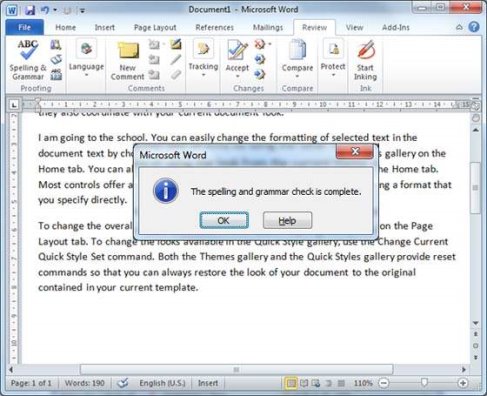
Step 4− Word displays a dialog box when it finishes checking for spelling and grammar mistakes, finally Click OK.
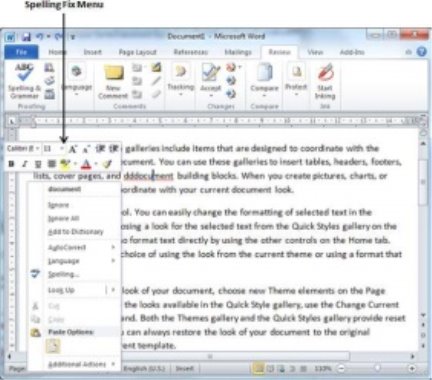
Check Spelling and Grammar using Right Click
If you will right-click the mouse button over a misspelled word, then it will show you the correct suggestions and the above mentioned options to fix the spelling or grammar mistake. Try it yourself.
Find & Replace
While working on editing a document you come across a situation very frequently when you want to search a particular word in your document and many times you will be willing to replace this word with another word at a few or all the places throughout the document. Here, we will understand how to find a word or phrase in a word document and how to replace an existing word with any other word using simple steps.
Find Command
The Find command enables you to locate specific text in your document. Following are the steps to find a word document in the following screen −
Step 1− Let us work out on a sample text available in our Word document. Just type =rand() and press Enter; the following screen will appear −
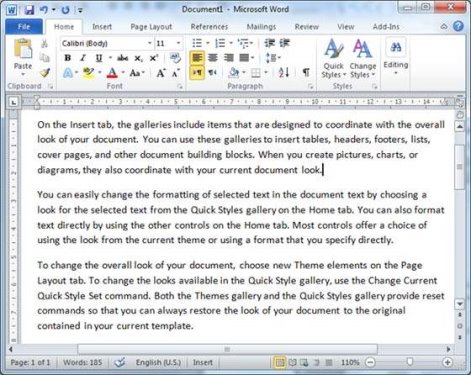
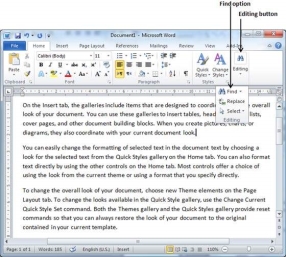
Step 2− Click the Find option in the Editing group on the Home tab or press Ctrl + F to launch the Navigation pane −
Step 3− Enter a word which you want to search in the Search box, as soon as you finish typing, Word searches for the text you entered and displays the results in the navigation pane and highlights the word in the document as in the following screenshot −
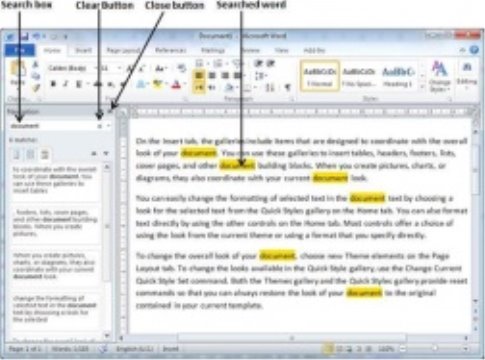
Step 4−You can click the clear button (X) to clear the search and results and perform another search.
Step 5−You can use further options while searching for a word. Click the option button to display the options menu and then click the Options option; this will display a list of options. You can select the options like match case to perform case-sensitive search.
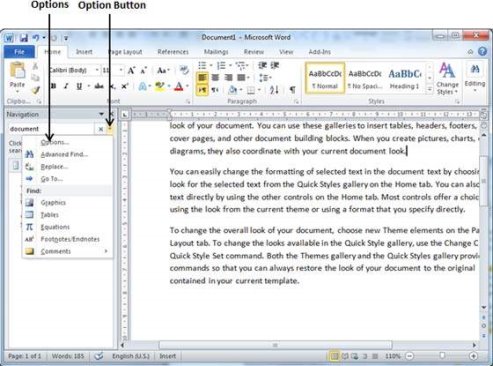
Step 6−Finally, if you are done with the Search operation, you can click the close button (X) to close the Navigation Pane.
Find & Replace Operation
We assume you are an expert in searching a word or phrase in a word document as explained above. This section will teach you how you can replace an existing word in your document. Following are the simple steps −
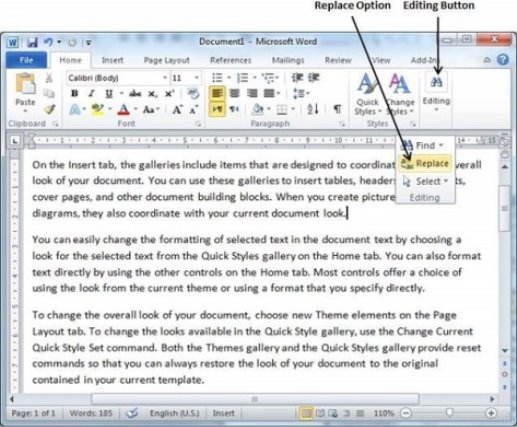
Step 1− Click the Replace option in the Editing group on the Home tab or press Ctrl + H to launch the Find and Replace dialog box shown in Step 2 −
Step 2− Type a word which you want to search. You can also replace the word using the Find and Replace dialog box as in the following screenshot −
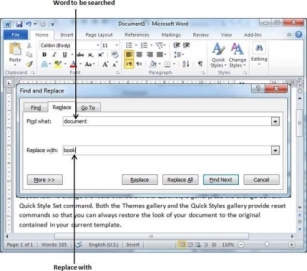
Step 3− Click the Replace button available on the Find and Replace dialog box and you will see the first occurrence of the searched word would be replaced with the replace with word. Clicking again on Replace button would replace next occurrence of the searched word. If you will click Replace All button then it would replace all the found words in one go. You can also use Find Next button just to search the next occurence and later you can use Replace button to replace the found word.
Step 4− You can use More >> button available on the dialog box to use more options and to make your search more specific like case sensitive search or searching for whole word only etc.
Step 5−Finally, if you are done with the Find and Replace operation, you can click the Close (X) or Cancel button of the dialog box to close the box.
Setting Text Fonts
Microsoft word allows you to use different fonts with different size. You can change your document's appearance by changing the fonts and their size. Usually you use different fonts for paragraphs and headings. It is important to learn how to use different fonts. This chapter will teach you how to change a font and its size in simple steps.
Change the Font Type & Size
We will understand in brief the font buttons that we will further use in this tutorial. Following is a screenshot to show you a few font related buttons.
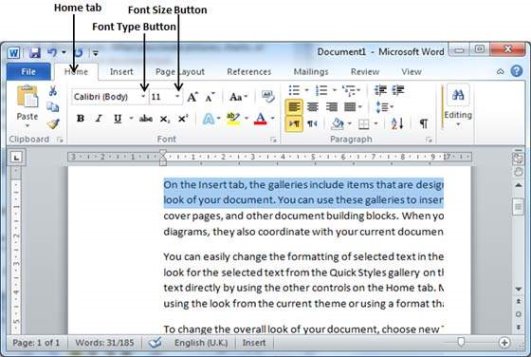
Step 1− Select the portion of text the font of which needs to be changed and click the Home tab. Now click the Font Type button to list down all the fonts available as shown below.
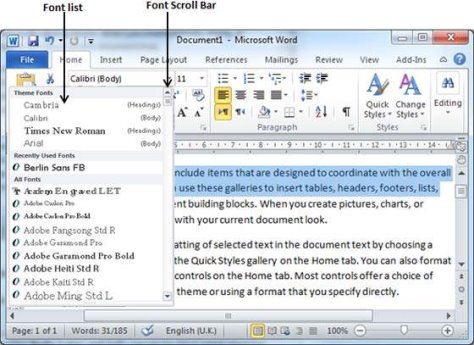
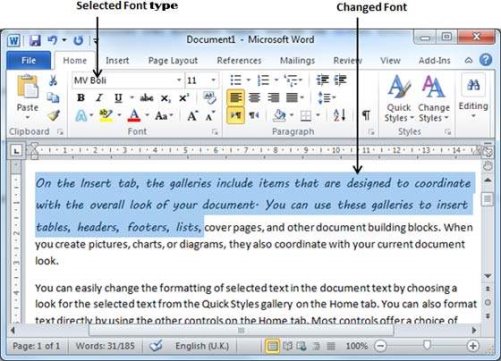
Step 2− Try to move the mouse pointer over the listed fonts. You will see that the text font changes when you move the mouse pointer over different fonts. You can use the Font Scroll Bar to display more fonts available. Finally select a desired font by clicking over the font name in the list. We have selected MV Boli as the font for our sample text.
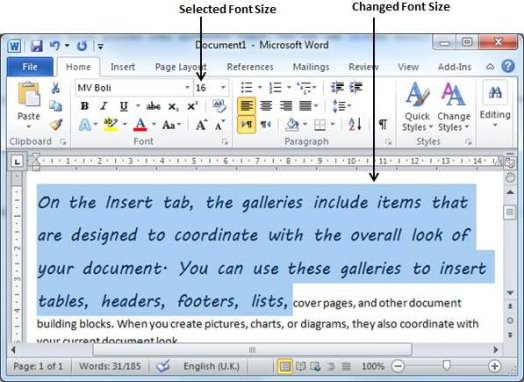
Step 3− similar way, to change the font size, click over the Font Size button which will display a font size list. You will use the same procedure to select a desired font size that you have used while selecting a font type.
Use Shrink and Grow Buttons
You can use a quick way to reduce or enlarge the font size. As shown in the first screenshot, the Shrink Font button can be used to reduce the font size whereas the Grow Font button can be used to enlarge the font size.
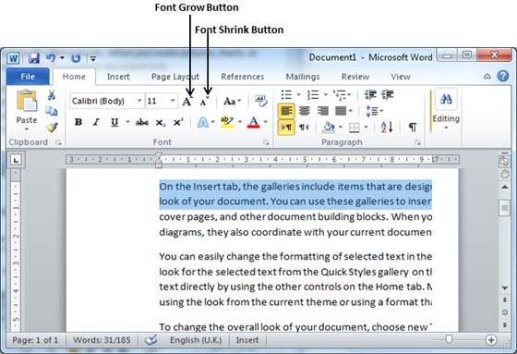
Try to click either of these two buttons and you will see the effect. You can click a single button multiple times to apply the effect. Each time you click either of the buttons, it will enlarge or reduce the font size by 1 point.
Clear Formatting Options
All of the setting can be reset to plain text, or the default formatting. To reset text to default settings −
Step 1− Select the portion of text that you want to reset.
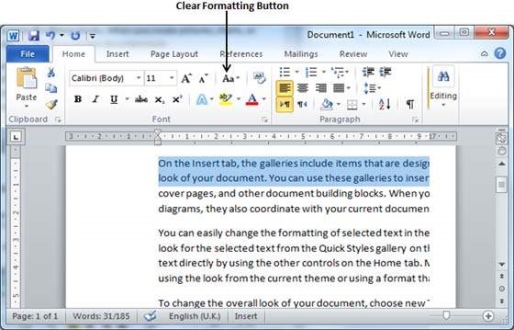
Step 2− Click the Clear Formatting button in the Home tab Font group, or simply use Ctrl + SPACEBAR.
Text Decoration
When we use the term decorate, it means decorate by putting the text in italics, underlining the text or making it bold to look more fancy and much more. In this chapter, we will also learn how we can strikethrough a text.
Making text bold
We use bold text to give more emphasis on the sentence. It is very simple to change a selected portion of text into bold font by following two simple steps −
Step 1− Select the portion of text that the font of which needs to be made bold. You can use any of the text selection methods to select the portion of text.
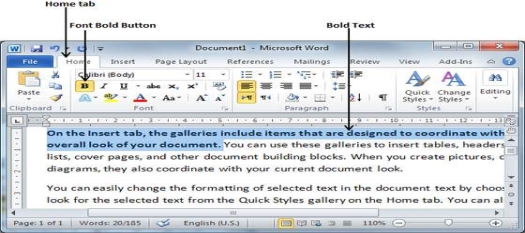
Step 2− Click the Font Bold [ B ] button in the Home tab Font group, or simply use Ctrl + B keys to make the selected portion of text bold.
Making Text Italic
An italic text appears with a small inclination and we use the italicized text to differentiate it from other text. It is very simple to change the selected text into italic font by following two simple steps −
Step 1− Select the portion of text the font of which needs to be italicized. You can use any of the text selection methods to select the portion of text.
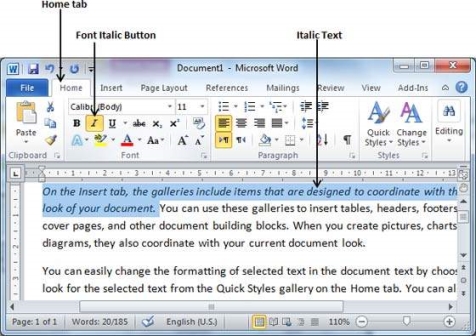
Step 2− Click the Font Italic [ I ] button in the Home tab Font group, or simply use the Ctrl + I keys to convert the portion of text in italic font.
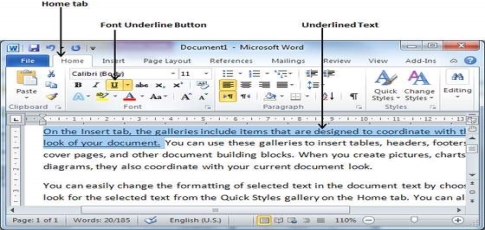
Underline the Text
An underlined portion of text appears with an underline and we use the underlined portion of text to make it more distinguished from other text. It is very simple to change the selected text into underlined font by following two simple steps −
Step 1− Select the portion of text which needs to be underlined. You can use any of the text selection method to select the portion of text.
Step 2− Click Font Underline [ U ] button in the Home tab Font group, or simply use the Ctrl + U keys to put an underline under the text.
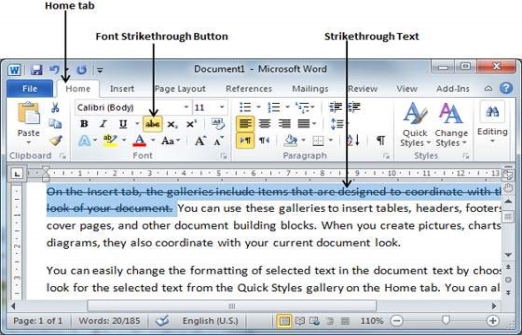
Strikethrough the Text
Strikethrough portion of text will look as if a line has been drawn through the middle of it. A strikethrough portion of text indicates that it has been deleted and that the portion of text is not required any more. It is very simple to change a selected portion of text into a strikethrough portion of text by following two simple steps −
Step 1− Select the portion of text that you want to change to a bold font. You can use any of the text selection method to select the portion of text.
Step 2− Click Font Strikethrough [ abc ] button in the Home tab Font group to put a line in the middle of the text which is called strikethrough the text.
Change Text Case
You can also capitalize a character you are typing by pressing and holding the SHIFT key while you type. You can also press the CAPS LOCK to have every letter that you type capitalized, and then press the CAPS LOCK again to turn off capitalization.
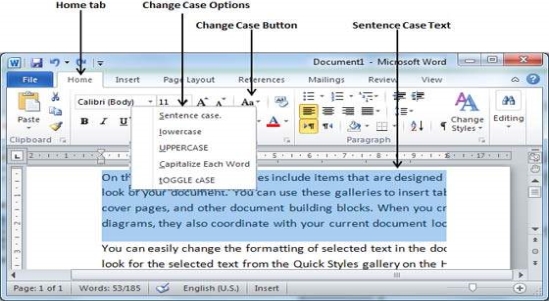
Change Text to Sentence Case
A sentence case is the case where the first character of every sentence is capitalized. It is very simple to change the selected portion of text into sentence case by following two simple steps −
Step 1− Select the portion of text that that needs to be put in sentence case. You can use any of the text selection methods to select the portion of text.
Step 2− Click the Change Case button and then select the Sentence Case option to capitalize the first character of every selected sentence.
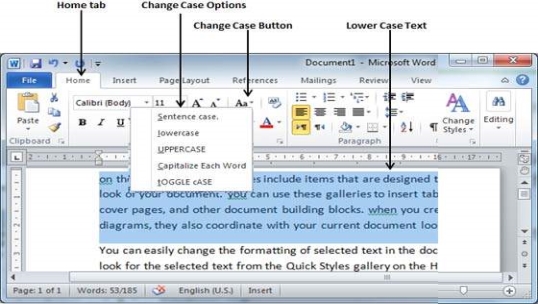
Change Text to Lowercase
Changing text to lowercase is where every word of a sentence is in lowercase. It is very simple to change a selected portion of text into lowercase by following two simple steps −
Step 1− Select the portion of text that needs to be put in lowercase. You can use any of the text selection methods to select the portion of text.
Step 2− Click the Change Case button and then select Lowercase option to display all the selected words in lowercase.
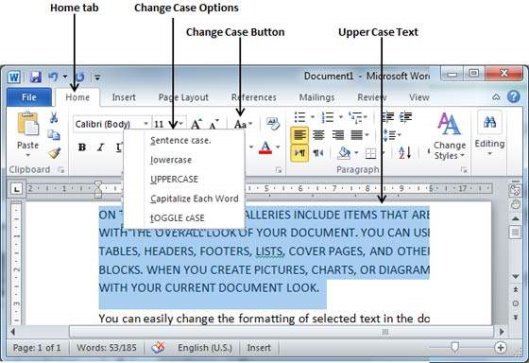
Change Text to Uppercase
This is where every word of a sentence is in uppercase. It is very simple to change selected text into uppercase by following two simple steps −
Step 1− Select the portion of text that you want to change to a bold font. You can use any of the text selection method to select the portion of text.
Step 2− Click the Change Case button and then select UPPERCASE option to display all selected words in all caps. All characters of every selected word will be capitalized.
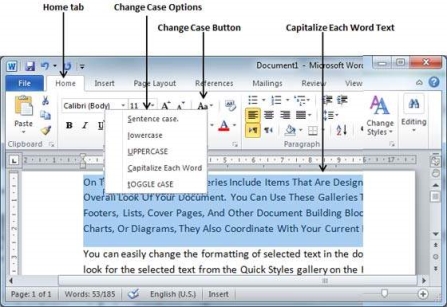
Capitalize Text
A capitalize case is the case where every first character of every selected word is in capital. This is very simple to change selected text into capitalize by following two simple steps −
Step 1− Select the portion of text that needs to be capitalized. You can use any of the text selection method to select the portion of text.
Step 2− Click the Change Case button and then select the Capitalize Each Word option to put a leading cap on each selected word.
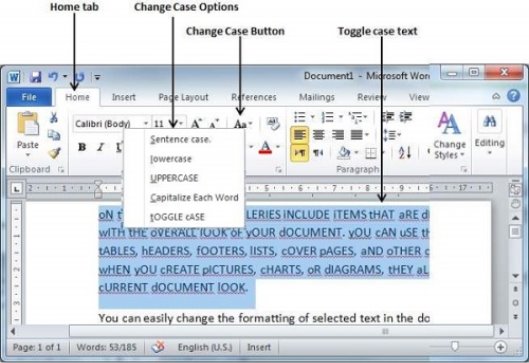
Toggle the Text
The Toggle operation will change the case of every character in reverse way. A capital character will become a character in lower case and a character in lower case will become a character in upper case. It is very simple to toggle case of the text by following two simple steps −
Step 1− Select the portion of text that you want to change to a bold font. You can use any of the text selection method to select the portion of text.
Step 2− Click the Change Case button and then select the tOGGLEcASE option to change all the words in lowercase into words in uppercase; the words in uppercase words change to words in lowercase.
Text Alignments
There are four types of paragraph alignment available in Microsoft Word — left-aligned, center-aligned, rightaligned, and justified.
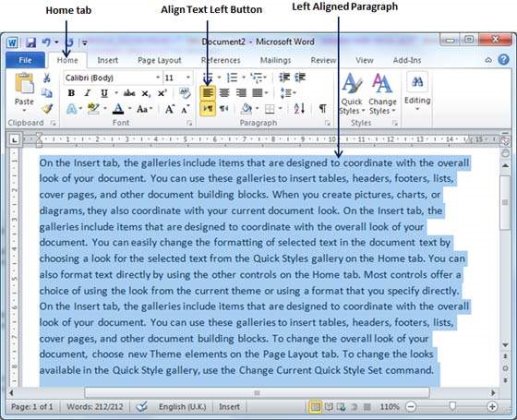
Left-Aligned Text
A paragraph's text is left aligned when it is aligned evenly along the left margin. Here is a simple procedure to make a paragraph text left-aligned.
Step 1− Click anywhere on the paragraph you want to align and click the Align Text Left button available on the Home tab or simply press the Ctrl + L keys.
Center Aligned Text
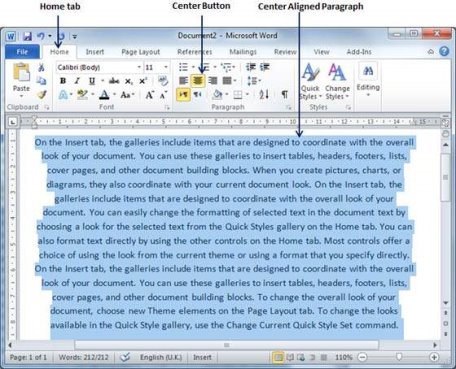
A paragraph's text will be said center aligned if it is in the center of the left and right margins. Here is a simple procedure to make a paragraph text center aligned.
Step 1− Click anywhere on the paragraph you want to align and click the Center button available on the Home tab or simply press the Ctrl + E keys.
Right-Aligned Text
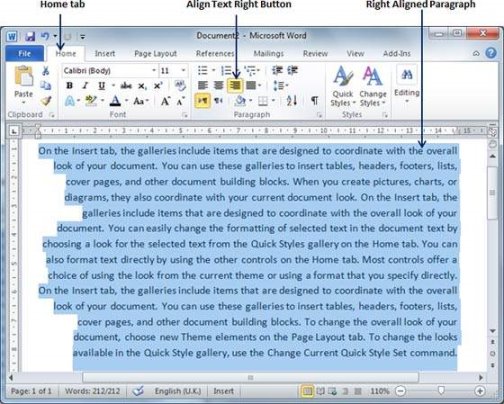
A paragraph's text is right-aligned when it is aligned evenly along the right margin. Here is a simple procedure to make a paragraph text right-aligned.
Step 1− Click anywhere on the paragraph you want to align and click the Align Text Right button available on the Home tab or simply press the Ctrl + R keys.
Justified Text
A paragraph's text is justified when it is aligned evenly along both the left and the right margins. Following is a simple procedure to make a paragraph text justified.
Step 1− Click anywhere on the paragraph you want to align and click the Justify button available on the Home tab or simply press the Ctrl + J keys.
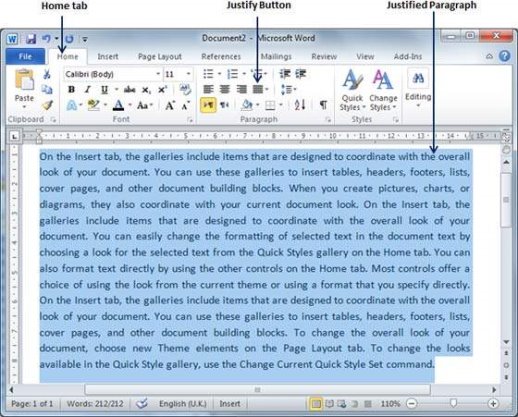
When you click the Justify button, it displays four options, justify, justify low, justify high and justify medium. You need to select only the justify option. The difference between these options is that low justify creates little space between two words, medium creates a more space than low justify and high creates maximum space between two words to justify the text.
Create Bullets
Create a List from Existing Text
This is very simple to convert a list of lines into a bulleted or numbered list. Following are the simple steps to create either bulleted list or numbered list.
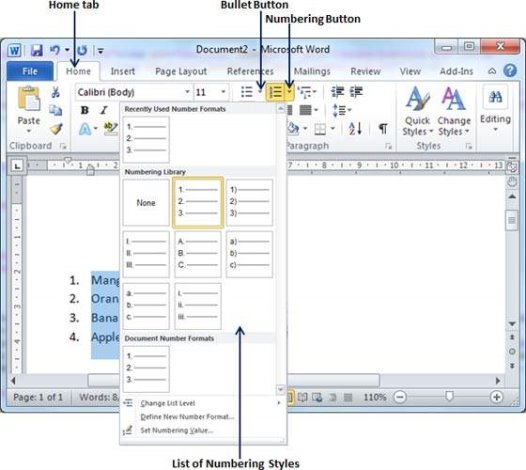
Step 1− Select a list of text to which you want to assign bullets or numbers. You can use any of the text selection method to select the portion of text.
Step 2− Click the Bullet Button triangle to display a list of bullets you want to assign to the list. You can select any of the bullet style available by simply clicking over it.
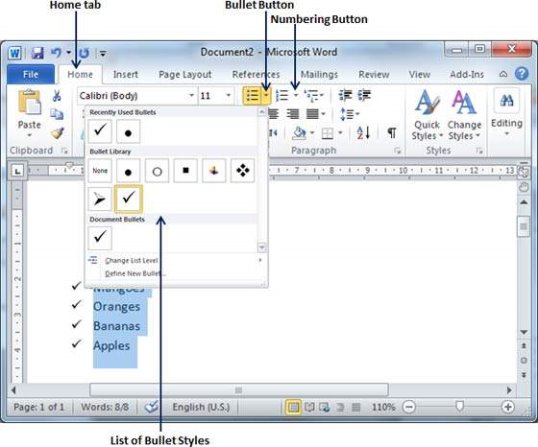
Step 3− If you are willing to create a list with numbers, then click the Numbering
Button triangle instead of the bullet button to display a list of numbers you want to assign to the list. You can select any of the numbering style available by simply clicking over it.
Create a List as You Type
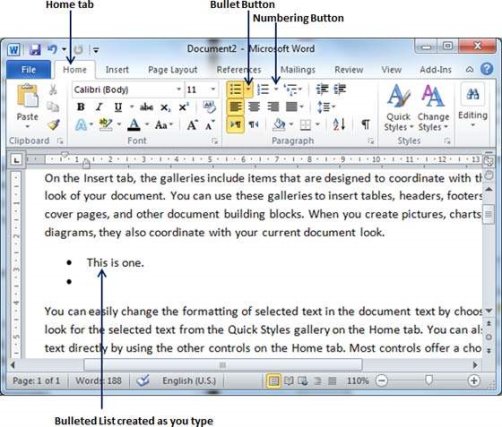
You can create a bulleted list as you type. Word will automatically format it according to your text. Following are the simple steps to create bulleted list as you type.
Step 1− Type *, and then either press the SPACEBAR or press the TAB key, and then type the rest of what you want in the first item of the bulleted list.
Step 2− When you are done with typing, press Enter to add the item in the list automatically and go to add next item in the list.
Step 3− Repeat Step 2 for each list item.
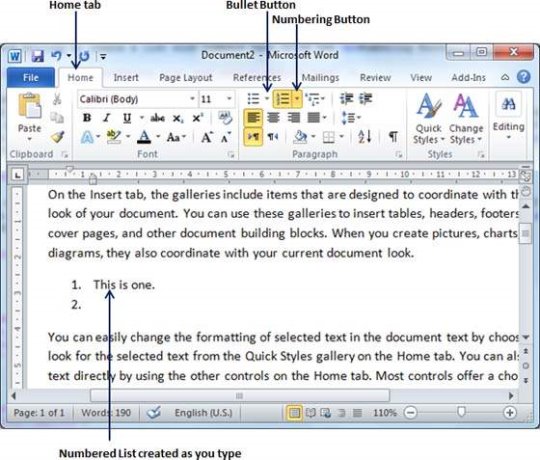
You can create a numbered list as you type. Word will automatically format it according to your text. Following are the simple steps to create numbered list as you type.
Step 1− Type 1, and then either press the SPACEBAR or press the TAB key, and then type the rest of what you want in the first item of the numbered list.
Step 2− When you are done with typing, press Enter to add the item in the list automatically and go to add next item in the list.
Step 3− Repeat Step 2 for each list item.
You can create sub-lists. These sub-lists are called multi-lists. It is simple to create sublists; press the Tab key to put items in sub-list. You can try it yourself.
Set Line Spacing
A line spacing is the distance between two lines in a Microsoft Word document. You can increase or decrease this distance as per your requirement by following a few simple steps. This chapter will explain how to set the distance between two lines as well as how to set the distance between two paragraphs.
Spacing between Lines
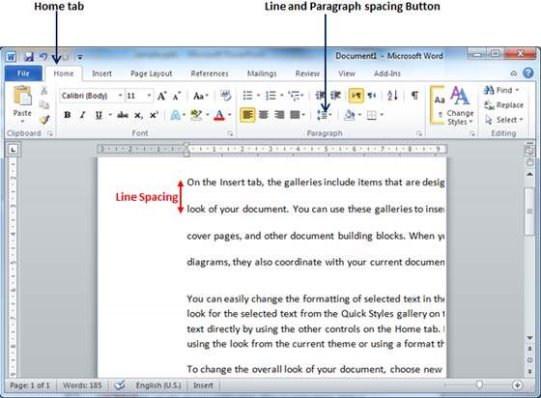
Following are the simple steps to adjust spacing between two lines of the document.
Step 1− Select the paragraph or paragraphs for which you want to define spacing. You can use any of the text selection method to select the paragraph(s).
Step 2− Click the Line and Paragraph Spacing Button triangle to display a list of options to adjust space between the lines. You can select any of the option available by simply clicking over it.
Spacing between Paragraphs
You can also set distance between two paragraphs. Following are the simple steps to set this distance.
Step 1− Select the paragraph or paragraphs for which you want to define spacing and click the Paragraph Dialog Box launcher available on the Home tab.
Step 2− Click the Before spinner to increase or decrease the space before the selected paragraph. Similar way, click the After spinner to increase or decrease the space after the selected paragraph. Finally, click the OK button to apply the changes.
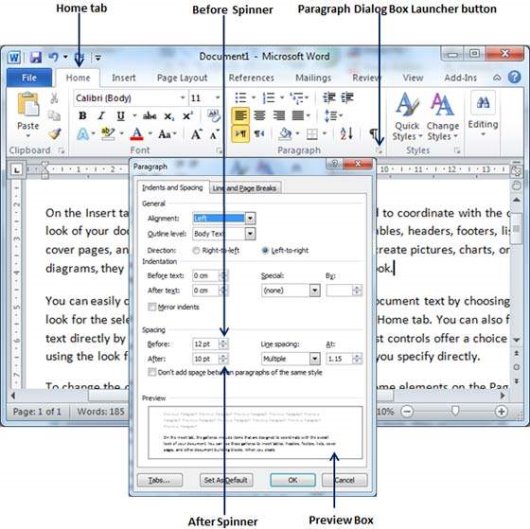
You can use the Line Spacing option available at the dialog box to set line spacing as we have seen in previous example. You can try it yourself.
Borders and Shades
Microsoft Word allows you to place a border on any or all of the four sides of selected text, paragraphs, and pages. You can also add different shades to the space occupied by the selected text, paragraphs, and pages. This chapter will teach you how to add any of the borders (left, right, top or bottom) around a text or paragraph or a page and how to add different shadows to them.
Add Borders to Text
Following are the simple steps to add border to any text or paragraph.
Step 1− Select the portion of text or paragraph to which you want to add border. You can use any of the text selection method to select the paragraph(s).
Step 2− Click the Border Button to display a list of options to put a border around the selected text or paragraph. You can select any of the option available by simply clicking over it.
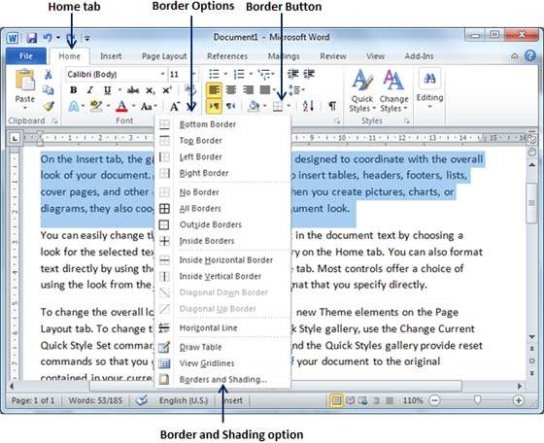
Step 3− Try to add different borders like left, right top or bottom by selecting different options from the border options.
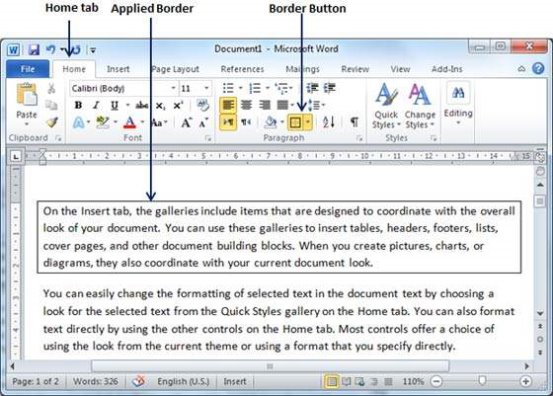
Step 4−To delete the existing border, simply select the No Border option from the border options.
Note−You can add a horizontal line by selecting the Horizontal Line option from the border options. Otherwise type --- (three hyphens) and press ENTER. A single, light horizontal line will be created between the left and the right margins.
Add Borders to Page
You can add borders of your choice to word pages by following the steps given below.
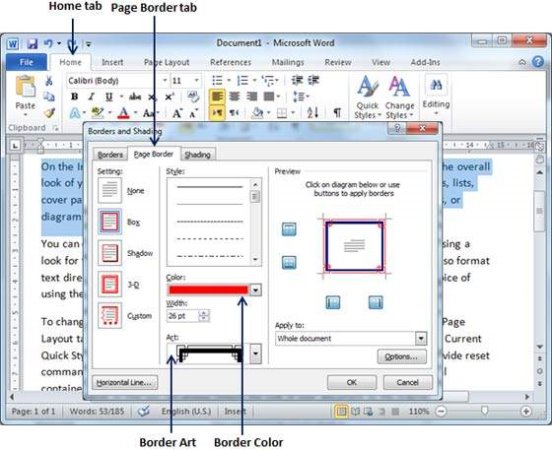
Step 1− Click the Border Button to display a list of options to put a border. Select the Border and Shading option available at the bottom of the list of options as shown in the above screenshot. This will display a Border and Shading dialog box. This dialog box can be used to set borders and shading around a selected text or page borders.
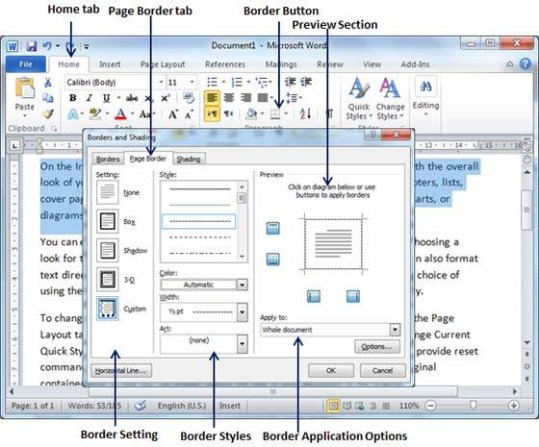
Step 2− Click the Page Border tab which will display a list of border settings, styles and options whether this border should be applied to the whole document or just one page or the first page.
Step 3− You can use the Preview section to disable or enable left, right, top or bottom borders of the page. Follow the instruction given in the preview section itself.
Step 4−You can customize your border by setting its color, width by using different art available under the style section.
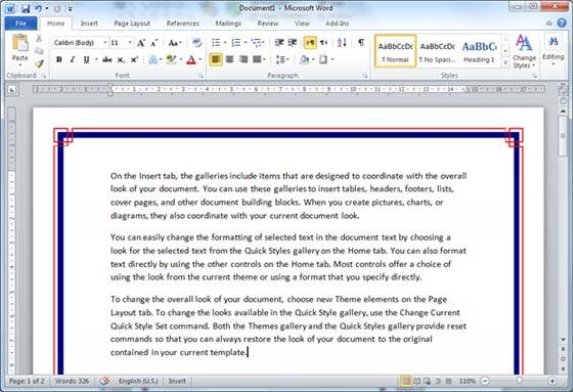
You can have similar or even better borders as given below.
Add Shades to Text
The following steps will help you understand how to add shades on a selected portion of text or a paragraph(s).
Step 1− Click the Border Button to display a list of options to put a border. Select the Border and Shading option available at the bottom of the list of options as shown in the above screenshot. This will display a Border and Shading dialog box. This dialog box can be used to set borders and shading around a selected portion of text or page borders.
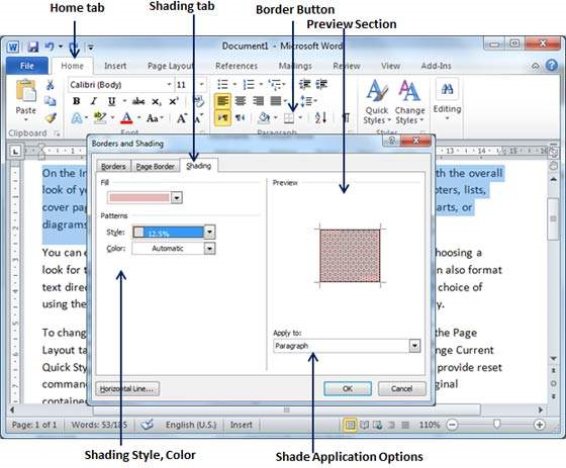
Step 2− Click the Shading tab; this tab will display the options to select fill, color and style and whether this border should be applied to a paragraph or a portion of text.
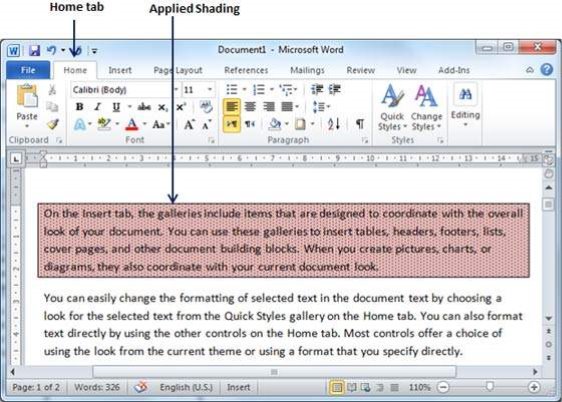
Step 3−You can use the Preview section to have an idea about the expected result. Once you are done, click the OK button to apply the result.
Set Tabs
Microsoft Word tabs help in setting up information properly within a column. Word enables you to set left, center, right, decimal, or bar tabs to line up columnar information. By default, Word places tabs every .5 inch across the page between the left and right margins.
S.No | Tab & Description |
1 | Left Left-aligns text at tab stop and this is the default tab. |
2 | Center Centers text over tab stop. |
3 | Right Right-aligns text at tab stop. |
4 | Decimal Aligns numbers at decimal point over tab stop. |
5 | Bar Creates a bar to separate the text. |
Setting a Tab
Following are the simple steps to set the center and the right tabs in a Word document. You can use similar steps but different tabs to set up decimal and bar tabs.
Step 1− Type some text that you want to line up with the tab stops. Press the Tab key only once between each column of information you to want to line up. I typed the following three lines.
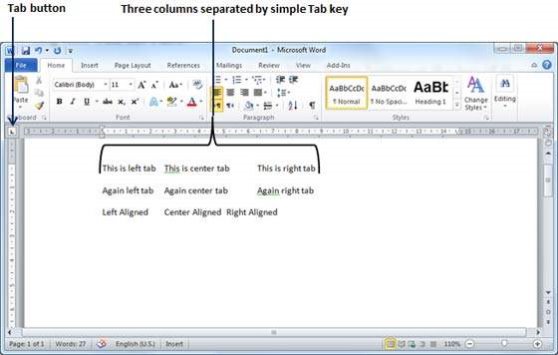
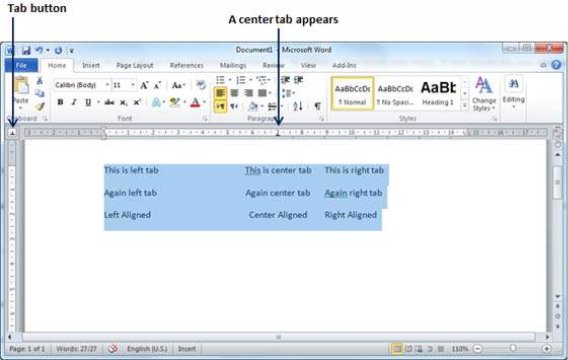
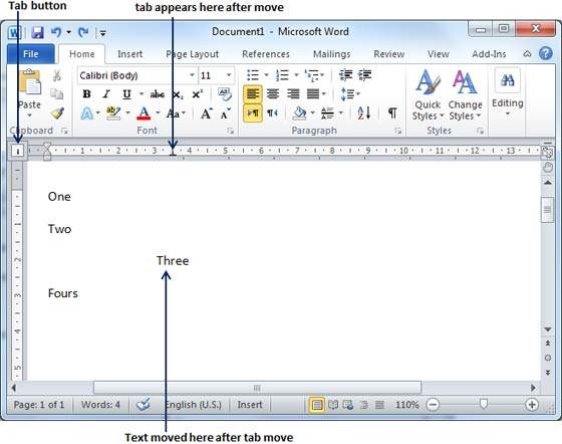
Step 2− Select a tab type using the Tab button; assume the center tab and finally select the paragraph or paragraphs the tabs of which you want to set. Next click the ruler where you want the tab to appear, a tab will appear at the ruler where you just clicked and the selected portion of text will be adjusted in the center.
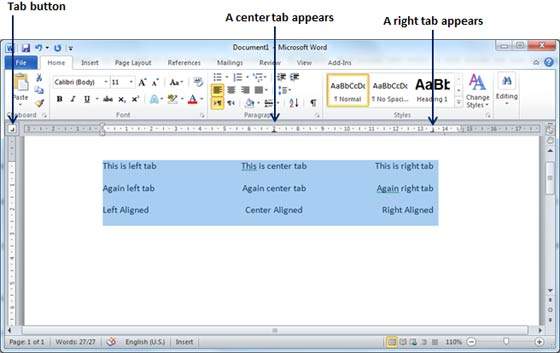
Step 3− Now select the right tab using the Tab Button and click the ruler at the right side where you want to align the text at the right side. A right tab will appear at the ruler where you just clicked and the selected portion of text will be right-aligned.
Moving a Tab
You can move an already set tab at a particular location by following the steps given below.
Step 1− Click just before the line for which you want to change the tab setting. Drag the tab sign available at the ruler to the left or right.
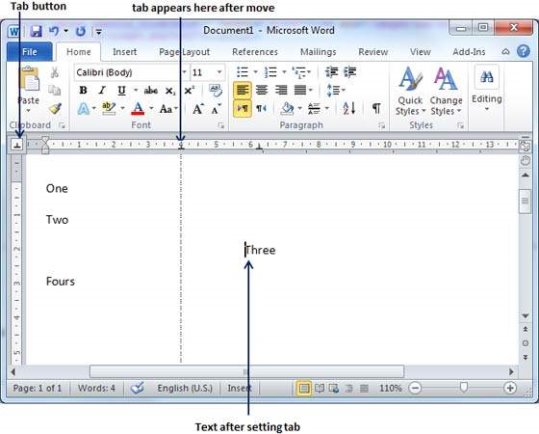
Step 2− A vertical line marks its position as you drag and when you click and drag a tab, the text moves with the tab.
Create a Table
A table is a structure of vertical columns and horizontal rows with a cell at every intersection. Each cell can contain text or graphics, and you can format the table in any way you want. Usually the top row in the table is kept as a table header and can be used to put some informative instruction.
Create a Table
The following steps will help you understand how to create a table in a Word document.
Step 1− Click the Insert tab followed by the Table button. This will display a simple grid as shown below. When you move your mouse over the grid cells, it makes a table in the table that appears in the document. You can make your table having the desired number of rows and columns.
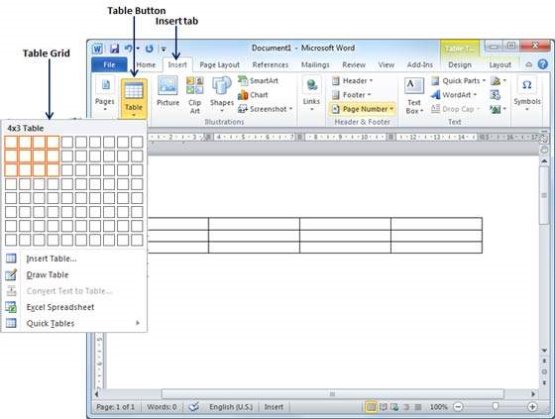
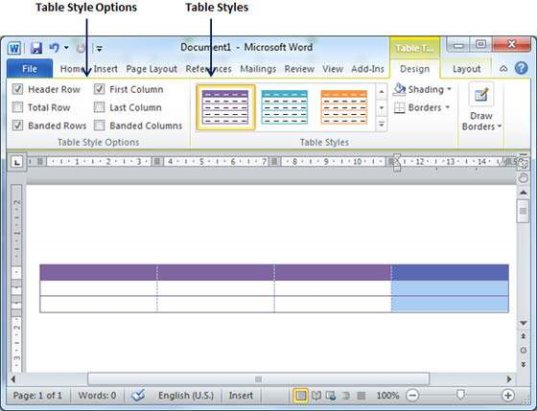
Step 2− Click the square representing the lower-right corner of your table, which will create an actual table in your document and Word goes in the table design mode. The table design mode has many options to work with as shown below.
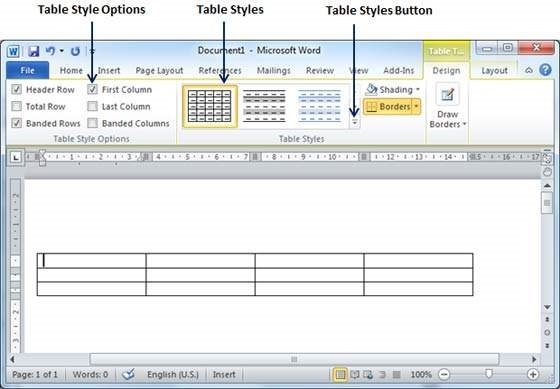
Step 3−This is an optional step that can be worked out if you want to have a fancy table. Click the Table Styles button to display a gallery of table styles. When you move your mouse over any of the styles, it shows real time preview of your actual table.
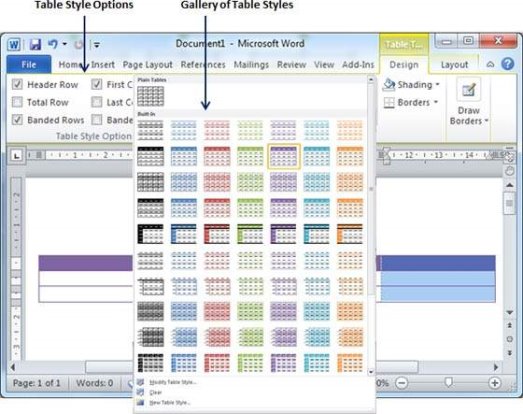
Step 4−To select any of the styles, just click the built-in table style and you will see that the selected style has been applied on your table.
Delete a Table
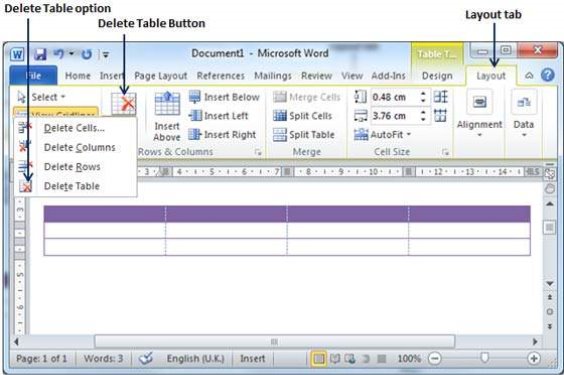
Following are the simple steps to delete an existing table from a word document.
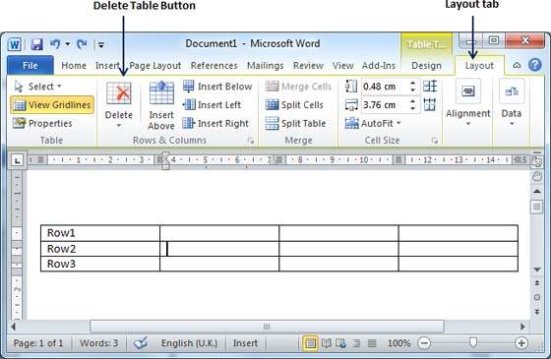
Step 1− Click anywhere in the table you want to delete.
Step 2− Click the Layout tab, and click the Delete Table option under the Delete Table Button to delete the complete table from the document along with its content.
Rows & Columns
A table is a structure of vertical columns and horizontal rows with a cell at every intersection. A Word table can contain as many as 63 columns but the number of rows is unlimited. This chapter will teach you how to add and delete rows and columns in a table.
Add a Row
Following are the simple steps to add rows in a table of a word document.
Step 1− Click a row where you want to add an additional row and then click the Layout tab; it will show the following screen.
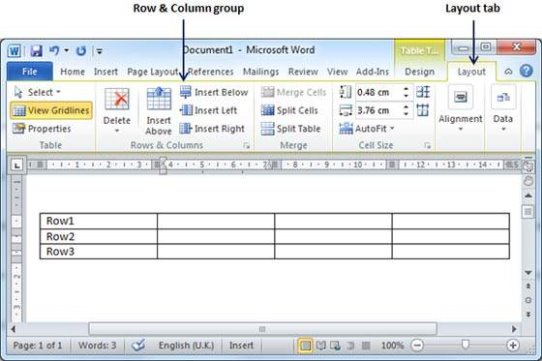
Step 2− Now use the Row & Column group of buttons to add any row below or above to the selected row. If you click the Insert Below button, it will add a row just below the selected row as follows.
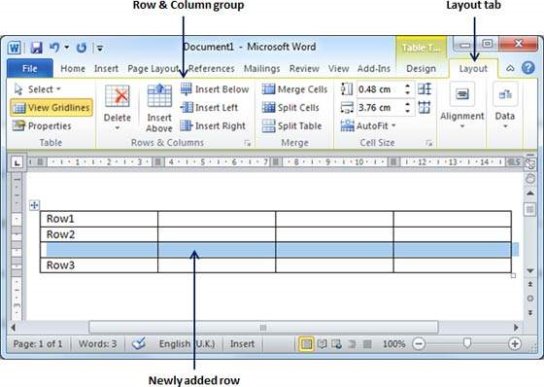
If you click the Insert Above button, it will add a row just above the selected row.
Delete a Row
The following steps will help you delete rows from a table of a Word document.
Step 1− Click a row which you want to delete from the table and then click the
Layout tab; it will show the following screen.
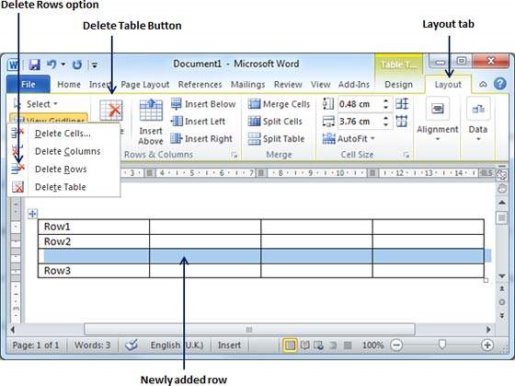
Step 2− Click the Layout tab, and then click the Delete Rows option under the
Delete Table Button to delete the selected row.
Add a Column
The following steps will help you add columns in a table of a Word document.
Step 1− Click a column where you want to add an additional column and then click the Layout tab; it will show the following screen.
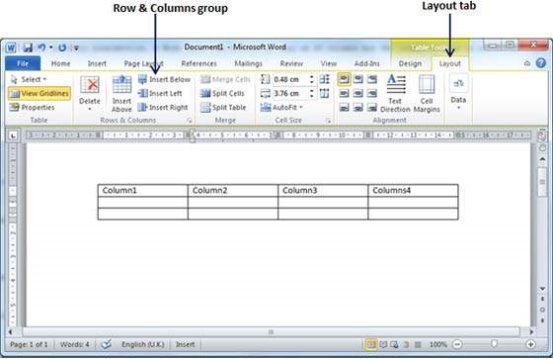
Step 2− Now use the Row & Column group of buttons to add any column to the left or right of the selected column. If you click the Insert Left button, it will add a column just left to the selected column as follows.
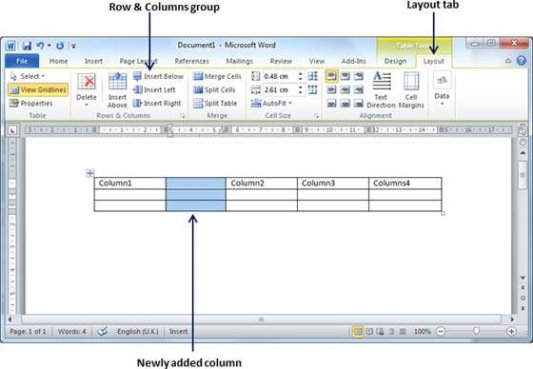
If you click the Insert Right button, it will add a column just next to the selected column.
Delete a Column
Following are the simple steps to delete columns from a table of a word document.
Step 1− Click a column which you want to delete from the table and then click the Layout tab; it will show the following screen.
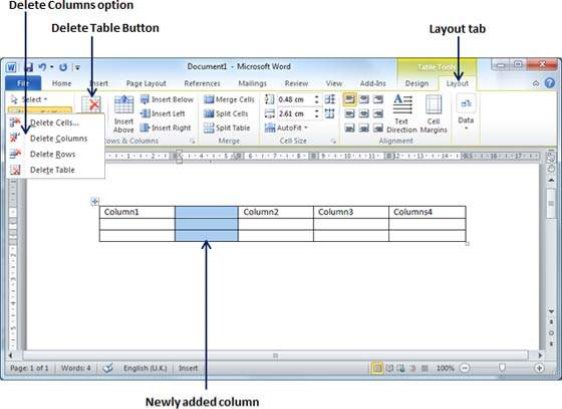
Step 2− Click the Layout tab, and click the Delete Column option under the Delete Table Button to delete the selected column.
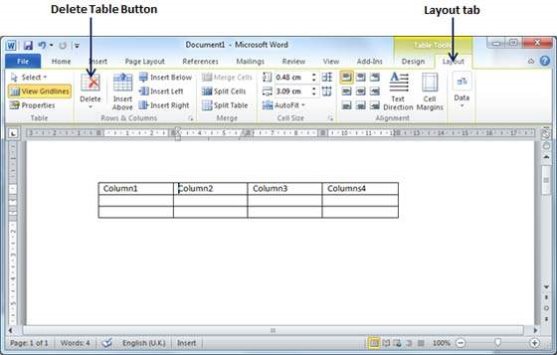
Merging Cells
Microsoft Word allows the merging of two or more cells to create one large cell. You will frequently need to merge columns of the top row to create the title of the table. You can merge cells either row-wise or column-wise, rather you cannot merge cells diagonally. This chapter will teach you how to merge multiple rows or columns.
Merging Cells
The following steps will help you merge table cells in a Word document.
Step 1− Bring your mouse pointer position inside the first cell that you want to merge. Now press the Shift key and click the cells around the cell which you want to merge into the first cell. This will highlight the cells which you click and they will be ready to be merged.
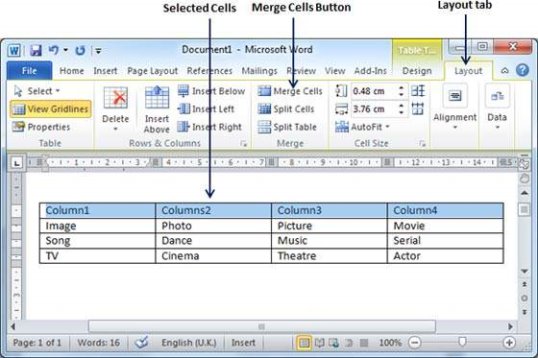
Step 2− Now click the Layout tab and then click the Merge Cells button which will merge all the selected cells.
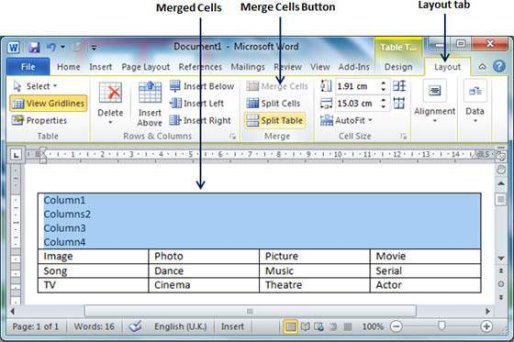
After merging the cells, all the content of the cells will be scrambled which you can fix later as you like. For example, you can convert the merged cells text into title or some other description. For example, let us have center-aligned and bigger font text as follows on top of the table.
Add Formula
Microsoft Word allows you to use mathematical formula in table cells which can be used to add numbers, to find the average of numbers, or find the largest or the smallest number in table cells you specify. There is a list of formulae, you can choose from the many based on the requirement. This chapter will teach you how
To use formula in word tables.
Add a Formula
Following are the simple steps to add formula in a table cell available in Word document.
Step 1− Consider the following table with the total number of rows. Click in a cell that should contain the sum of the rows.
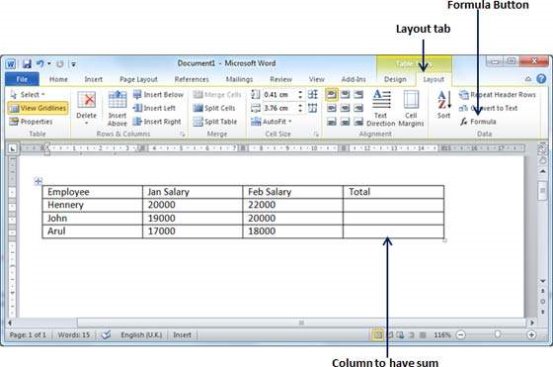
Step 2− Now click the Layout tab and then click the Formula button; this will display a Formula Dialog Box which will suggest a default formula, which is =SUM(LEFT) in our case. You can select a number format using Number Format List Box to display the result or you can change the formula using the Formula List Box.
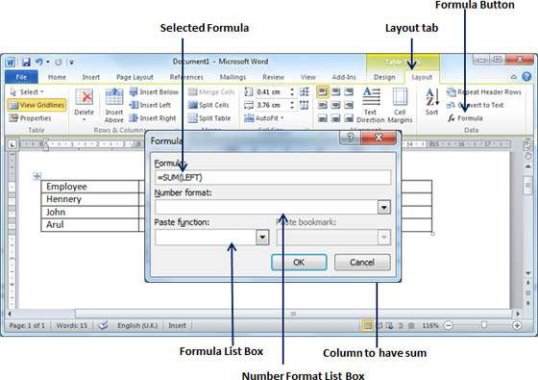
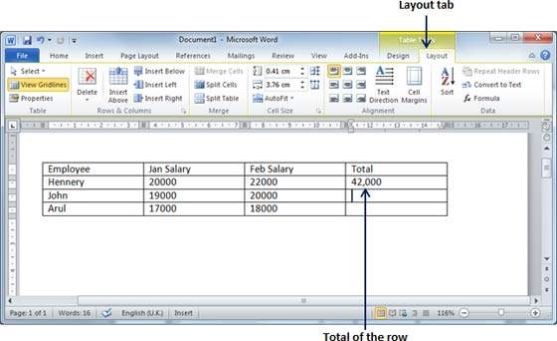
Step 3− Now click OK to apply the formula and you will see that the left cells have been added and the sum has been put in the total cell where we wanted to have it. You can repeat the procedure to have the sum of other two rows as well.
Cell Formulae
The Formula dialog box provides the following important functions to be used as formula in a cell.
S.No | Formula & Description |
1 | AVERAGE( ) The average of a list of cells |
2 | COUNT( ) The number of items in a list of cells |
3 | MAX( ) The largest value in a list of cells |
4 | MIN( ) The smallest value in a list of cells |
5 | PRODUCT( ) The multiplication of a list of cells |
6 | SUM( ) The sum of a list of cells |
We assume you are familiar with how to create a spreadsheet program; you can construct your word cell formula. Word formulae uses a reference system to refer to an individual table cells. Each column is identified by a letter, starting with A for the first column, B for the second column, and so on. After the letter comes the row number. Thus, the first cell in the first row is A1, the third cell in the fourth row is C4, and so on.
Following are useful points to help you in constructing a word cell formula.
S.No | Cell References and Description |
1 | A single cell reference, such as B3 or F7 |
2 | A range of cells, such as A4:A9 or C5:C13 |
3 | A series of individual cells, such as A3, B4, C5 |
4 | ABOVE, referring to all cells in the column above the current cell. |
5 | BELOW, referring to all cells in the column below the current cell. |
6 | LEFT, referring to all cells in the row to the left of the current cell |
7 | RIGHT, referring to all cells in the row to the right of the current cell |
You can also construct simple Math expressions, such as B3+B5*10 by using simple mathematical operators +, -, /, *, %.
Printing Documents
Consider you are done with previewing and proofing your document and ready for the final printing. This chapter will teach you how to print a part or a complete Microsoft Word document.
Printing Documents
The following steps will help you print your Microsoft Word document.
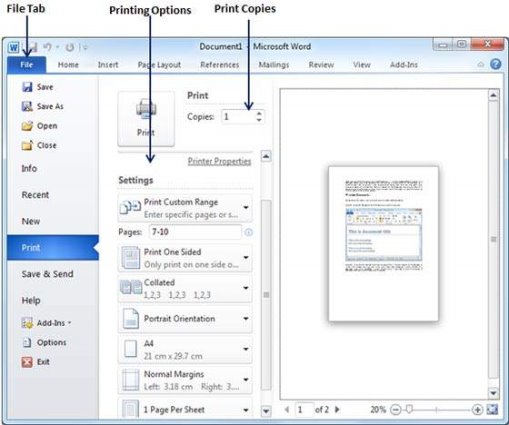
Step 1 − Open the document for which you want to see the preview. Next click the File tab followed by the Print option which will display a preview of the document in the right column. You can scroll up or scroll down your document to walk through the document using given Scrollbar. The middle column gives various options to be set before you send your document to the printer.
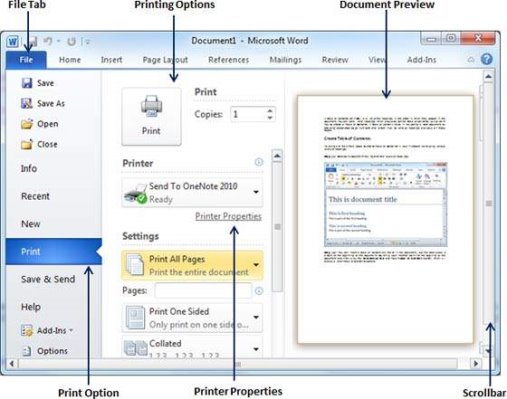
Step 2 − You can set various other printing options available. Select from among the following options, depending on your preferences.
S.No | Option and Description |
1 | Copies Set the number of copies to be printed; by default, you will have one copy of the document. |
2 | Print Custom Range This option will be used to print a particular page of the document. Type the number in Pages option, if you want to print all the pages from 7 till 10 then you would have to specify this option as 7-10 and Word will print only 7th, 8th, 9th and 10th pages. |
3 | Print One Sided By default, you print one side of the page. There is one more option where you will turn up your page manually in case you want to print your page on both sides of the page. |
4 | Collated By default, multiple copies will print Collated; if you are printing multiple copies and you want the copies uncollated, select the Uncollated option. |
5 | Orientation By default, page orientation is set to Portrait; if you are printing your document in landscape mode then select the Landscape mode. |
6 | A4 By default, the page size is A4, but you can select other page sizes available in the dropdown list. |
7 | Custom Margin Click the Custom Margins dropdown list to choose the document margins you want to use. For instance, if you want to print fewer pages, you can create narrower margins; to print with more white space, create wider margins. |
8 | 1 Page Per Sheet By default, the number of pages per sheet is 1 but you can print multiple pages on a single sheet. Select any option you like from the given dropdown list by clicking over the 1 Page Per Sheet option. |
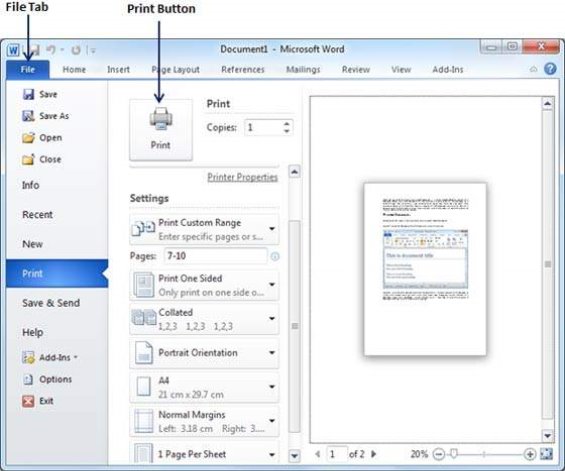
Step 3 − Once you are done with your setting, click on the Print button which will send your document to the printer for final printing.
What is Microsoft Excel?
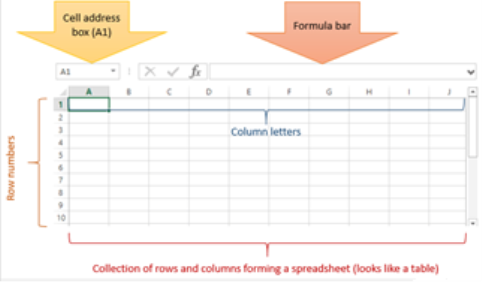
Microsoft Excel is a spreadsheet program that is used to record and analyse numerical data. Think of a spreadsheet as a collection of columns and rows that form a table. Alphabetical letters are usually assigned to columns and numbers are usually assigned to rows. The point where a column and a row meet is called a cell. The address of a cell is given by the letter representing the column and the number representing a row. Let's illustrate this using the following image.
Why Should I Learn Microsoft Excel?
We all deal with numbers in one way or the other. We all have daily expenses which we pay for from the monthly income that we earn. For one to spend wisely, they will need to know their income vs. Expenditure. Microsoft Excel comes in handy when we want to record, analyze and store such numeric data.
Where can I get Microsoft Excel?
There are number of ways in which you can get Microsoft Excel. You can buy it from a hardware computer shop that also sells software. Microsoft Excel is part of the Microsoft Office suite of programs. Alternatively, you can download it from the Microsoft website but you will have to buy the license key.
How to Open Microsoft Excel?
Running Excel is not different from running any other Windows program. If you are running Windows with a GUI like (Windows XP, Vista, and 7) follow the following steps.
- Click on start menu
- Point to all programs
- Point to Microsoft Excel
- Click on Microsoft Excel
Alternatively, you can also open it from the start menu if it has been added there. You can also open it from the desktop shortcut if you have created one.
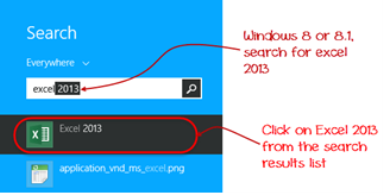
For this tutorial, we will be working with Windows 8.1 and Microsoft Excel 2013. Follow the following steps to run Excel on Windows 8.1
- Click on start menu
- Search for Excel N.B. Even before you even typing, all programs starting with
What you have typed will be listed.
- Click on Microsoft Excel
The following image shows you how to do this
Understanding the Ribbon
The ribbon provides shortcuts to commands in Excel. A command is an action that the user performs. An example of a command is creating a new document, printing a documenting, etc. The image below shows the ribbon used in Excel 2013.
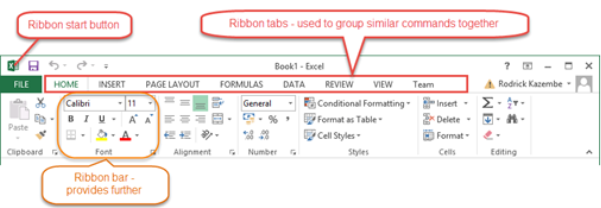
Ribbon components explained
Ribbon start button - it is used to access commands i.e. creating new documents, saving existing work, printing, accessing the options for customizing Excel, etc.
Ribbon tabs – the tabs are used to group similar commands together. The home tab is used for basic commands such as formatting the data to make it more presentable, sorting and finding specific data within the spreadsheet.
Ribbon bar – the bars are used to group similar commands together. As an example, the Alignment ribbon bar is used to group all the commands that are used to align data together.
Understanding the worksheet (Rows and Columns, Sheets, Workbooks)
A worksheet is a collection of rows and columns. When a row and a column meet, they form a cell. Cells are used to record data. Each cell is uniquely identified using a cell address. Columns are usually labelled with letters while rows are usually numbers.
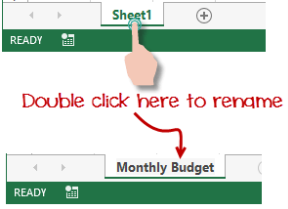
A workbook is a collection of worksheets. By default, a workbook has three cells in Excel. You can delete or add more sheets to suit your requirements. By default, the sheets are named Sheet1, Sheet2 and so on and so forth. You can rename the sheet names to more meaningful names i.e. Daily Expenses, Monthly Budget, etc.
Customization Microsoft Excel Environment
Personally I like the black colour, so my excel theme looks blackish. Your favourite colour could be blue, and you too can make your theme colour look blue-like. If you are not a programmer, you may not want to include ribbon tabs i.e. developer. All this is made possible via customizations. In this sub-section, we are going to look at;
- Customization the ribbon
- Setting the colour theme
- Settings for formulas
- Proofing settings
- Save settings
Customization of ribbon

The above image shows the default ribbon in Excel 2013. Let's start with customization the ribbon, suppose you do not wish to see some of the tabs on the ribbon, or you would like to add some tabs that are missing such as the developer tab. You can use the options window to achieve this.
- Click on the ribbon start button
- Select options from the drop down menu. You should be able to see an Excel Options dialog window
- Select the customize ribbon option from the left-hand side panel as shown below
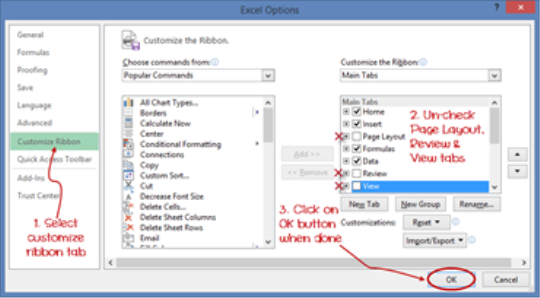
- On your right-hand side, remove the check marks from the tabs that you do not wish to see on the ribbon. For this example, we have removed Page Layout, Review, and View tab.
- Click on the "OK" button when you are done.
Your ribbon will look as follows

Adding custom tabs to the ribbon
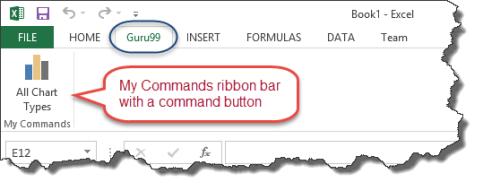
You can also add your own tab, give it a custom name and assign commands to it. Let's add a tab to the ribbon with the text Guru99
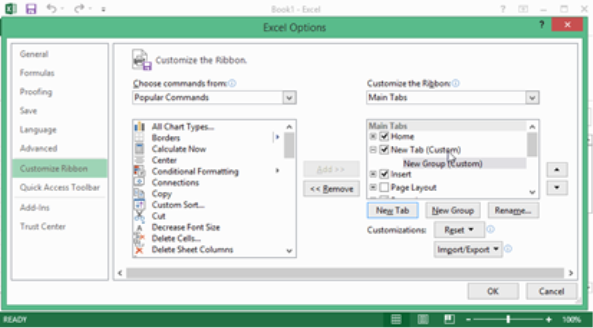
- Right click on the ribbon and select Customize the Ribbon. The dialogue window shown above will appear
- Click on new tab button as illustrated in the animated image below
- Select the newly created tab
- Click on Rename button
- Give it a name of Guru99
- Select the New Group (Custom) under Guru99 tab as shown in the image below
- Click on Rename button and give it a name of My Commands
- Let's now add commands to my ribbon bar
- The commands are listed on the middle panel
- Select All chart types command and click on Add button
- Click on OK
Your ribbon will look as follows
Setting the colour theme
To set the color-theme for your Excel sheet you have to go to Excel ribbon, and click on à File àOption command. It will open a window where you have to follow the following steps.
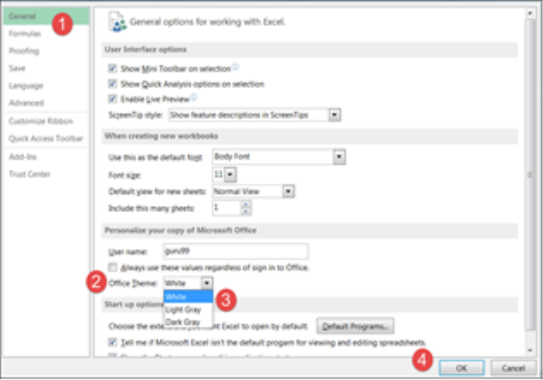
- The general tab on the left-hand panel will be selected by default.
- Look for colour scheme under General options for working with Excel
- Click on the colour scheme drop-down list and select the desired colour
- Click on OK button
Settings for formulas
This option allows you to define how Excel behaves when you are working with formulas. You can use it to set options i.e. autocomplete when entering formulas, change the cell referencing style and use numbers for both columns and rows and other options.
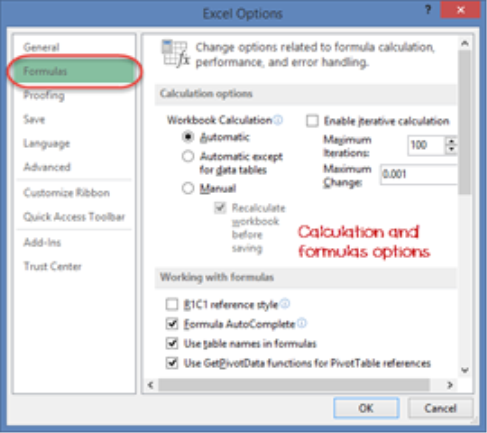
If you want to activate an option, click on its check box. If you want to deactivate an option, remove the mark from the checkbox. You can this option from the Options dialogue window under formulas tab from the left-hand side panel
Proofing settings
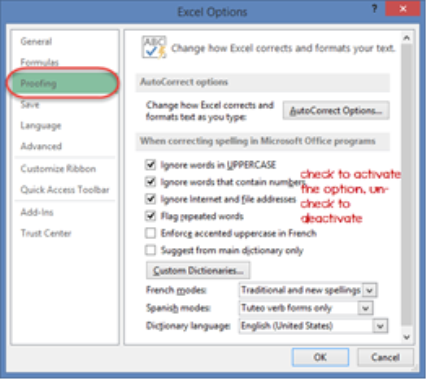
This option manipulates the entered text entered into excel. It allows setting options such as the dictionary language that should be used when checking for wrong spellings, suggestions from the dictionary, etc. You can this option from the options dialogue window under the proofing tab from the left-hand side panel
Save settings
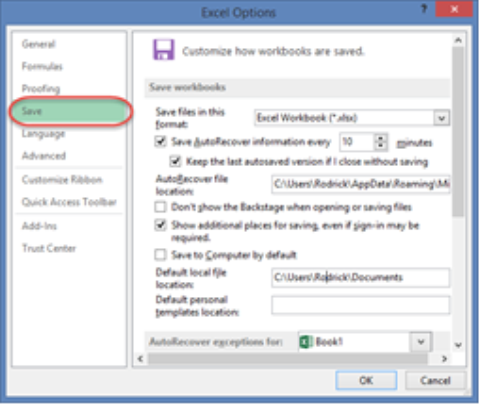
This option allows you to define the default file format when saving files, enable auto recovery in case your computer goes off before you could save your work, etc. You can use this option from the Options dialogue window under save tab from the left-hand side panel
Important Excel shortcuts
Ctrl + P | Used to open the print dialogue window |
Ctrl + N | Creates a new workbook |
Ctrl + S | Saves the current workbook |
Ctrl + C | Copy contents of current select |
Ctrl + V | Paste data from the clipboard |
SHIFT + F3 | Displays the function insert dialog window |
SHIFT + F11 | Creates a new worksheet |
F2 | Check formula and cell range covered |
Without doubt, an Excel spreadsheet is one of the most advanced tools for working with raw data—and one of the most feared. The application looks complicated, way too advanced, and like something that would take hours to figure out.
I wouldn’t be surprised if upon hearing that you had to start using MS Excel, your heart started to pound. Is there any way to make Microsoft Excel less scary and intimidating? Yes.
By learning a few spreadsheet tricks, you can bring Excel down to your level and start looking at the application in a different light. We rounded up some of the simplest yet powerful MS Excel spreadsheet tips you can start using on your data.
1. Use MS Excel Format Painter
To start you off, get yourself familiar with formatting your spreadsheet cells. A visually organized spreadsheet is highly appreciated by others as it can help them follow your data and calculations easily. To quickly apply your formatting across hundreds of cells, use the Format Painter:
- Select the cell with the formatting you wish to replicate
- Go to the Home menu and click on the Format Painter. Excel will display a paintbrush next to the cursor.
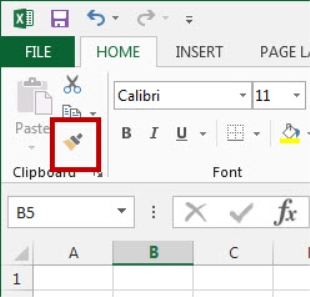
3. While that paintbrush is visible, click to apply all of the attributes from that cell to any other.
To format a range of cells, double-click the Format Painter during step 1. This will keep the formatting active indefinitely. Use the ESC button to deactivate it when you’re done.
2. Select Entire Spreadsheet Columns or Rows
Another quick tip– use the CTRL and SHIFT buttons to select entire rows and columns.
- Click on the first cell of the data sequence you want to select.
- Hold down CTRL + SHIFT
- Then use the arrow keys to get all the data either above, below or adjacent to the cell you’re in.
You can also use CTRL + SHIFT + * to select your entire data set.
3. Import Data Into Excel Correctly
The benefit of using is Excel is that you can combine different types of data from all kinds of sources. The trick is importing that data properly so you can create Excel drop down lists or pivot tables from it.
Don’t copy-paste complex data sets. Instead, use the options from the Get External Data option under the Data tab. There are specific options for different sources. So use the appropriate option for your data:
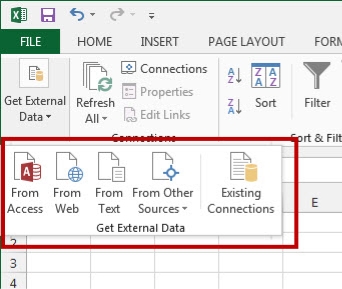
4. Enter The Same Data Into Multiple Cells
At one point, you may find yourself needing to enter the same data into a number of different cells. Your natural instinct would be to copy-paste over and over again. But there’s a quicker way:
- Select all the cells where you need the same data filled in (use CTRL + click to select individual cells that are spread across the worksheet)
- In the very last cell you select, type in your data
- Use CTRL+ENTER. The data will be filled in for each cell you selected.
5. Display Excel Spreadsheet Formulas

Jumping into a spreadsheet created by someone else? Don’t worry. You can easily orient yourself and find out which formulas were used. To do this, use the Show Formulas button. Or you can use CTRL + on your keyboard. This will give you a view of all formulas used in the workbook.
6. Freeze Excel Rows And Columns
This is a personal favourite of mine when it comes to viewing lengthy spreadsheets. Once you scroll past the first 20 rows, the first row with the column labels annoyingly disappear from view and you begin to lose track of how the data was organized.
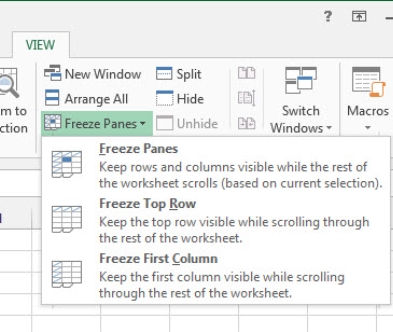
To keep them visible, use the Freeze Panes feature under the View menu. You can opt to freeze the top row or, if you have a spreadsheet with numerous columns, you can opt to freeze the first column.
7. Enter Data Patterns Instantly
One great feature in Excel is that it can automatically recognize data patterns. But what’s even better is that Excel will let you enter those data patterns to other cells.
- Simply enter your information in two cells to establish your pattern.
- Highlight the cells. There will be a small square in the bottom right hand corner of the last cell.
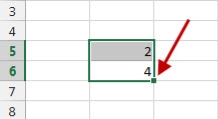
3. Place your cursor over this square until it becomes a black cross.
4. Then click and drag it with your mouse down to populate the cells within a column
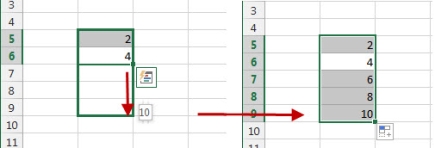
8. Hide Spreadsheet Rows and Columns
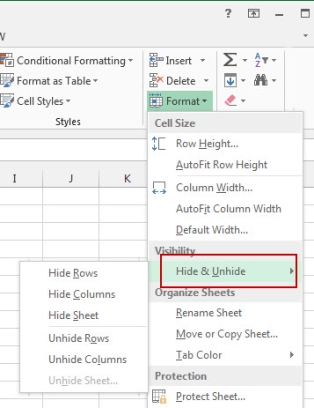
In some cases, you may have information in rows or columns that are for your eyes only and no one else’s. Isolate these cells from your work area (and prying eyes) by hiding them:
- Select the first column or row in the range you want to hide.
- Go to Format under the Home menu.
- Select Hide & Unhide>Hide Rows or Hide Columns
. 
To unhide them, click on the first row or column that occur just before and after the hidden range. Repeat steps 2 and 3, but select Unhide Rows or Unhide Columns.
9. Copy Formulas Or Data Between Worksheets
Another helpful tip to know is how to copy formulas and data to a separate worksheet. This is handy when you’re dealing with data that’s spread across different worksheets and requires repetitive calculations.
- With the worksheet containing the formula or data you wish to copy opened, CTRL + click on the tab of the worksheet you want to copy it to.
- Click on or navigate to the cell with the formula or data you need (in the opened worksheet).
- Press F2 to activate the cell.
- Press Enter. This will re-enter the formula or data, and it will also enter it into the same corresponding cell in the other selected worksheet as well.
1. Use Pivot Tables to recognize and make sense of data.
Pivot Tables are used to reorganize data in a spreadsheet. They won't change the data that you have, but they can sum up values and compare different information in your spreadsheet, depending on what you'd like them to do.
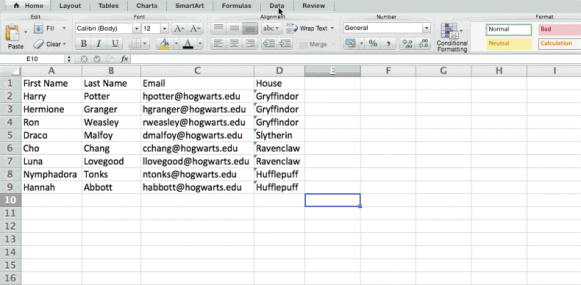
Let's take a look at an example. Let's say I want to take a look at how many people are in each house at Hogwarts. You may be thinking that I don't have too much data, but for longer data sets, this will come in handy.
To create the Pivot Table, I go to Data > Pivot Table. Excel will automatically populate your Pivot Table, but you can always change around the order of the data. Then, you have four options to choose from.
- Report Filter: This allows you to only look at certain rows in your dataset. For example, if I wanted to create a filter by house, I could choose to only include students in Gryffindor instead of all students.
- Column Labels: These could be your headers in the dataset.
- Row Labels: These could be your rows in the dataset. Both Row and Column labels can contain data from your columns (e.g. First Name can be dragged to either the Row or Column label -- it just depends on how you want to see the data.)
- Value: This section allows you to look at your data differently. Instead of just pulling in any numeric value, you can sum, count, average, max, min, count numbers, or do a few other manipulations with your data. In fact, by default, when you drag a field to Value, it always does a count.
Since I want to count the number of students in each house, I'll go to the Pivot Table and drag the House column to both the Row Labels and the Values. This will sum up the number of students associated with each house.
2. Add more than one row or column.
As you play around with your data, you might find you're constantly needing to add more rows and columns. Sometimes, you may even need to add hundreds of rows. Doing this one-by-one would be super tedious. Luckily, there's always an easier way.
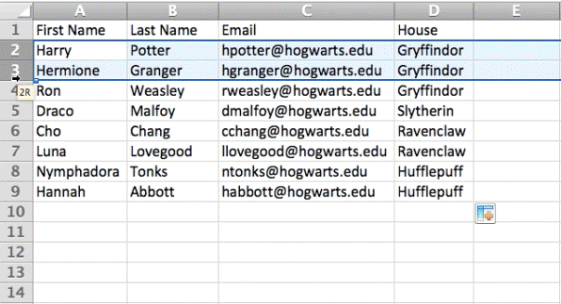
To add multiple rows or columns in a spreadsheet, highlight the same number of pre-existing rows or columns that you want to add. Then, right-click and select "Insert."
In the example below, I want to add an additional three rows. By highlighting three rows and then clicking insert, I'm able to add an additional three blank rows into my spreadsheet quickly and easily.
3. Use filters to simplify your data.
When you're looking at very large data sets, you don't usually need to be looking at every single row at the same time. Sometimes, you only want to look at data that fit into certain criteria. That's where filters come in.
Filters allow you to pare down your data to only look at certain rows at one time. In Excel, a filter can be added to each column in your data -- and from there, you can then choose which cells you want to view at once.
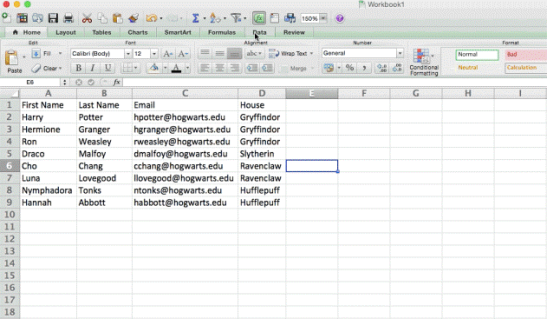
Let's take a look at the example below. Add a filter by clicking the Data tab and selecting "Filter." Clicking the arrow next to the column headers and you'll be able to choose whether you want your data to be organized in ascending or descending order, as well as which specific rows you want to show.
In my Harry Potter example, let's say I only want to see the students in Gryffindor. By selecting the Gryffindor filter, the other rows disappear.
Pro Tip: Copy and paste the values in the spreadsheet when a Filter is on to do additional analysis in another spreadsheet.
4. Remove duplicate data points or sets.
Larger data sets tend to have duplicate content. You may have a list of multiple contacts in a company and only want to see the number of companies you have. In situations like this, removing the duplicates comes in quite handy.
To remove your duplicates, highlight the row or column that you want to remove duplicates of. Then, go to the Data tab, and select "Remove Duplicates" (under Tools). A pop-up will appear to confirm which data you want to work with. Select "Remove Duplicates," and you're good to go.
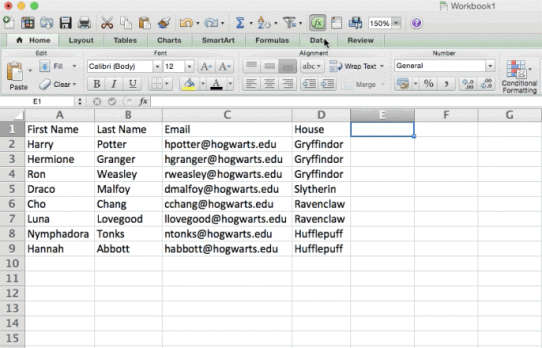
You can also use this feature to remove an entire row based on a duplicate column value. So if you have three rows with Harry Potter's information and you only need to see one, then you can select the whole dataset and then remove duplicates based on email. Your resulting list will have only unique names without any duplicates.
5. Transpose rows into columns.
When you have low rows of data in your spreadsheet, you might decide you actually want to transform the items in one of those rows into columns (or vice versa). It would take a lot of time to copy and paste each individual header -- but what the transpose feature allows you to do is simply move your row data into columns, or the other way around.
Start by highlighting the column that you want to transpose into rows. Right-click it, and then select "Copy." Next, select the cells on your spreadsheet where you want your first row or column to begin. Right-click on the cell, and then select "Paste Special." A module will appear -- at the bottom, you'll see an option to transpose. Check that box and select OK. Your column will now be transferred to a row or vice-versa.
6. Split up text information between columns.
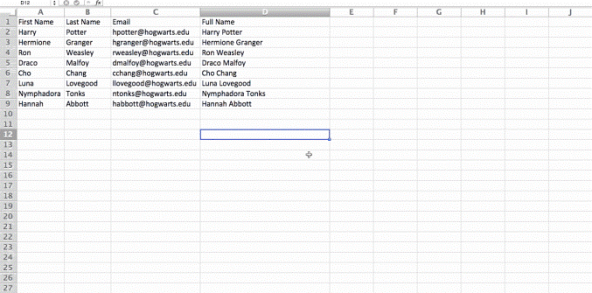
What if you want to split out information that's in one cell into two different cells? For example, maybe you want to pull out someone's company name through their email address. Or perhaps you want to separate someone's full name into a first and last name for your email marketing templates.
Thanks to Excel, both are possible. First, highlight the column that you want to split up. Next, go to the Data tab and select "Text to Columns." A module will appear with additional information.
First, you need to select either "Delimited" or "Fixed Width."
- "Delimited" means you want to break up the column based on characters such as commas, spaces, or tabs.
- "Fixed Width" means you want to select the exact location on all the columns that you want the split to occur.
In the example case below, let's select "Delimited" so we can separate the full name into first name and last name.
Then, it's time to choose the Delimiters. This could be a tab, semi-colon, comma, space, or something else. ("Something else" could be the "@" sign used in an email address, for example.) In our example, let's choose the space. Excel will then show you a preview of what your new columns will look like.
When you're happy with the preview, press "Next." This page will allow you to select Advanced Formats if you choose to. When you're done, click "Finish."
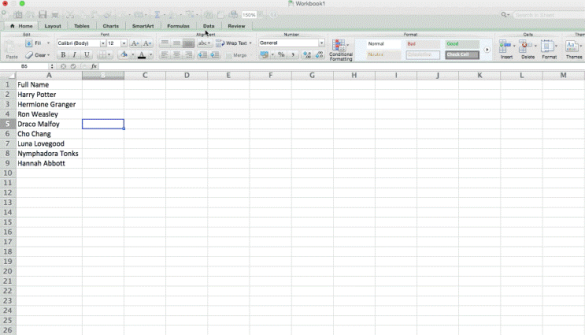
Excel Formulas
7. Use these formulas for simple calculations
In addition to doing pretty complex calculations, Excel can help you do simple arithmetic like adding, subtracting, multiplying, or dividing any of your data.
- To add, use the + sign.
- To subtract, use the - sign.
- To multiply, use the * sign.
- To divide, use the / sign.
You can also use parenthesis to ensure certain calculations are done first. In the example below (10+10*10), the second and third 10 were multiplied together before adding the additional 10. However, if we made it (10+10)*10, the first and second 10 would be added together first.
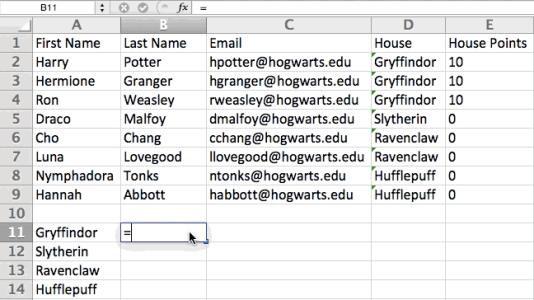
8. Get the average of numbers in your cells.
If you want the average of a set of numbers, you can use the formula =AVERAGE(Cell Range). If you want to sum up a column of numbers, you can use the formula =SUM(Cell Range).
9. Use conditional formatting to make cells automatically change color based on data.
Conditional formatting allows you to change a cell's color based on the information within the cell. For example, if you want to flag certain numbers that are above average or in the top 10% of the data in your spreadsheet, you can do that. If you want to color code commonalities between different rows in Excel, you can do that. This will help you quickly see information the is important to you.
To get started, highlight the group of cells you want to use conditional formatting on. Then, choose "Conditional Formatting" from the Home menu and select your logic from the dropdown. (You can also create your own rule if you want something different.) A window will pop up that prompts you to provide more information about your formatting rule. Select "OK" when you're done, and you should see your results automatically appear.
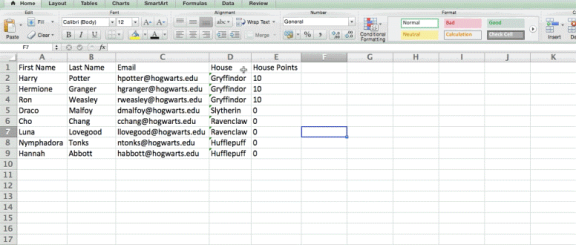
10. Use IF THEN Excel formula to automate certain Excel functions.
Sometimes, we don't want to count the number of times a value appears. Instead, we want to input different information into a cell if there is a corresponding cell with that information.
For example, in the situation below, I want to award ten points to everyone who belongs in the Gryffindor house. Instead of manually typing in 10's next to each Gryffindor student's name, I can use the IF THEN Excel formula to say that if the student is in Gryffindor, then they should get ten points.
The formula: IF(logical_test, value_if_true, value of false)
Example Shown Below: =IF(D2="Gryffindor","10","0")
In general terms, the formula would be IF(Logical Test, value of true, value of false).
Let's dig into each of these variables.
- Logical_Test: The logical test is the "IF" part of the statement. In this case, the logic is D2="Gryffindor" because we want to make sure that the cell corresponding with the student says "Gryffindor." Make sure to put Gryffindor in quotation marks here.
- Value_if_True: This is what we want the cell to show if the value is true. In this case, we want the cell to show "10" to indicate that the student was awarded the 10 points. Only use quotation marks if you want the result to be text instead of a number.
- Value_if_False: This is what we want the cell to show if the value is false. In this case, for any student not in Gryffindor, we want the cell to show "0" to show 0 points. Only use quotation marks if you want the result to be text instead of a number.

Note: In the example above, I awarded 10 points to everyone in Gryffindor. If I later wanted to sum the total number of points, I wouldn't be able to because the 10's are in quotes, thus making them text and not a number that Excel can sum.
11. Use dollar signs to keep one cell's formula the same regardless of where it moves.
Have you ever seen a dollar sign in an Excel formula? When used in a formula, it isn't representing an American dollar; instead, it makes sure that the exact column and row are held the same even if you copy the same formula in adjacent rows.
You see, a cell reference -- when you refer to cell A5 from cell C5, for example -- is relative by default. In that case, you're actually referring to a cell that's five columns to the left (C minus A) and in the same row (5). This is called a relative formula. When you copy a relative formula from one cell to another, it'll adjust the values in the formula based on where it's moved. But sometimes, we want those values to stay the same no matter whether they're moved around or not -- and we can do that by making the formula in the cell into what's called an absolute formula.
To change the relative formula (=A5+C5) into an absolute formula, we'd precede the row and column values by dollar signs, like this: (=$A$5+$C$5).
Excel Functions
12. Use VLOOKUP function pull data from one area of a sheet to another.
Have you ever had two sets of data on two different spreadsheets that you want to combine into a single spreadsheet?
For example, you might have a list of people's names next to their email addresses in one spreadsheet, and a list of those same people's email addresses next to their company names in the other -- but you want the names, email addresses, and company names of those people to appear in one place.
I have to combine data sets like this a lot -- and when I do, the VLOOKUP is my go-to formula. Before you use the formula, though, be absolutely sure that you have at least one column that appears identically in both places. Scour your data sets to make sure the column of data you're using to combine your information is exactly the same, including no extra spaces.
The formula: =VLOOKUP(lookup value, table array, column number, [range lookup])
The formula with variables from our example below: =VLOOKUP(C2,Sheet2!A:B,2,FALSE)
In this formula, there are several variables. The following is true when you want to combine information in Sheet 1 and Sheet 2 onto Sheet 1.
- Lookup Value: This is the identical value you have in both spreadsheets. Choose the first value in your first spreadsheet. In the example that follows, this means the first email address on the list, or cell 2 (C2).
- Table Array: The range of columns on Sheet 2 you're going to pull your data from, including the column of data identical to your lookup value (in our example, email addresses) in Sheet 1 as well as the column of data you're trying to copy to Sheet 1. In our example, this is "Sheet2!A:B." "A" means Column A in Sheet 2, which is the column in Sheet 2 where the data identical to our lookup value (email) in Sheet 1 is listed. The "B" means Column B, which contains the information that's only available in Sheet 2 that you want to translate to Sheet 1.
- Column Number: If the table array (the range of columns you just indicated) this tells Excel which column the new data you want to copy to Sheet 1 is located in. In our example, this would be the column that "House" is located in. "House" is the second column in our range of columns (table array), so our column number is 2. [Note: Your range can be more than two columns. For example, if there are three columns on Sheet 2 -- Email, Age, and House -- and you still want to bring House onto Sheet 1, you can still use a VLOOKUP. You just need to change the "2" to a "3" so it pulls back the value in the third column: =VLOOKUP(C2:Sheet2!A:C,3,false).]
- Range Lookup: Use FALSE to ensure you pull in only exact value matches.
In the example below, Sheet 1 and Sheet 2 contain lists describing different information about the same people, and the common thread between the two is their email addresses. Let's say we want to combine both datasets so that all the house information from Sheet 2 translates over to Sheet 1.
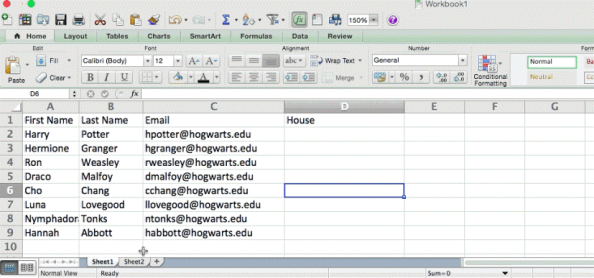
So when we type in the formula =VLOOKUP(C2,Sheet2!A:B,2,FALSE), we bring all the house data into Sheet 1.
Keep in mind that VLOOKUP will only pull back values from the second sheet that are to the right of the column containing your identical data. This can lead to some limitations, which is why some people prefer to use the INDEX and MATCH functions instead.
13. Use INDEX MATCH formulas to pull data from horizontal columns.
Like VLOOKUP, the INDEX and MATCH functions pull in data from another dataset into one central location. Here are the main differences:
- VLOOKUP is a much simpler formula. If you're working with large data sets that would require thousands of lookups, using the INDEX MATCH function will significantly decrease load time in Excel.
- INDEX MATCH formulas work right-to-left, whereas VLOOKUP formulas only work as a left-to-right lookup. In other words, if you need to do a lookup that has a lookup column to the right of the results column, then you'd have to rearrange those columns in order to do a VLOOKUP. This can be tedious with large datasets and/or lead to errors.
So if I want to combine information in Sheet 1 and Sheet 2 onto Sheet 1, but the column values in Sheets 1 and 2 aren't the same, then to do a VLOOKUP, I would need to switch around my columns. In this case, I'd choose to do an INDEX MATCH instead.
Let's look at an example. Let's say Sheet 1 contains a list of people's names and their Hogwarts email addresses, and Sheet 2 contains a list of people's email addresses and the Patronus that each student has. (For the non-Harry Potter fans out there, every witch or wizard has an animal guardian called a "Patronus" associated with him or her.) The information that lives in both sheets is the column containing email addresses, but this email address column is in different column numbers on each sheet. I'd use the INDEX MATCH formula instead of VLOOKUP so I wouldn't have to switch any columns around.
So what's the formula, then? The INDEX MATCH formula is actually the MATCH formula nested inside the INDEX formula. You'll see I differentiated the MATCH formula using a different color here.
The formula: =INDEX(table array, MATCH formula)
This becomes: =INDEX(table array, MATCH (lookup_value, lookup_array))
The formula with variables from our example below: =INDEX(Sheet2!A:A,(MATCH(Sheet1!C:C,Sheet2!C:C,0)))
Here are the variables:
- Table Array: The range of columns on Sheet 2 containing the new data you want to bring over to Sheet 1. In our example, "A" means Column A, which contains the "Patronus" information for each person.
- Lookup Value: This is the column in Sheet 1 that contains identical values in both spreadsheets. In the example that follows, this means the "email" column on Sheet 1, which is Column C. So: Sheet1!C:C.
- Lookup Array: This is the column in Sheet 2 that contains identical values in both spreadsheets. In the example that follows, this refers to the "email" column on Sheet 2, which happens to also be Column C. So: Sheet2!C:C.
Once you have your variables straight, type in the INDEX MATCH formula in the top-most cell of the blank Patronus column on Sheet 1, where you want the combined information to live.
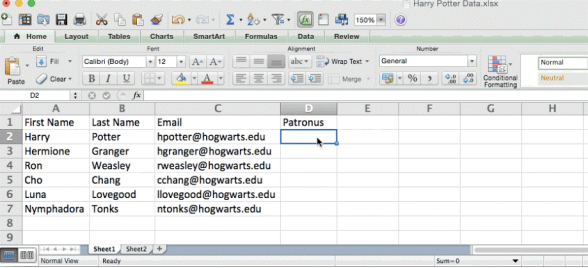
14. Use COUNTIF function to make Excel count words or numbers in any range of cells.
Instead of manually counting how often a certain value or number appears, let Excel do the work for you. With the COUNTIF function, Excel can count the number of times a word or number appears in any range of cells.
For example, let's say I want to count the number of times the word "Gryffindor" appears in my data set.
The formula: =COUNTIF(range, criteria)
The formula with variables from our example below: =COUNTIF(D:D,"Gryffindor")
In this formula, there are several variables:
- Range: The range that we want the formula to cover. In this case, since we're only focusing on one column, we use "D:D" to indicate that the first and last column are both D. If I were looking at columns C and D, I would use "C:D."
- Criteria: Whatever number or piece of text you want Excel to count. Only use quotation marks if you want the result to be text instead of a number. In our example, the criteria is "Gryffindor."
Simply typing in the COUNTIF formula in any cell and pressing "Enter" will show me how many times the word "Gryffindor" appears in the dataset.
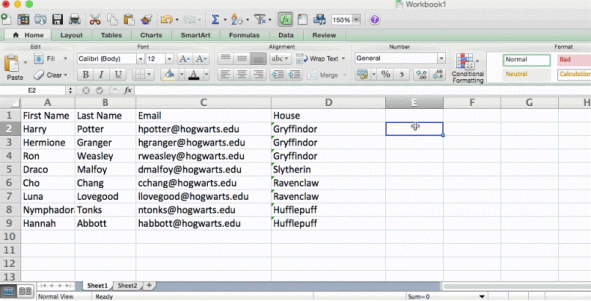
15. Combine cells using &.
Databases tend to split out data to make it as exact as possible. For example, instead of having a data that shows a person's full name, a database might have the data as a first name and then a last name in separate columns. Or, it may have a person's location separated by city, state, and zip code. In Excel, you can combine cells with different data into one cell by using the "&" sign in your function.
The formula with variables from our example below: =A2&" "&B2
Let's go through the formula together using an example. Pretend we want to combine first names and last names into full names in a single column. To do this, we'd first put our cursor in the blank cell where we want the full name to appear. Next, we'd highlight one cell that contains a first name, type in an "&" sign, and then highlight a cell with the corresponding last name.
But you're not finished -- if all you type in is =A2&B2, then there will not be a space between the person's first name and last name. To add that necessary space, use the function =A2&" "&B2. The quotation marks around the space tell Excel to put a space in between the first and last name.
To make this true for multiple rows, simply drag the corner of that first cell downward as shown in the example.
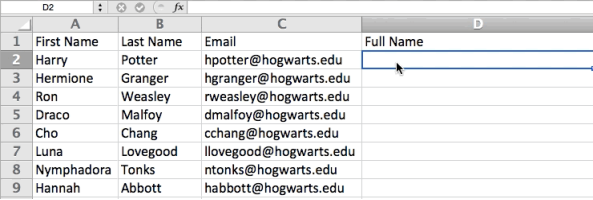
We hope you found this article helpful! Bookmark it to keep these handy Excel tips in your back pocket.
16. Add checkboxes.
If you're using an Excel sheet to track customer data and want to oversee something that isn't quantifiable, you could insert checkboxes into a column.
For example, if you're using an Excel sheet to manage your sales prospects and want to track whether you called them in the last quarter, you could have a "Called this quarter?" column and check off the cells in it when you've called the respective client.
Here's how to do it in Excel's 2018 and 2019 software.
Highlight a cell you'd like to add checkboxes to in your spreadsheet. Then, click DEVELOPER. Then, under FORM CONTROLS, click the checkbox or the selection circle highlighted in the image below.
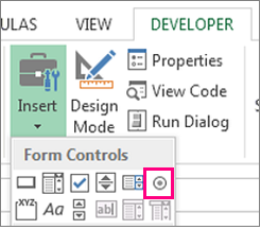
Once the box appears in the cell, copy it, highlight the cells you also want it to appear in, and then paste it.
17. Hyperlink a cell to a website.
If you're using your sheet to track social media or website metrics, it can be helpful to have a reference column with the links each row is tracking. If you add a URL directly into Excel, it should automatically be clickable. But, if you have to hyperlink words, such as a page title or the headline of a post you're tracking, here's how.
Highlight the words you want to hyperlink, then press Shift K. From there a box will pop up allowing you to place the hyperlink URL. Copy and paste the URL into this box and hit or click Enter.
If the key shortcut isn't working for any reason, you can also do this manually by highlighting the cell and clicking Insert > Hyperlink.
18. Add drop-down menus.
Sometimes, you'll be using your spreadsheet to track processes or other qualitative things. Rather than writing words into your sheet repetitively, such as "Yes", "No", "Customer Stage", "Sales Lead", or "Prospect", you can use dropdown menus to quickly mark descriptive things about your contacts or whatever you're tracking.
Here's how to add drop-downs to your cells.
Highlight the cells you want the drop-downs to be in, then click the Data menu in the top navigation and press Validation.

From there, you'll see a Data Validation Settings box open. Look at the Allow options, then click Lists and select Drop-down List. Check the In-Cell dropdown button, then press OK.
Print a Worksheet
To print a worksheet in Excel, execute the following steps.
1. On the File tab, click Print.
2. To preview the other pages that will be printed, click 'Next Page' or 'Previous Page' at the bottom of the window.
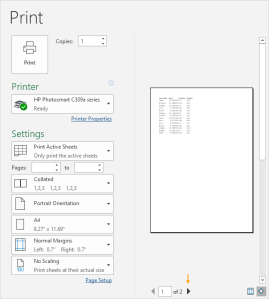
3. To print the worksheet, click the big Print button.
What to Print
Instead of printing the entire worksheet, you can also print the current selection.
1. First, select the range of cells you want to print.
2. Next, under Settings, select Print Selection.
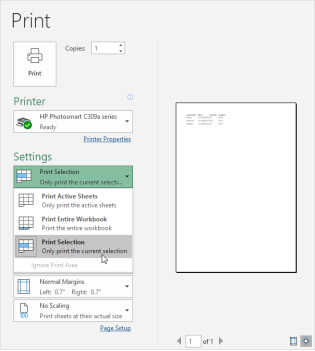
3. To print the selection, click the big Print button.
Note: you can also print the active sheets (first select the sheets by holding down CTRL and clicking the sheet tabs) or print the entire workbook. Use the boxes next to Pages (see first screenshot) to only print a few pages of your document. For example, 2 to 2 only prints the second page.
Multiple Copies
To print multiple copies, execute the following steps.
1. Use the arrows next to the Copies box.
2. If one copy contains multiple pages, you can switch between Collated and Uncollated. For example, if you print 6 copies, Collated prints the entire first copy, then the entire second copy, etc. Uncollated prints 6 copies of page 1, 6 copies of page 2, etc.
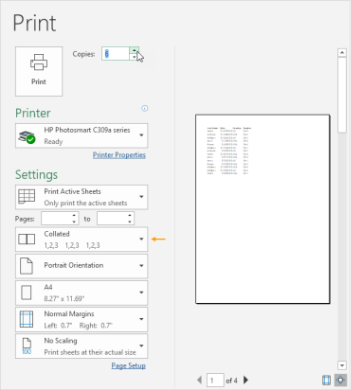
Orientation
You can switch between Portrait Orientation (more rows but fewer columns) and Landscape Orientation (more columns but fewer rows).
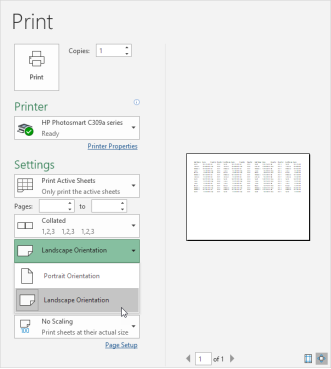
Page Margins
To adjust the page margins, execute the following steps.
1. Select one of the predefined margins (Normal, Wide or Narrow) from the Margins drop-down list.
2. Or click the 'Show Margins' icon at the bottom right of the window. Now you can drag the lines to manually change the page margins.
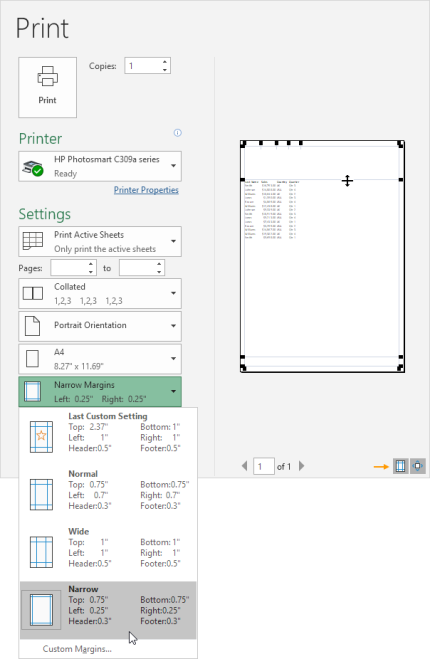
Scaling
If you want to fit more data on one page, you can fit the sheet on one page. To achieve this, execute the following steps.
1. Select 'Fit Sheet on One Page' from the Scaling drop-down list.
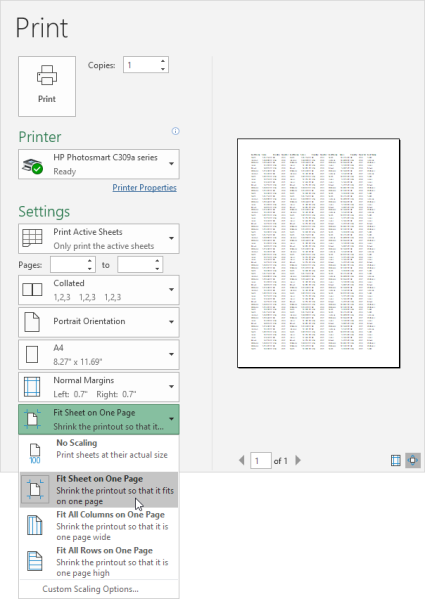
Note: you can also shrink the printout to one page wide or one page high. Click Custom Scaling Options to manually enter a scaling percentage or to fit the printout to a specific number of pages wide and tall. Be careful, Excel doesn't warn you when your printout becomes unreadable.
Every PowerPoint presentation is composed of a series of slides. To begin creating a slide show, you'll need to know the basics of working with slides. You'll need to feel comfortable with tasks such as inserting a new slide, changing the layout of a slide, arranging existing slides, changing the slide view, and adding notes to a slide.
Understanding slides and slide layouts
When you insert a new slide, it will usually have placeholders to show you where content will be placed. Slides have different layouts for placeholders, depending on the type of information you want to include. Whenever you create a new slide, you'll need to choose a slide layout that fits your content.
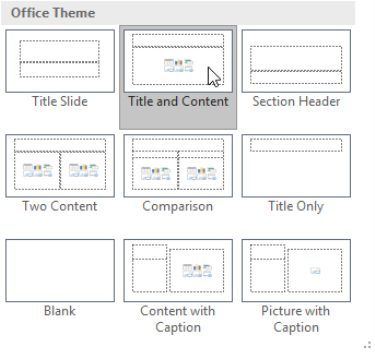
Placeholders can contain different types of content, including text, images, and videos. Many placeholders have thumbnail icons you can click to add specific types of content. In the example below, the slide has placeholders for the title and content.
To insert a new slide:
Whenever you start a new presentation, it will contain one slide with the Title Slide layout. You can insert as many slides as you need from a variety of layouts.
- From the Home tab, click the bottom half of the NewSlide command.

2. Choose the desired slide layout from the menu that appears.
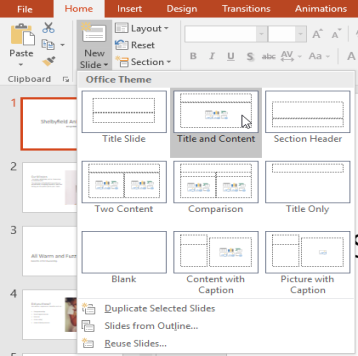
3. The new slide will appear. Click any placeholder and begin typing to add text. You can also click an icon to add other types of content, such as a picture or a chart.
To change the layout of an existing slide, click the Layout command, then choose the desired layout.
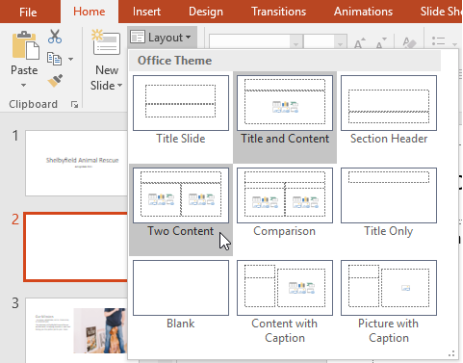
To quickly add a slide that uses the same layout as the selected slide, click the top half of the New Slide command.

Organizing slides
PowerPoint presentations can contain as many slides as you need. The Slide Navigation pane on the left side of the screen makes it easy to organize your slides. From there, you can duplicate, rearrange, and delete slides in your presentation.

Working with slides
- Duplicate slides: If you want to copy and paste a slide quickly, you can duplicate it. To duplicate slides, select the slide you want to duplicate, right-click the mouse, and choose Duplicate Slide from the menu that appears. You can also duplicate multiple slides at once by selecting them first.
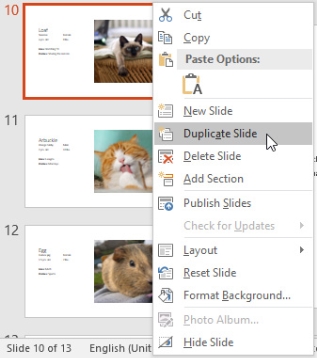
- Move slides: It's easy to change the order of your slides. Just click and drag the desired slide in the Slide Navigation pane to the desired position.
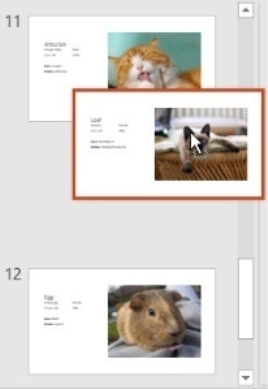
- Delete slides: If you want to remove a slide from your presentation, you can delete it. Simply select the slide you want to delete, then press the Delete or Backspace key on your keyboard.
To copy and paste slides:
If you want to create several slides with the same layout, you may find it easier to copy and paste a slide you've already created instead of starting with an empty slide.
- Select the slide you want to copy in the Slide Navigation pane, then click the Copy command on the Home tab. Alternatively, you can press Ctrl+Con your keyboard.
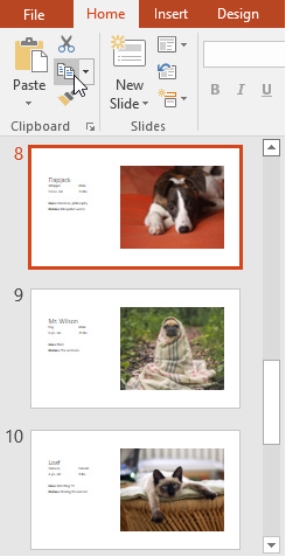
2. In the Slide Navigation pane, click just below a slide (or between two slides) to choose a paste location. A horizontal insertion point will appear.
3. Click the Paste command on the Home tab. Alternatively, you can press Ctrl+Von your keyboard.
4. The slide will appear in the selected location.
Customizing slide layouts
Sometimes you may find that a slide layout doesn't exactly fit your needs. For example, a layout might have too many—or too few—placeholders. You might also want to change how the placeholders are arranged on the slide. Fortunately, PowerPoint makes it easy to adjust slide layouts as needed.
Adjusting placeholders
- To select a placeholder: Hover the mouse over the edge of the placeholder and click (you may need to click the text in the placeholder first to see the border). A selected placeholder will have a solidline instead of a dotted line.
- To move a placeholder: Select the placeholder, then click and drag it to the desired location.
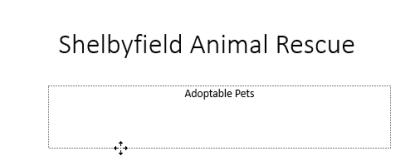
- To resize a placeholder: Select the placeholder you want to resize. Sizing handles will appear. Click and drag the sizing handles until the placeholder is the desired size. You can use the corner sizing handles to change the placeholder's height and width at the same time.

- To delete a placeholder: Select the placeholder you want to delete, then press the Delete or Backspace key on your keyboard.
To add a text box:
Text can be inserted into both placeholders and text boxes. Inserting text boxes allows you to add to the slide layout. Unlike placeholders, text boxes always stay in the same place, even if you change the theme.
- From the Insert tab, select the TextBox command.

2. Click and drag to draw the text box on the slide.
3. The text box will appear. To add text, simply click the text box and begin typing.
Using blank slides
If you want even more control over your content, you may prefer to use a blank slide, which contains no placeholders. Blank slides can be customized by adding your own text boxes, pictures, charts, and more.
- To insert a blank slide, click the bottom half of the New Slide command, then chooseBlank from the menu that appears.
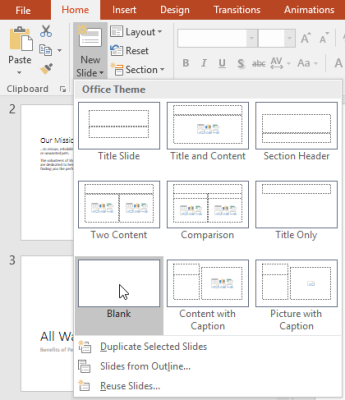
While blank slides offer more flexibility, keep in mind that you won't be able to take advantage of the predesigned layouts included in each theme.
To play the presentation:
Once you've arranged your slides, you may want to play your presentation. This is how you will present your slide show to an audience.
- Click the Start From Beginning command on the Quick Access Toolbar to see your presentation.
2. The presentation will appear in full-screen mode.
3. You can advance to the next slide by clicking your mouse or pressing the spacebar on your keyboard. Alternatively, you can use the arrow keys on your keyboard to move forward or backward through the presentation.
4. Press the Esc key to exit presentation mode.
You can also press the F5 key at the top of your keyboard to start a presentation.
Customizing slides
To change the slide size:
By default, all slides in PowerPoint 2013 use a 16-by-9—or widescreen—aspect ratio. You might know that widescreen TVs also use the 16-by-9 aspect ratio. Widescreen slides will work best with widescreen monitors and projectors. However, if you need your presentation to fit a 4-by-3 screen, it's easy to change the slide size to fit.
- To change the slide size, select the Design tab, then click the Slide Size command. Choose the desired slide size from the menu that appears, or click Custom Slide Size for more options.
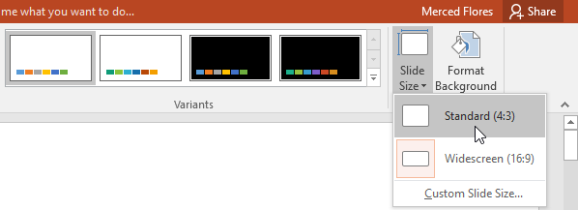
To format the slide background:
By default, all slides in your presentation use a white background. It's easy to change the background style for some or all of your slides. Backgrounds can have a solid, gradient, pattern, or picture fill.
- Select the Design tab, then click the FormatBackground command.

2. The Format Background pane will appear on the right. Select the desired fill options. In our example, we'll use a Solidfill with a light gold color.
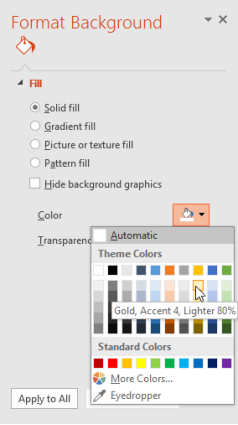
3. The background style of the selected slide will update.
4. If you want, you can click Apply to All to apply the same background style to all slides in your presentation.
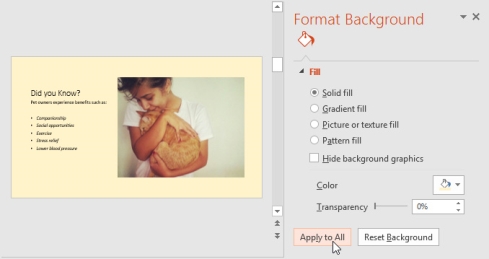
To apply a theme:
A theme is a predefined combination of colors, fonts, and effects that can quickly change the look and feel of your entire slide show. Different themes also use different slide layouts, which can change the arrangement of your existing placeholders. Select the Design tab on the Ribbon, then click the More drop-down arrow to see all of the available themes.

- Select the desired theme.
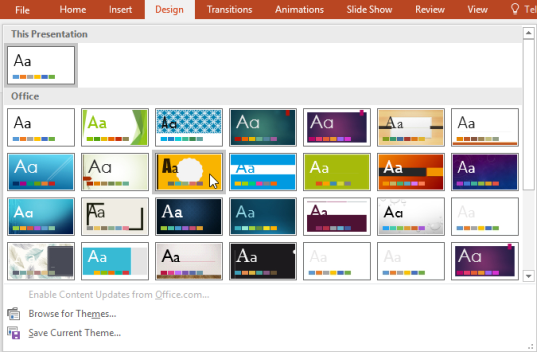
2. The theme will be applied to your entire presentation.

Try applying a few different themes to your presentation. Some themes will work better than others, depending on your content.
Create Presentation
PowerPoint offers a host of tools that will aid you in creating a presentation. These tools are organized logically into various ribbons in PowerPoint. The table below describes the various commands you can access from the different menus.
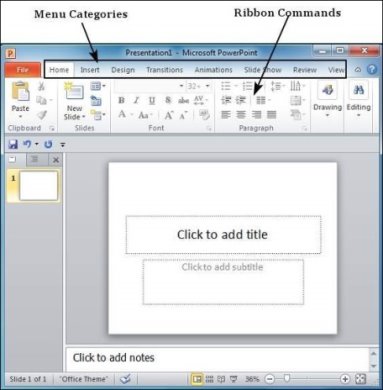
Menu Category | Ribbon Commands |
Home | Clipboard functions, manipulating slides, fonts, paragraph settings, drawing objects and editing functions. |
Insert | Insert tables, pictures, images, shapes, charts, special texts, multimedia and symbols. |
Design | Slide setup, slide orientation, presentation themes and background. |
Transitions | Commands related to slide transitions. |
Animations | Commands related to animation within the individual slides. |
Slide Show | Commands related to slideshow set up and previews. |
Review | Proofing content, language selection, comments and comparing presentations. |
View | Commands related to presentation views, Master slides, color settings and window arrangements. |
Besides these depending on the objects selected in the slide, there are other menu tabs that get enabled.
Add New Slides
Here are the steps that allow you to insert a new slide in the deck −
Step 1− Right-click in the Navigation Pane under any existing slide and click on the New Slide option.
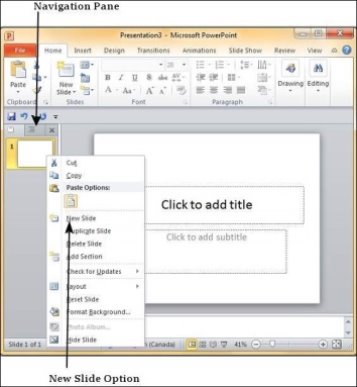
Step 2−The new slide is inserted. You can now change the layout of this slide to suit your design requirements.
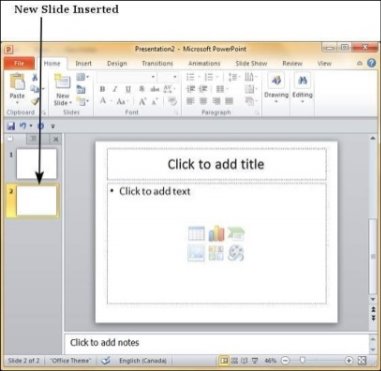
Step 3−To change the slide layout, right-click on the newly inserted slide and go to the Layout option where you can choose from the existing layout styles available to you.
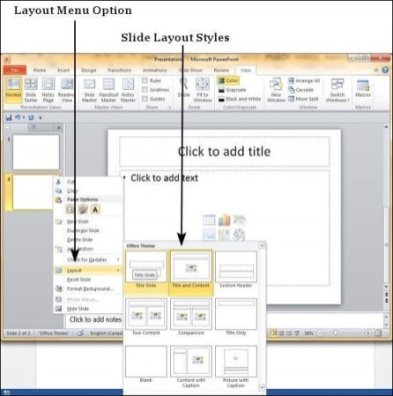
You can follow the same steps to insert a new slide in between existing slides or at the end on the slide list.
When we insert a new slide, it inherits the layout of its previous slide with one exception. If you are inserting a new slide after the first slide (Title slide), the subsequent slide will have the Title and Content layout.
You will also notice that if you right-click in the first step without selecting any slide the menu options you get are different, although you can insert a new slide from this menu too.
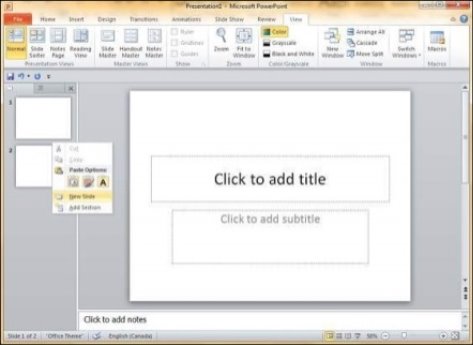
Adding Text in Boxes
PowerPoint allows users to add text to the slide in a well-defined manner to ensure the content is well distributed and easy to read. The procedure to add the text in a PowerPoint slide is always the same - just click in the text box and start typing. The text will follow the default formatting set for the text box, although this formatting can be changed later as required. What changes is the different kinds of content boxes that support text in a PowerPoint slide.
Given below are some of the most common content blocks you will see in PowerPoint.
Title Box
This is typically found on slides with the title layout and in all the slides that have a title box in them. This box is indicated by "Click to add title".
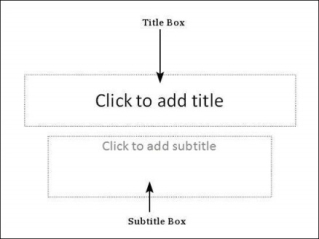
Subtitle Box
This is found only in slides with the Title layout. This is indicated by "Click to add subtitle"
Content Box
This is found in most of the slides that have a placeholder for adding content. This is indicated by "Click to add text". As you can see, this box allows you to add text as well as non-text content. To add text to such a box, click anywhere on the box, except on one of the content icons in the center and start typing.
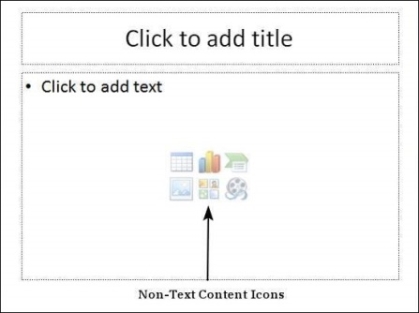
Text Only Box
This is not a default content box available in PowerPoint, but you can create it using Slide Master, if required. This is also indicated by "Click to add text". The only difference between the Text Only Box and the Content Box is that the former only supports text in the content area.
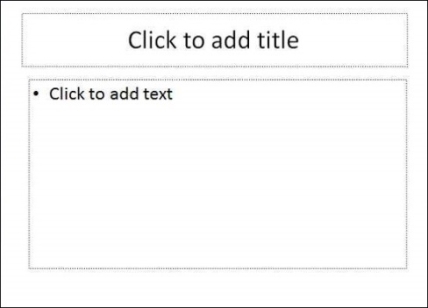
Adding New Text Boxes
Most of the standard layouts come with the text box option. As mentioned in the previous chapter, text boxes will have "Click to add text" as the default text. Here are the steps to add new text boxes in slide.
Step 1− Click on the Text Box icon in the Home ribbon under the Drawing section.
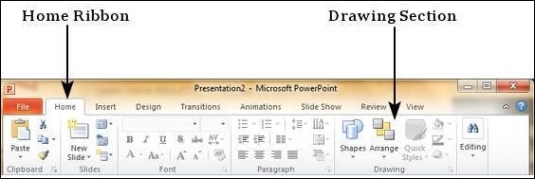
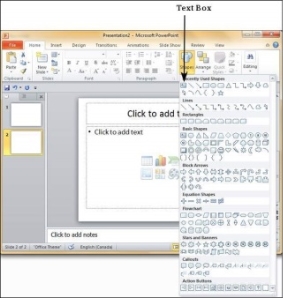
Step 2−You will get the insert text box cursor that looks like an inverted cross.
Step 3− Click to insert a text box. You can now start typing directly into the text box.
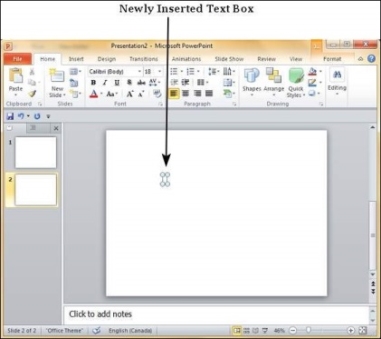
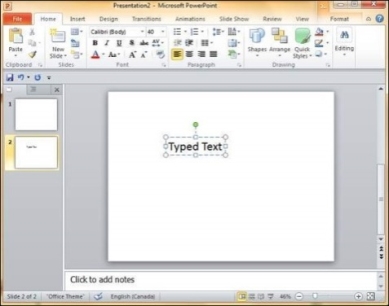
Step 4−Alternately, you can click and drag the cursor without releasing the click to create a text box.
The size of the text box can be adjusted by selecting one of the edges marked by squares or corners marked by circles.

Deleting Existing Slide
There are times while building a slide deck, you may need to delete some slides. This can be done easily from PowerPoint. You can delete the slides from the Normal view as well as the Slide Sorter view. In each view, you can delete the slides in two ways.
Deleting from Normal View
Step 1− Go to the Normal view.
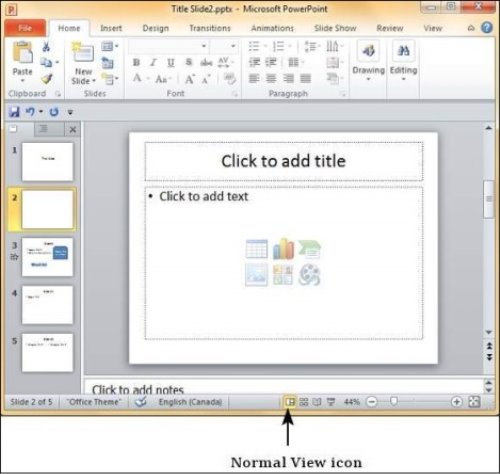
Step 2− Right-click on the slide to be deleted and select the Delete Slide option.
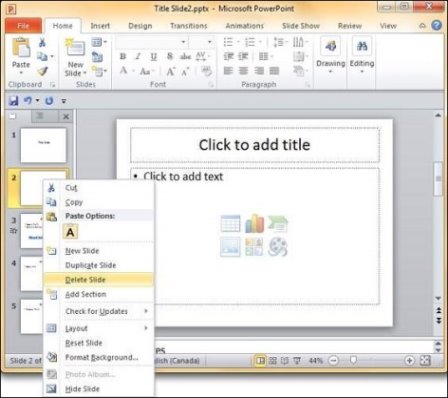
Alternately, you can select the slide and press the Delete button on your key board.
Deleting from Slide Sorter View
Let us now understand how to deleted slides from the Slide Sorter View.
Step 1− Go to the Slide Sorter view.
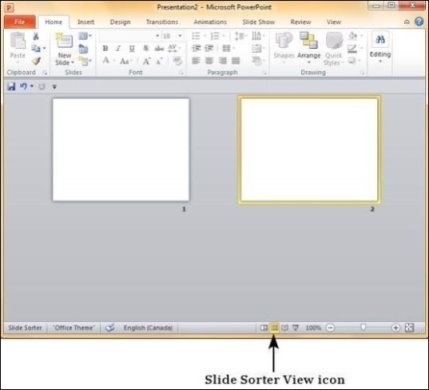
Step 2− Right-click on the slide to be deleted and select the Delete Slide option.
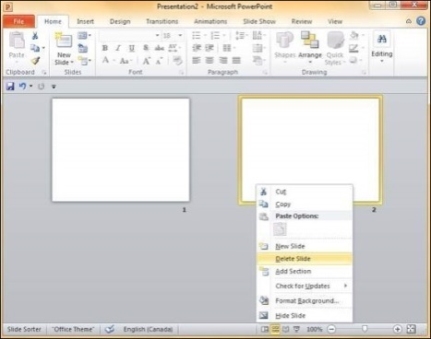
Alternately, you can select the slide and press the Delete button on your key board.
Rearranging Slides
Rearranging slides is important when it comes to organizing the overall presentation flow. While it is vital that you get the right content in every slide, it is equally important that you are able to present them in a format that makes it easier for the audience to understand the content too; most times this will require rearranging the slides.
You can rearrange slides from two views in PowerPoint - Normal View and Slide Sorter View. Given below are the steps to rearrange slides from different views.
Normal View
Step 1− Select the slide to be moved.
Step 2− Left click on the slide and drag it to the position in the sequence where you want to place it. PowerPoint will indicate the insert position with a line in-between existing slides.
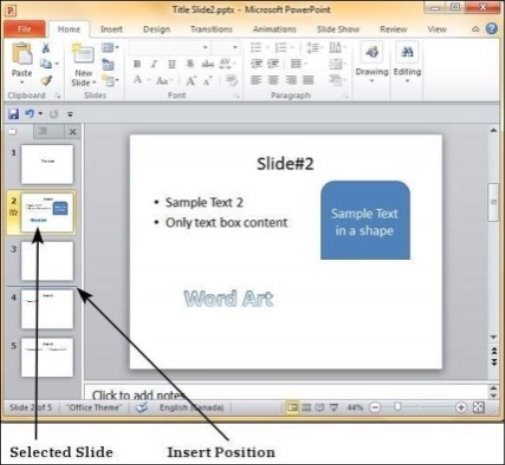
Step 3− When you get to the right position release the left click button to insert the slide. Alternately you can also cut the selected slide and paste it back in the sequence as shown below.
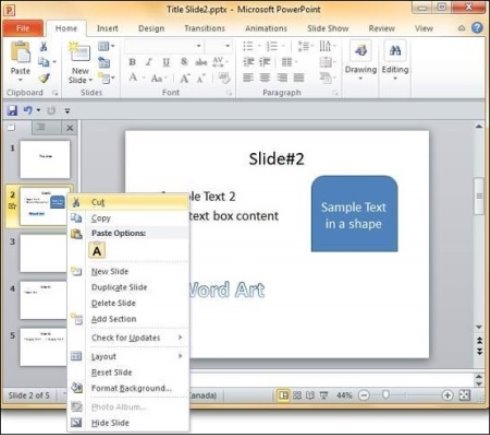
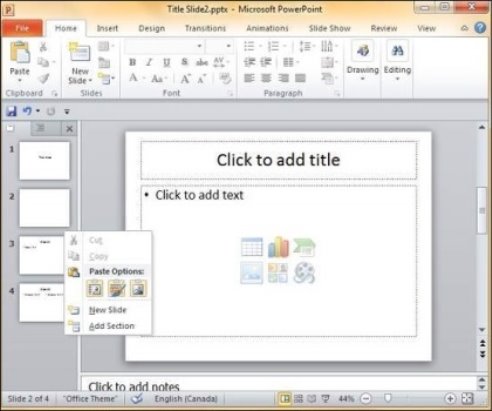
Slide Sorter View
Let us now understand how the Slide Sorter View works.
Step 1− Select the slide to be moved.
Step 2− Left click on the slide and drag it to the position in the sequence where you want to place it. PowerPoint will indicate the insert position with a line in-between existing slides.
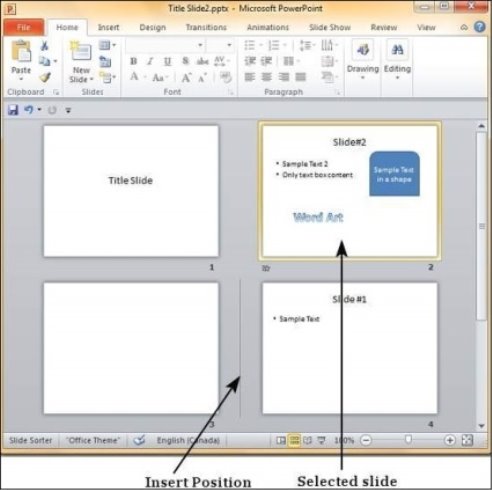
Step 3− When you get to the right position release the left click button to insert the slide. Alternately you can also cut the selected slide and paste it back in the sequence as shown below.
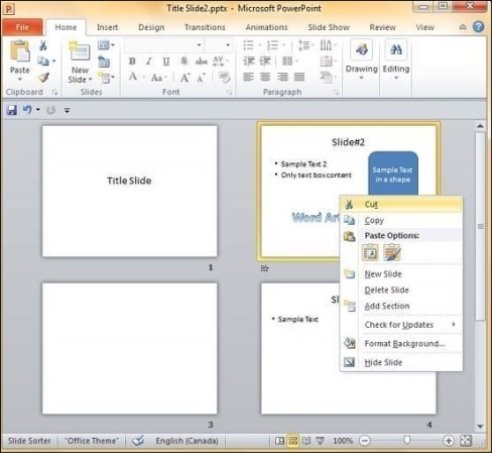
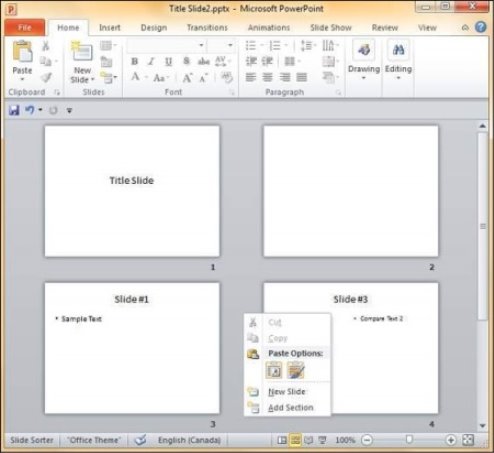
Adding Slide Notes
Slide notes can be very useful tools for presentation. These notes are not displayed on the screen in the Slideshow mode, but the presenter can see them so they can prepare well to present the slides. Depending on your Print settings, you can also print the slide notes along with the slides.
This chapter will show you how to add slide notes to an existing presentation.
Step 1−To locate the slide notes, set the view in Normal mode.
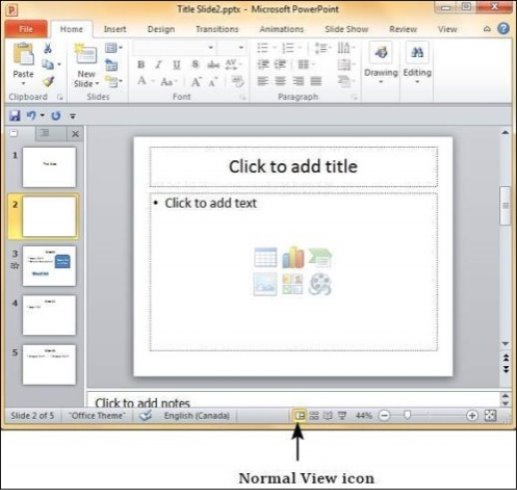
Step 2− The Slide Notes section is indicated by "Click to add notes".
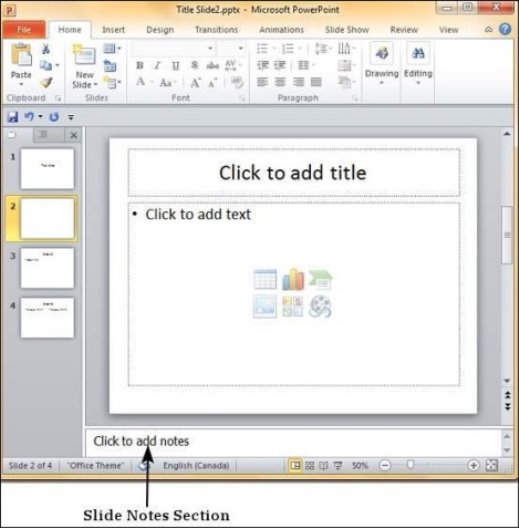
Step 3−You can click on the top border and drag the section to increase its size to make it easier to type.
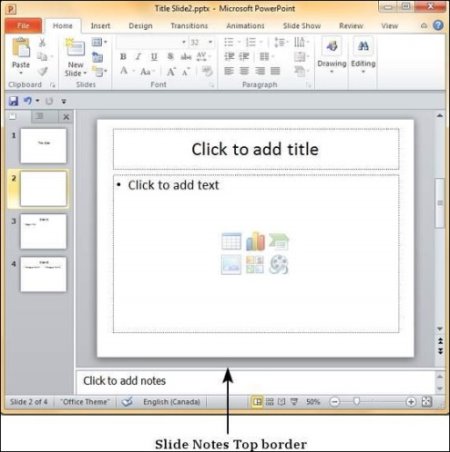
Step 4− Type your text in this section as slide notes.
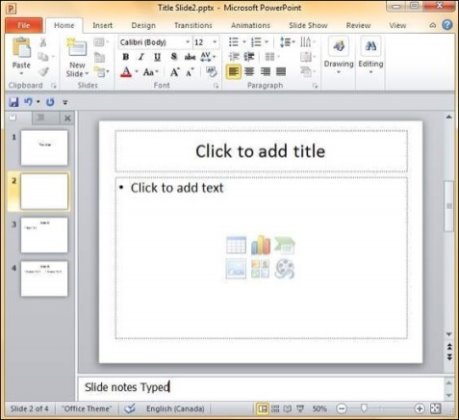
You can only use bullets, numbering and alignment functions in the Slide Notes section. All other functions can be selected, but can be applied only to the selected slide, not the notes.
Slide notes can be printed from the print menu under the Backstage view. From the Print Layout option, select Notes Pages or 3 Slides. Notes Pages will print a single slide with the slide notes below it. The 3 Slides will print all three slides with notes on the right side.
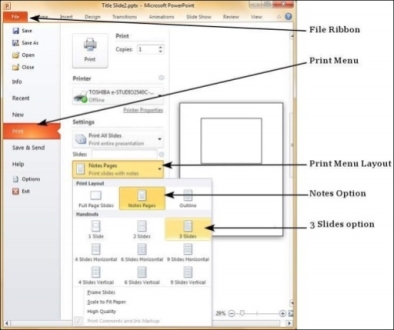
Saving Presentation
One of the most basic tasks in PowerPoint is being able to save your work; this is probably the most important task as well. There are many users who have burnt their fingers for not saving their work in time and losing hours of hard work. The following are the basic steps to save a presentation.
Step 1− Click on the File tab to launch the Backstage view and select Save.
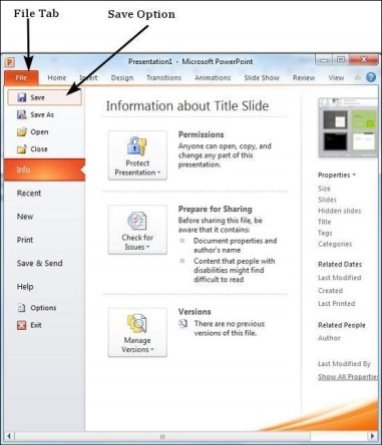
Step 2− In the Save As dialog, type in the file name and click "Save".
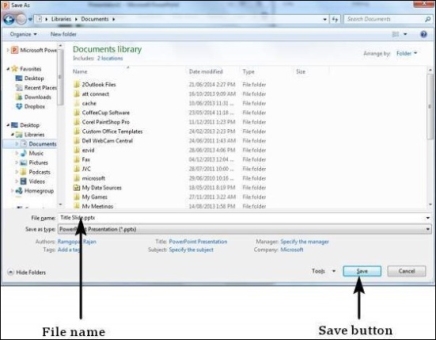
Step 3−The default file format is .pptx. If you want to save the file with a different name, choose one of the file types from the "Save as type" dropdown list.
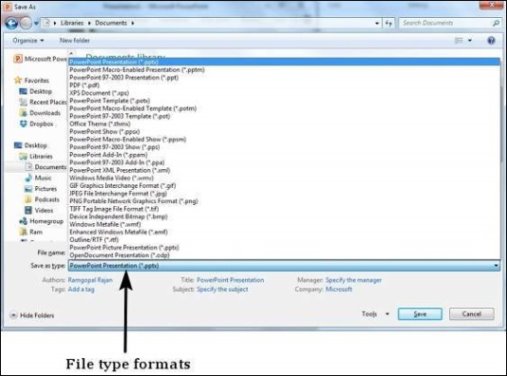
If you are working on an already saved file, the "Save" option in the Backstage view will directly save the file in the existing format with the existing name. If you want to change the format or filename of an existing file, use the Save As option instead.
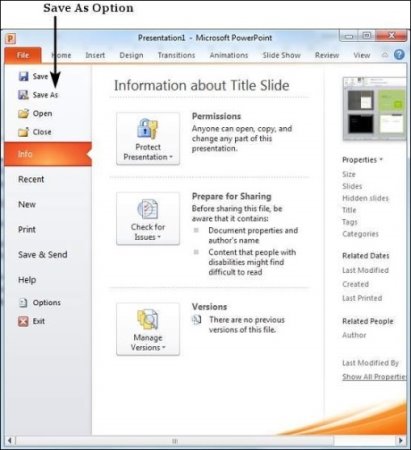
Copy and Paste Content
PowerPoint offers to the users a wide range of options when it comes to duplicating content. PowerPoint has the standard cut and copy functions but allows variations of paste options.
Cut Option
This option allows you to cut content from the slide - this means the original content is being moved to a different location hence the content will be deleted from its original location when you use this option. To cut a content, you need to select it and press "Ctrl + X" or right-click on the selected content and select Cut.
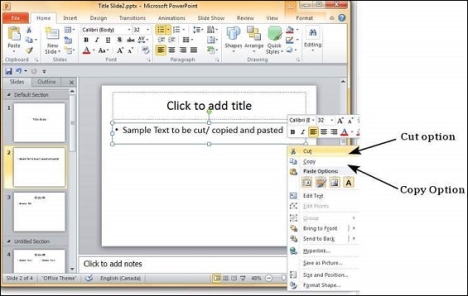
Copy Option
This option allows you to copy content from one location to another; hence the original content is retained it its place while the duplicate content can be pasted. To copy a portion of content, you need to select it and press "Ctrl + C" or right-click on the selected content and select Copy.
Paste Option
This option allows you to paste the cut or copied content at the desired location. There are multiple paste options for you to choose from. These options are indicated by different icons when you right-click at the desired location. Even if you do not remember the icons, you can hover your cursor on top of them for tooltip explanations. The table below describes the paste options in PowerPoint.
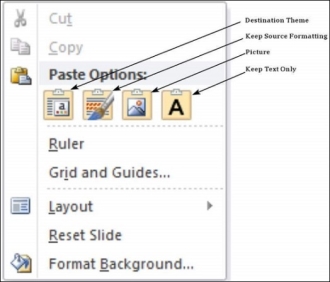
S.No | Paste Option & Description |
1 | Destination Theme Pasted content adopts the destination theme. |
2 | Keep Source Formatting Pasted content retains the source formatting - available for table or Excel content. |
3 | Picture Content is pasted as an image - once pasted as an image, the content cannot be modified. |
4 | Keep Text Only Pastes just the text - available for table or Excel content. |
You can also paste content using "Ctrl + V". In this case, you can make changes to the pasted object by pressing the Ctrl key to get access to the paste options. Note that these options are available only immediately after pasting. If you perform some other action, you will not be able to make changes based on the paste options.
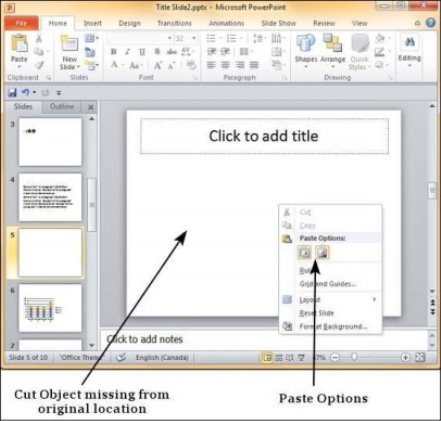
Copy and Paste Content
PowerPoint offers to the users a wide range of options when it comes to duplicating content. PowerPoint has the standard cut and copy functions but allows variations of paste options.
Cut Option
This option allows you to cut content from the slide - this means the original content is being moved to a different location hence the content will be deleted from its original location when you use this option. To cut a content, you need to select it and press "Ctrl + X" or right-click on the selected content and select Cut.
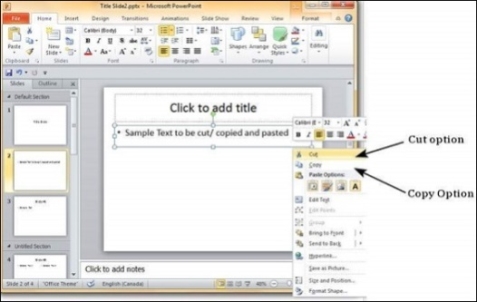
Copy Option
This option allows you to copy content from one location to another; hence the original content is retained it its place while the duplicate content can be pasted. To copy a portion of content, you need to select it and press "Ctrl + C" or right-click on the selected content and select Copy.
Paste Option
This option allows you to paste the cut or copied content at the desired location. There are multiple paste options for you to choose from. These options are indicated by different icons when you right-click at the desired location. Even if you do not remember the icons, you can hover your cursor on top of them for tooltip explanations. The table below describes the paste options in PowerPoint.
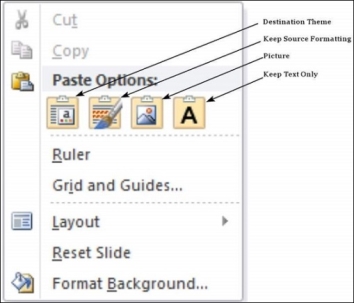
S.No | Paste Option & Description |
1 | Destination Theme Pasted content adopts the destination theme. |
2 | Keep Source Formatting Pasted content retains the source formatting - available for table or Excel content. |
3 | Picture Content is pasted as an image - once pasted as an image, the content cannot be modified. |
4 | Keep Text Only Pastes just the text - available for table or Excel content. |
You can also paste content using "Ctrl + V". In this case, you can make changes to the pasted object by pressing the Ctrl key to get access to the paste options. Note that these options are available only immediately after pasting. If you perform some other action, you will not be able to make changes based on the paste options.
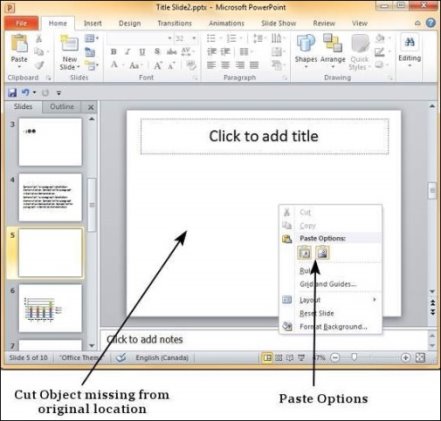
Find & Replace Content
PowerPoint offers its users the ability to search for specific text and if required replace it automatically. This is a very useful tool when you need to review a very large presentation or correct the same error in multiple places in the slide. Given below are the steps to find and replace text in PowerPoint. Although, you can only use this function for text, the text itself can be present in a text box, in another shape, as a WordArt, in SmartArt or tables.
Finding Content
The following steps will show you how to find content in PowerPoint.
Step 1− In the Home tab, under the Editing section click on Find.
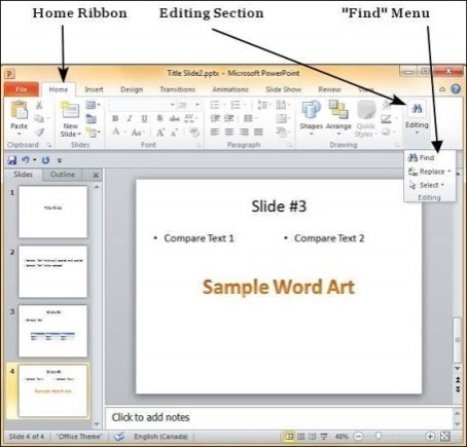
Step 2− Type the text you want to search in the "Find what:" field.
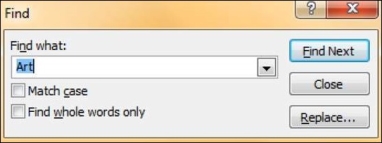
Step 3− You can narrow your search by selecting "Match Case" - to find exact case match - and "Find whole words only" - to find whole words and not words where typed word is just a part of the word.
Step 4− Press on "Find Next" to find the next occurrence of the search word.
Step 5− The Find dialog does not disappear after finding the first instance, so you can keep pressing "Find Next" multiple times till you reach the end of the search. At this point, you will receive a message from PowerPoint indicating the end of the search.

Replacing Content
Here are the steps to replace content in PowerPoint.
Step 1− In the Home tab, under the Editing section click on the Replace button.
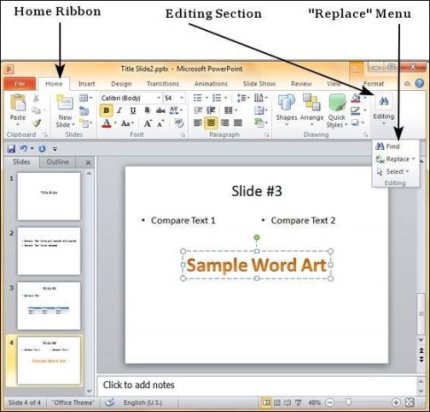
Step 2− Type the text you want to replace in the "Find what:" field and the replaced text in "Replace with:" field
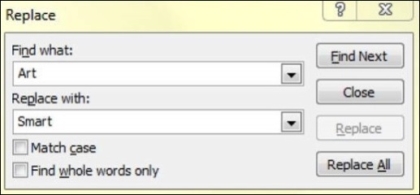
Step 3− You can narrow your search by selecting "Match Case" - to find the exact case match - and "Find whole words only" - to find the whole words and not words where typed word is just a part of the word.
Step 4− Press on "Find Next" to find the next occurrence of the search word. PowerPoint will show you the next occurrence and you can then click on "Replace" to replace the word. If you want to skip the occurrence, you can press "Find Next" again without pressing "Replace"
Step 5− The Replace dialog does not disappear after finding the first instance, so you can keep pressing "Find Next" multiple times till you reach the end of the search. At this point, you will receive a message from PowerPoint indicating the end of the search.

Font Management
One of the key elements of any good presentation is the text, hence managing the fonts in PowerPoint is vital to designing an impressive slideshow. PowerPoint offers extensive font management features to cover various aspects of fonts. The font management can be accessed from the Home ribbon in the Font group.
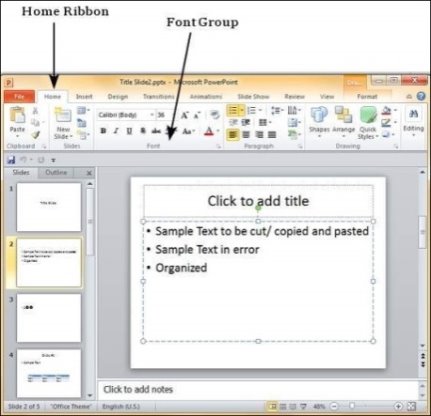
You can also access font management features by selecting a text box, right-clicking and selecting Font.
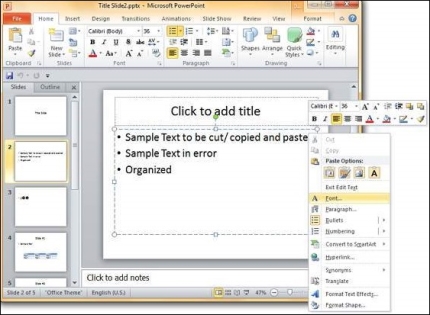
This opens up the Font dialog which contains all the font management features available under the font section in the Home ribbon.
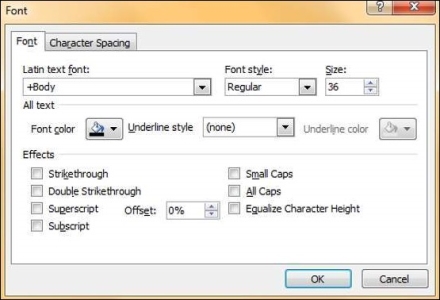
The table below describes various font management features available in PowerPoint.
S.No | Features & Description |
1 | Font Type Defines the font type like Arial, Verdana, etc. |
2 | Font Size Defines the font size. Besides, there are icons to increase and decrease the font size in steps in the Font group. |
3 | Font Style Defines font styles like Regular, Bold, Italics or Underlined. |
4 | Font Color Specifies the font color. |
5 | Font Effects Defines effects like shadow, strikethrough, subscript, superscript, etc. |
6 | Character Spacing Specifies character spacing like loose, tight, normal, etc. |
Setting Text Fonts
PowerPoint offers a wide range of pre-built fonts to choose from. Depending on the purpose of the presentation you may want to choose a more casual font or a formal one. This section will look at the steps to set the text fonts.
Step 1−The default font in PowerPoint 2010 is Calibri.
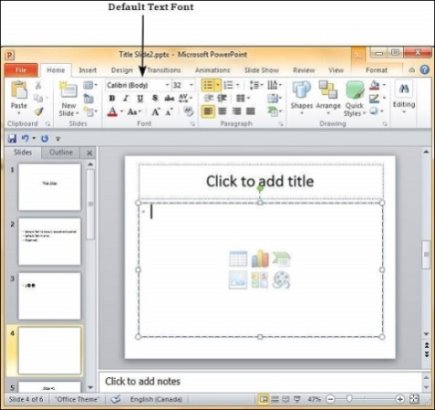
Step 2−To change the text font, select that portion of text the font of which needs to be changed. If you select the entire text box or shape, the changes will apply to all the text in the selection. If you select specific text, the changes will apply to selection only.
Step 3− In the Font group, under the Home ribbon, click on the font face dropdown.
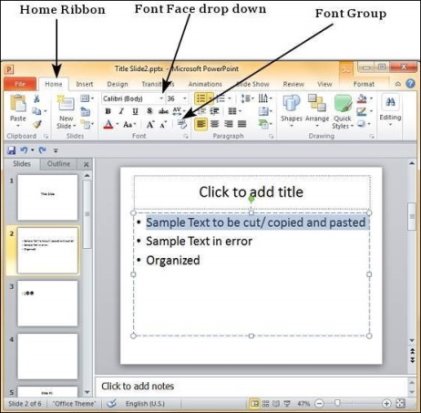
Step 4− Scroll through the list of font faces to pick the one that suits your needs. As you move your cursor over the fonts, the selection will change accordingly to give you a preview.
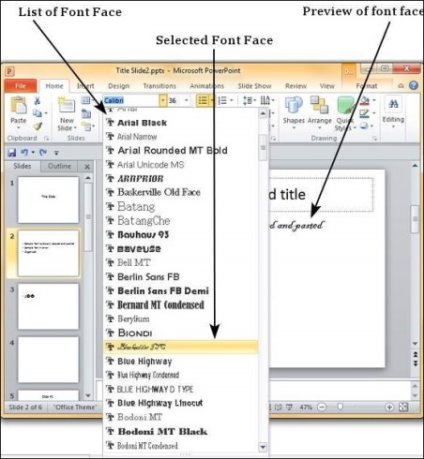
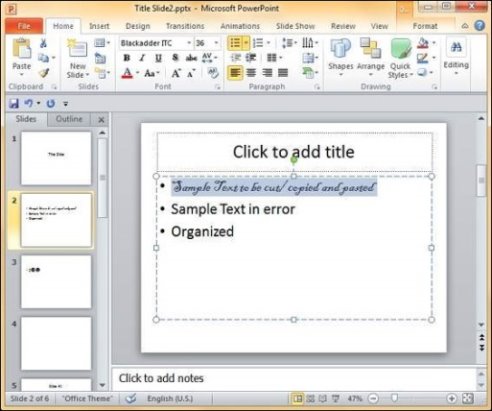
Apply Formatting
One of the most powerful tools in Microsoft Office is the application of formatting feature. This feature basically lets you define the right format once and apply the same to a series of objects in the rest of the presentation or any other file. While working with large presentations or just working on slides for a long time, if you ever need to make a change in the style and want it applied across multiple content this is the tool to use.
The following are the steps to apply formatting to your presentation −
Step 1− Select the content you want to copy the formatting from.
Step 2− Go to the Clipboard group under the Home ribbon.
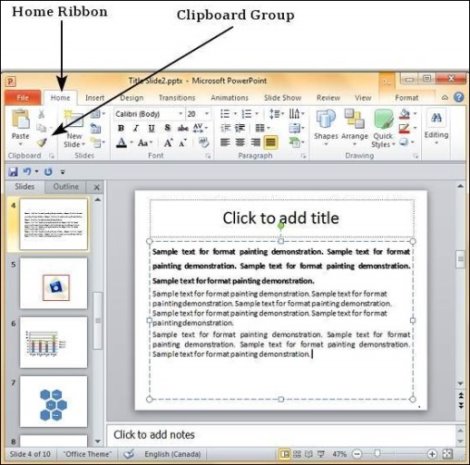
Step 3− Click on the Format Painter icon.
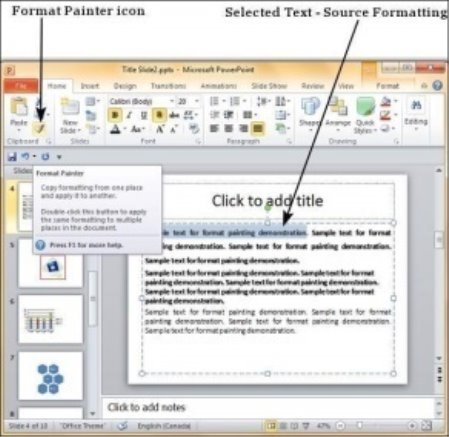
Step 4− Select the content you want to format.
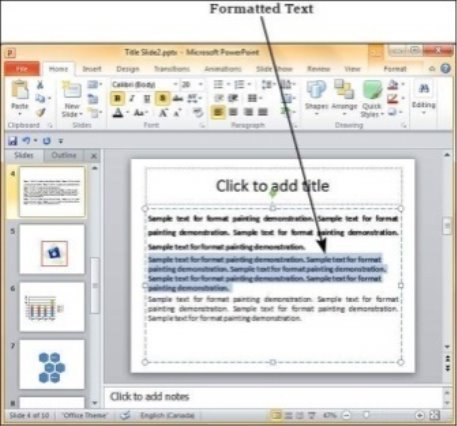
Here are some key aspects about the Format Painter −
- If you click on the Format Painter icon just once, the formatting will be copied just once.
- If you click on the Format Painter icon twice quickly, you can copy the formatting multiple times.
- If you want to copy just the text formatting and not the paragraph features, ensure that you select just the sample text and not the entire paragraph.
- If you want to copy paragraph and font formatting, you must select the entire paragraph.
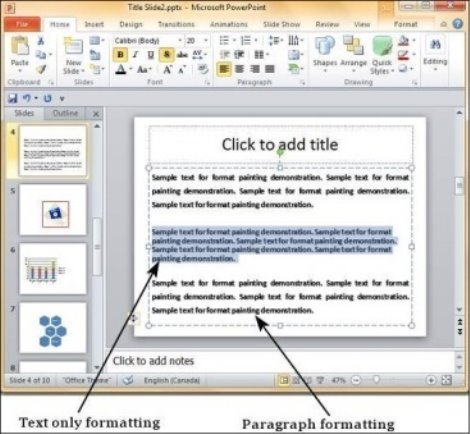
Add & Format Tables
One of the most powerful data representation techniques is the use of tables. Table allows information to be segregated making it easy to read. PowerPoint has features that let you add tables in slides and also format them to enhance their visual effects. What's more, these tables are also compatible with Microsoft Excel, so you can basically take a spreadsheet or a section of a spreadsheet and paste it into a slide as a table.
The following steps will help you add a table in PowerPoint.
Step 1− Go to the Tables group under the Insert ribbon.
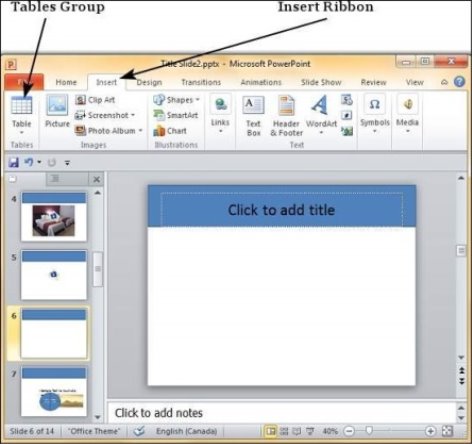
Step 2− Click on the dropdown and select your table dimension from the matrix.
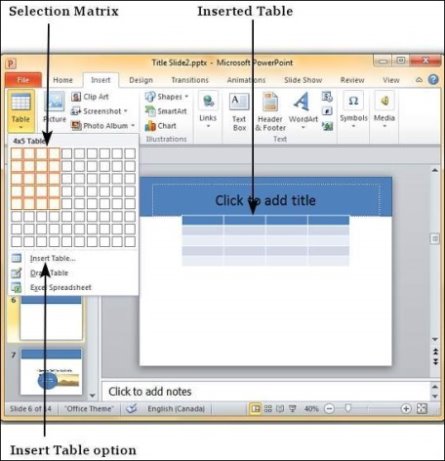
Step 3− If you require more than 10 columns or 8 rows click on "Insert Table" to open the Insert Table dialog where you can specify the column and row count.
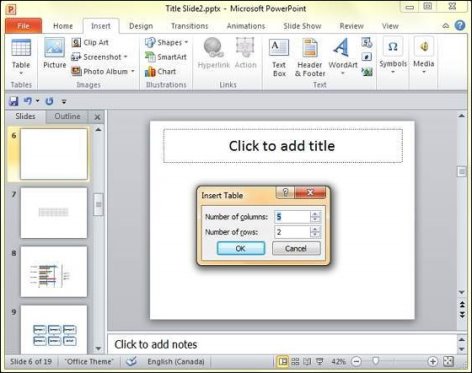
PowerPoint table is a simple table that does not support the mathematical features of an Excel spreadsheet. If you want to carry out some calculations, you can insert an Excel spreadsheet instead of a regular table.
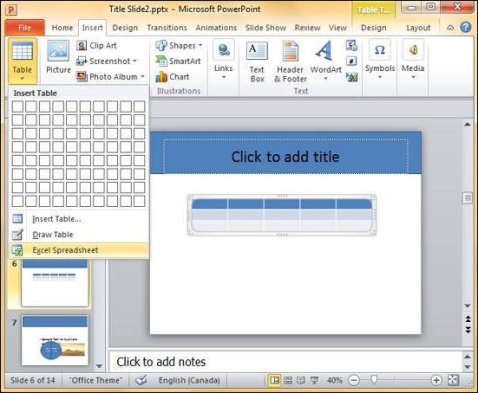
This will insert the spreadsheet in the slide and as long as the spreadsheet is selected, the ribbon at the top will be changed to an Excel ribbon instead of a PowerPoint one.
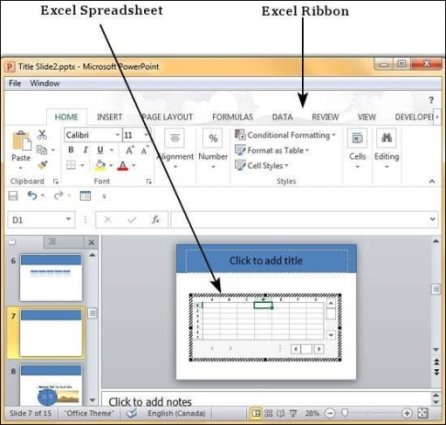
The PowerPoint table formatting features have been grouped under two ribbons: Design and Format. The sections below discuss the features under each ribbon. To access these ribbons, you must select the table first.
Table Design Features
We will now understand the table design features in PowerPoint.
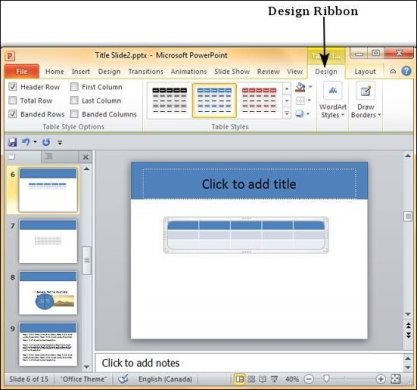
The following table shows the different table design features –
Feature | Sub Features | Description |
Table Style Options | Header Row | Adds a different shade to the first row to distinguish it. |
Total Row | Adds a different shade to the last row to distinguish it. | |
Banded Rows | Shades alternate rows in the table with the same color. | |
First Column | Adds a different shade to the first column to distinguish it. | |
Last Column | Adds a different shade to the last row to distinguish it. | |
Banded Columns | Shades alternate columns in the table with the same color. | |
Table Styles | Shading | Offers different shades to be added to selected table/ row/ column/ cell. You can pick from solid shade, texture, image or gradient shading. |
Border | Offers different border options for the table. You can edit the border color, thickness and style | |
Effects | Offers the ability to create table shadow or reflection. You can also create bevels for individual cells. | |
Word Art Styles | Text Fill | Allows you to change the color of the text within the table. |
Text Outline | Allows you to add an outline to the text within the table and change the outline color, weight and style. | |
Text Effects | Allows you to add special effects (like reflection, shadow etc.) to the text within the table. | |
Quick Styles | Contains a list of pre-defined Word Art styles that can be applied to the selected text within the table with a single click. | |
Draw Borders | Pen Style | Defines the style of the table border when you draw it. |
Pen Weight | Defines the thickness of the table border when you draw it. | |
Pen Color | Defines the color of the table border when you draw it. | |
Draw Table | Allows you to append new rows, columns, cells to existing table, split existing rows, columns or cells and draw brand new tables. | |
Eraser | Allows you to delete table borders and merge cells, rows or columns. |
Table Format Features
We will now understand the various table format features in PowerPoint.
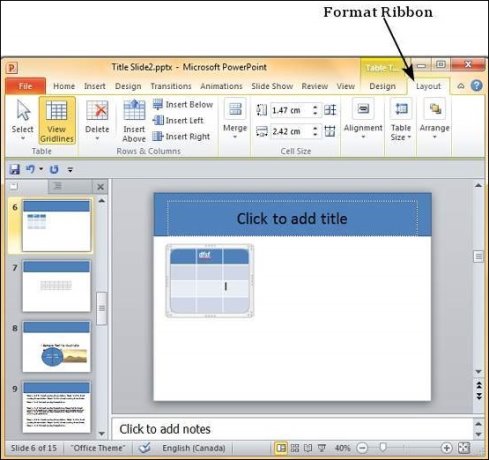
The following table shows the various table format features −
Feature | Sub Features | Description |
Table | Select | Allows you to select the entire table or the row(s) or column(s) depending on the position of your cursor. |
View Gridlines | Toggles the gridline display within the table. | |
Rows & Columns | Delete | Allows you to delete selected row(s) or column(s) or the entire table. |
Insert Above | Inserts a row above the row where the cursor is currently. If you haven't placed the cursor within the table, it adds a new row at the top of the table. | |
Insert Below | Inserts a row below the row where the cursor is currently. If you haven't placed the cursor within the table, it adds a new row at the bottom of the table. | |
Insert Left | Inserts a column to the left of the column where the cursor is currently. If you haven't placed the cursor within the table, it adds a new column to the left of the table. | |
Insert Right | Inserts a column to the right of the column where the cursor is currently. If you haven't placed the cursor within the table, it adds a new column to the right of the table. | |
Merge | Merge | Allows you to merge cells, rows or columns. This is enabled only if you have selected more than one cell, row or column. |
Split Cells | Allows you to specify the number of rows and columns into which the current section of cell(s) need to be split. | |
Cell Size | Height/ Width | Defines the height and width of the selected cell. Usually if you change these aspects for a single cell, the change affects the entire row or column too. |
Distribute Rows | Equalizes the height of all the rows to fit the current table height. | |
Distribute Columns | Equalizes the width of all the columns to fit the current table width. | |
Alignment | Horizontal Alignment | Allows you to align the selected text to the left, right or center of the cell. |
Vertical Alignment | Allows you to align the selected text to the top, bottom or middle of the cell. | |
Text Direction | Allows you to change the direction of the selected text within the cells. | |
Cell Margins | Allows you to define the margins within the cell. | |
Table Size | Height | Allows you to adjust the table height - it retains the relative heights of the individual rows while changing the overall table height. |
Width | Allows you to adjust the table width - it retains the relative widths of the individual columns while changing the overall table width. | |
Lock Aspect Ratio | Checking this box will ensure the ratio between the table height and width is maintained when one of these is changed. | |
Arrange | Bring Forward | Allows you to move the table up by one layer or right to the top. |
Send Backward | Allows you to move the table down by one layer or right to the bottom of the slide. | |
Selection Pane | Toggles the Selection and Visibility sidebar. | |
Align | Allows you to align the entire table with reference to the slide. |
Add & Format Charts
Charts are an effective way of representing data. Long list of confusing numbers can instantly become trends which can be spotted when they are captured as charts. PowerPoint supports the addition and formatting of charts.
Given below are the steps to add a chart to PowerPoint.
Step 1− Go to the Illustrations group under the Insert ribbon.
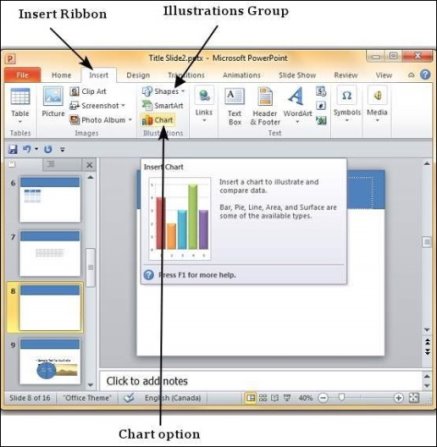
Step 2− Click on the Chart option to open the Insert Chart dialog. You can choose the chart category and pick individual chart types from the list.
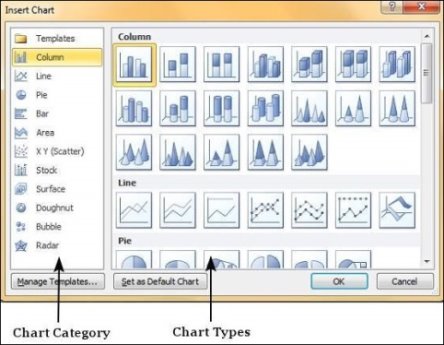
Step 3− Select the chart type and click OK or double-click on the chart type to insert the chart in the slide.
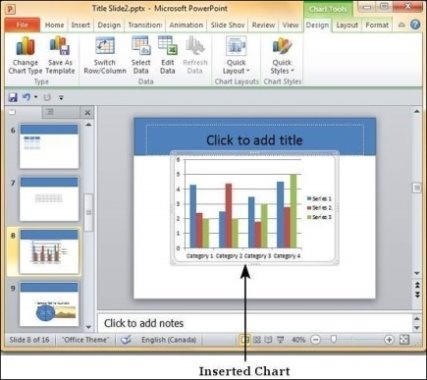
Step 4− Along with the chart, an Excel spreadsheet is also launched. This spreadsheet is the source for your chart. You can change the category names, series names and individual values to suit your needs.
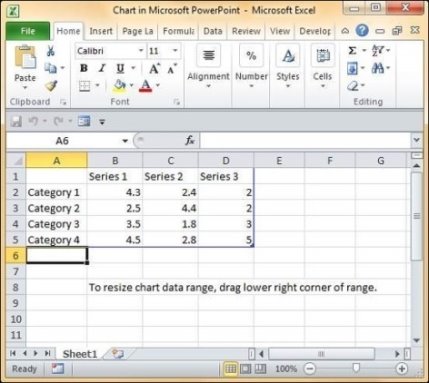
As you edit the values and the table in Excel the chart gets modified accordingly.
The PowerPoint chart formatting features have been grouped under three ribbons: Design, Layout and Format. The sections below discuss the features under each ribbon. To access these ribbons you must select the chart first.
Chart Design Features
We will now understand the various chart design features in PowerPoint.
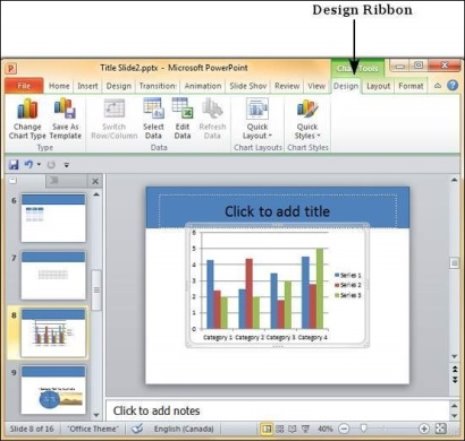
The table given below describes the various chart design features –
Feature | Sub Features | Description |
Type | Change Chart Type | Changes the chart type retaining the same data. |
Save As Template | Saves current chart type as a template. | |
Data | Switch Row/Column | Transposes current excel data - this is enabled when you have the source data excel sheet open. |
Select Data | Changes the data range covered in the chart. | |
Edit Data | Changes the chart source data. | |
Refresh Data | Refreshes the chart to show the latest data. | |
Chart Layouts | Chart Layouts | Offers a list of predefined layouts which can be instantly applied to current chart with a single click. |
Chart Styles | Chart Styles | Offers a list of predefined styles which can be instantly applied to current chart with a single click. |
Chart Layout Features
We will now understand the various chart layout features in PowerPoint.
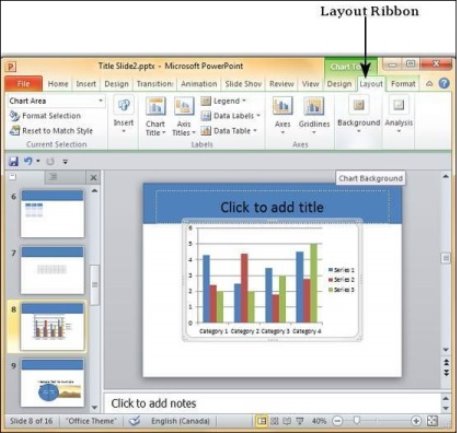
The following table describes the various chart layout features in PowerPoint.
Feature | Sub Features | Description |
Current Selection | Drop down | Shows the currently selected chart element. |
Format Selection | Shows the selection format dialog to update the selection. | |
Reset to Match Style | Discards all the chart customizations and matches the chart with the overall presentation theme. | |
Insert | Picture | Superimposes an image on top of the chart. |
Shape | Adds a shape to the slide. | |
Text Box | Adds a text box to the slide. | |
Labels | Chart Title | Defines the visibility, position and style of the chart title. |
Axis Titles | Defines the visibility, position and style of the axis titles. | |
Legend | Defines the visibility and position of the chart legend. | |
Data Labels | Defines the visibility and position of the data labels. | |
Data Table | Defines the visibility, position and format of the data table. | |
Axes | Axes | Defines the position and scale of axes. |
Gridlines | Defines the visibility and scale of axes. | |
Background | Plot Area | Toggles chart plot area - available only for 2D charts. |
Chart Wall | Toggles the chart wall - available only for 3D charts. | |
Chart Floor | Toggles the chart floor - available only for 3D charts. | |
3-D Rotation | Toggles the chart 3D rotation- available only for 3D charts. |
Chart Format Features
We will now understand the various chart format features in PowerPoint.
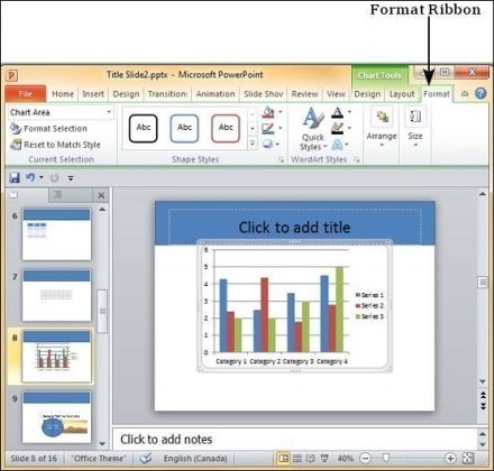
The following table describes the various chart format features in PowerPoint.
Feature | Sub Features | Description |
Current Selection | Drop down | Shows the currently selected chart element. |
Format Selection | Shows the selection format dialog to update the selection. | |
Reset to Match Style | Discards all the chart customizations and matches the chart with the overall presentation theme. | |
Shape Styles | Shape Fill | Offers different shades to be added to selected chart series item. You can pick from solid shade, texture, image or gradient shading. |
Border | Offers different border options for selected chart series item. You can edit the border color, thickness and style. | |
Effects | Offers the ability to add special effects to selected chart series item. | |
Word Art Styles | Text Fill | Allows you to change the color of the text within the chart. |
Text Outline | Allows you to add an outline to the text within the chart and change the outline color, weight and style. | |
Text Effects | Allows you to add special effects (like reflection, shadow etc.) to the text within the chart. | |
Quick Styles | Contains a list of pre-defined Word Art styles that can be applied to the selected text within the chart with a single click. | |
Arrange | Bring Forward | Allows you to move the chart up by one layer or right to the top. |
Send Backward | Allows you to move the chart down by one layer or right to the bottom of the slide. | |
Selection Pane | Toggles the Selection and Visibility sidebar. | |
Align | Allows you to align the entire chart with reference to the slide. | |
Group | Allows you to group multiple charts as one group object, or split a group object into individual charts. | |
Size | Height | Allows you to adjust the chart height. |
Width | Allows you to adjust the chart width. |
HYPERLINK
In Microsoft PowerPoint, there are times when users need to insert a link to a web page or a file in a network folder. Links can be useful for directing others who view the slides to a specific site, file, or linking to an external bibliography for a school assignment. Adding this type of link, called a hyperlink, can be done by following the steps below.
Inserting a hyperlink
- Open Microsoft PowerPoint.
- Type the text in the PowerPoint slide that you want to be linked.
How to highlight or select text.
4. In the menu bar or Ribbon at the top of the PowerPoint program window, click the Insert tab.
5. On the Insert tab, in the Links section, click the Link option.
6. In the Insert Hyperlink window, type in the web page address you want to link to in the Address text field. If you're not sure what the address is, go to the website in a web browser and copy the URL from your browser's address bar.
7. Once, you're done, click OK.
Tip
You can also press the keyboard shortcut Ctrl+K to create a hyperlink out of any highlighted text.
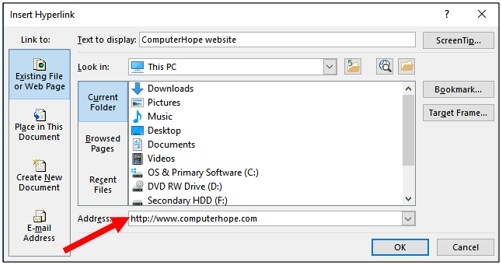
As you can see in the image below, the highlighted text is now a hyperlink, set to the Computer Hope website.
Tip
To set a link to a location in the same slide deck, click the Place in This Document option on the left side. Then, you can choose the location you'd like to link your highlighted text.
Printing Presentation
It is sometimes necessary that you share your slides with your audience in printed format before you begin presenting them so they can take notes. There are other times when you want to give your audience handouts with additional notes.
To print slides, you must go to the Backstage view under the File tab and click on the Print menu.
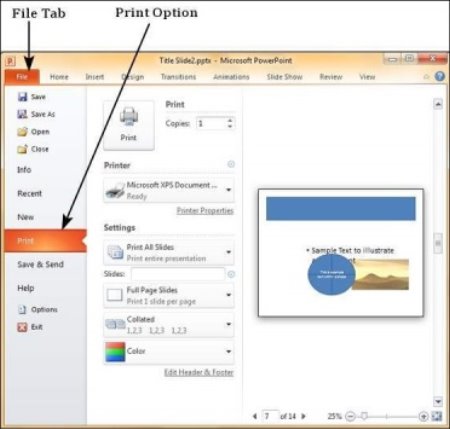
The following table describes the various printing options available in PowerPoint.
Main Settings | Options | Description |
Printing Slides | Print All Slides | Prints all the slides in the presentation. |
Print Selection | Prints just the selected objects. | |
Print Current Slide | Prints just the selected slide. | |
Custom Range | Defines the slides you want printed. | |
Slides | This is same as the Custom Range. | |
Print Layout | Full Page Slides | One slide per page. |
Notes Page | Slide and notes for every slide printed one below another - one slide per page. | |
Outline | Print Slide outline. | |
Handouts | Prints 1 or 2 or 3 or 4 or 6 or 9 slides per page - aligned vertically or horizontally. When you print handouts with 3 slides, you get the slide and the notes printed next to each other. | |
Collation | Collating Options | Prints slides in sequence or prints multiple copies of each slide one after another. |
Printing Color | Color | Selects color, greyscale or black & white printing options. Although you can select any color settings, the output will depend on the kind of printer you use. A non-color printer cannot print color slides. |
Saving Presentation
One of the most basic tasks in PowerPoint is being able to save your work; this is probably the most important task as well. There are many users who have burnt their fingers for not saving their work in time and losing hours of hard work. The following are the basic steps to save a presentation.
Step 1− Click on the File tab to launch the Backstage view and select Save.
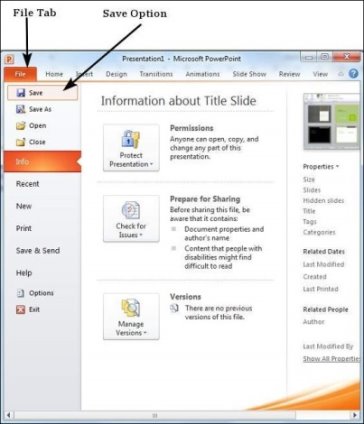
Step 2− In the Save As dialog, type in the file name and click "Save".
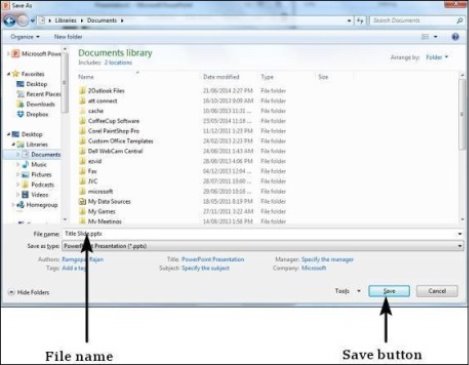
Step 3−The default file format is .pptx. If you want to save the file with a different name, choose one of the file types from the "Save as type" dropdown list.
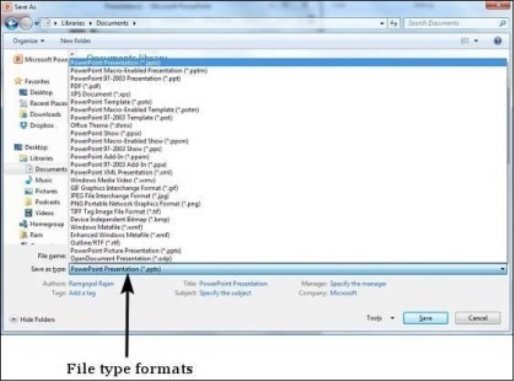
If you are working on an already saved file, the "Save" option in the Backstage view will directly save the file in the existing format with the existing name. If you want to change the format or filename of an existing file, use the Save As option instead.
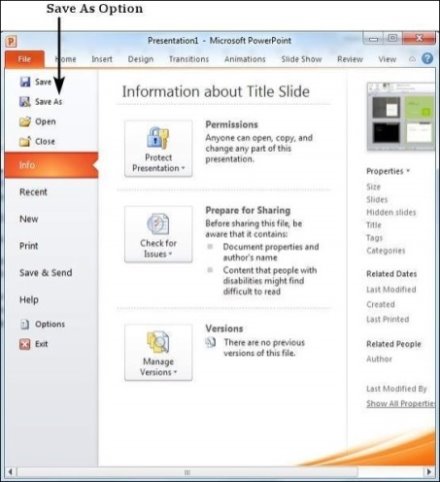
The commands for saving, opening, and closing presentations are on the File menu.
To save a new presentation:
- Choose File > Save As (Ctrl+S), or click the Save button on the toolbar. With a new, untitled presentation, Save and Save As function the same.
The Save As dialog box appears
 Saving a presentation.
2. Type a descriptive name in the File Name text box.
3. If necessary, choose a different disk or folder by navigating the dialog box as you would any standard Windows file dialog.
4. Click Save.
TIP
You can do this entire operation from the keyboard, if you prefer (it's often faster). Press Ctrl+S to invoke the Save As dialog box; if necessary, type the path into the File Name box (like c:\my documents\pres), press Enter, type the filename, and then press Enter.
To open an existing presentation:
- Choose File > Open, or click the Open button on the toolbar.
The Open dialog box appears.
2. If necessary, choose a different disk or folder by navigating the dialog box as you would any standard Windows file dialog.
3. Click the name in the list and click Open.
To close the current presentation:
- Choose File > Close (Ctrl+F4), or click the Close Window button (the X) in the presentation window. (Of the two Xs at the top-right of the application windows, the lower one closes the current presentation and the top one closes all of PowerPoint.)
TIP
The names of recently opened presentations appear at the bottom of the File menu. To open one of these files, just click the name.
When saving presentations, don't use names like "My Presentation." Instead, name your files so you will remember what they contain. Presentation filenames can be many characters long and contain several words.
Text Books:
1. Computer Basics by IGNOU.
2. Suresh K Basendrea: Computers Today
3. Pradeep K. Sinha, Priti Sinha, “Computer Fundamentals”. BPB Publications.
4. Rajaraman, V., “Fundamental of Computers”. Prentice Hall India, New Delhi
5. Sanders Donald H Computers Today