Unit – 5
Pictorial View
What is isometric?
It is defined as 3D objects drawn with no perspective. i.e., Lines have no vanishing points is termed as isometric.
What is Perspective?
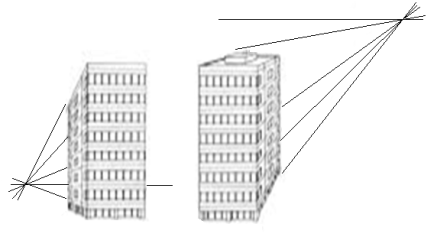
It is defined as 3D objects drawn with 1 or more vanishing points is called as Perspective.
Lines in Isometric Projection
Relation between line in isometric projection: -
1.Line those are parallel to object are parallel at isometric projection.
2. Vertical lines at object seen vertical at isometric projection.
3. Horizontal lines on body are drawn at an angle of 30owith horizontal at isometric projection.
4. Lines parallel to an isomeric axis term as isometric line and by fore shortened to 82%.
5. Lineswhich are not parallel to any isometric axis is term as non-isometric line.

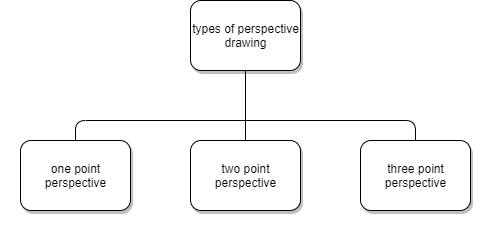
There are typically three types of perspective drawing:
One-point perspective,
Two-point perspective, and
Three-point perspective.
Perspective Principles
The main principle that are responsible for linear perspective are
1) size of forms,
2) overlap of forms,
3) placement of forms and
4) Convergence of lines.
All four principles can and should be used together to best interpret perspective.
Size of Forms
The largest of similar forms will appear closest to the viewer. With this scene, the square on the right appears closest because it is largest of the three. The square on the left appears to be the farthest away because it is the smallest.
Overlap of Forms
The square at the top looks bigger because it is overlapping the square at the bottom.
Placement of Forms
Forms placed farthest from the horizon appear closest to the viewer. The square on the right is farther from the horizon than the other two boxes, causing it to look closer to the viewer, whereas the other boxes are closer to the horizon, making them appear farther away.
Convergence of Lines
Parallel lines converge in the distance. In this scene, the road lines (orthogonal lines) meet as they recede into the distance, giving the appearance of depth. A vanishing point is formed where the orthogonal lines meet. The principle of convergence of lines shares the concept of depth expressed through size in that the width of the path decreases with distance.

Principle of Isometric Projections
It’s a pictorial orthographic projection of an object where a transparent cube containing the object is tilted before one of those solid diagonals of the cube becomes perpendicular to the vertical plane along with the three axes are equally inclined to this vertical plane

Building Information Modelling (BIM) is an intelligent 3D model-based process that gives architecture, engineering, and construction (AEC) professionals the insight and tools to more efficiently plan, design, construct, and manage buildings and infrastructure
BIM uses CAD, this is the 3D modelling portion of a BIM model.BIM works to increase collaboration between designers, subcontractors, and more in the early phases of construction.
Modelling benefits include:
5 fundamentals of BIM are: -
1. Visualization
2. Quantification
3. Communication
4. Coordination
5. Simulation
References:
1. Subhash C Sharma & Gurucharan Singh (2005), “Civil Engineering Drawing”, Standard Publishers
2. Ajeet Singh (2002), “Working with AUTOCAD 2000 with updates on AUTOCAD 200I”, Tata- Mc Graw- Hill Company Limited, New Delhi
3. Sham Tickoo Swapna D (2009), “AUTOCAD for Engineers and Designers”, Pearson Education
4. Venugopal (2007), “Engineering Drawing and Graphics + AUTOCAD”, New Age International Pvt. Ltd.
5. Balagopal and Prabhu (1987), “Building Drawing and Detailing”, Spades publishing KDR building, Calicut
6. (Corresponding set of) CAD Software Theory and User Manuals.
7. Malik R.S., Meo, G.S. (2009) Civil Engineering Drawing, Computech Publication Ltd New Asian. Sikka, V.B. (2013), A Course in Civil Engineering Drawing, S.K.Kataria& Sons.