Unit -1
Java Swing
JavaBeans is a platform-agnostic, portable model developed in the Java programming language. Beans are the components that make it up.
JavaBeans, to put it simply, are classes that encapsulate several objects into a single object. It facilitates access to these objects from a variety of locations. Constructors, Getter/Setter Methods, and other features are included in JavaBeans.
There are a few JavaBeans conventions that should be followed:
● A default constructor should be available for beans (no arguments).
● Getter and setter methods should be available in beans.
● To read the value of a readable property, a getter method is utilized.
● A setter method should be used to update the value.
● JavaBeans should implement java.io.serializable because it allows you to save, store, and restore the state of the JavaBean you're dealing with.
A JavaBean is a Java class that must adhere to the following rules:
● It should have a constructor that takes no arguments.
● Serializable is a must.
● It should include getter and setter methods for setting and retrieving the values of properties.
Advantages
The following are some of Java Beans benefits:
● Portable: Because JavaBeans are written entirely in Java, they can run on any platform that supports the Java Run-Time Environment. The Java Virtual Machine implements all platform-specific features, as well as JavaBeans support.
● Compact and Easy: Components made with JavaBeans are simple to design and use. The JavaBeans architecture places a strong emphasis on this area. Writing a simple Bean does not need much work. Furthermore, because a bean is light, it does not need to carry a lot of inherited baggage to maintain the bean's environment.
● Carries the Strengths of the Java Platform: There isn't any new sophisticated process for registering components with the run-time system in JavaBeans, so it's very compatible.
● Another program can access the JavaBean properties and methods.
● It makes reusing software components much easier.
Properties
A JavaBean property is a named feature that the user of the object can access. The feature can be any Java data type, and it must contain the classes you specify.
A property on a JavaBean can be read, write, read-only, or write-only. Two methods in the JavaBean's implementation class are used to access JavaBean features:
- GetPropertyName () - For example, if the property is called firstName, the method to read it is called getFirstName(). The accessor is the name for this procedure.
- SetPropertyName () - For example, if the property name is firstName, the method to write that value is setFirstName(). The mutator is the name of this approach.
Key takeaway
JavaBeans is a platform-agnostic, portable model developed in the Java programming language. Beans are the components that make it up.
JFrame
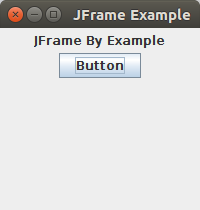
The javax.swing package. The JFrame class is a container that inherits the java.awt package. Frame is a type of class. JFrame functions similarly to a main window, allowing users to add components such as labels, buttons, and text fields to construct a graphical user interface.
JFrame, unlike Frame, allows you to hide or close the window using the setDefaultCloseOperation(int) method.
Nested class
Modifier and Type | Class | Description |
Protected class | JFrame.AccessibleJFrame | For the JFrame class, this class implements accessibility support. |
Constructor
Constructor | Description |
JFrame() | It creates a new frame, which is first undetectable. |
JFrame(GraphicsConfiguration gc) | It produces a Frame with a blank title in the provided GraphicsConfiguration of a screen device. |
JFrame(String title) | It generates a new Frame with the supplied title that is initially invisible. |
JFrame(String title, GraphicsConfiguration gc) | It produces a JFrame with the supplied title and a screen device's GraphicsConfiguration. |
Fields
Modifier and Type | Field | Description |
Protected AccessibleContext | AccessibleContext | The accessible context property. |
Static int | EXIT_ON_CLOSE | The default window closing operation of the exit programme. |
Protected JRootPane | RootPane | The JRootPane object that controls the contentPane, optional menuBar, and glassPane for this frame. |
Protected boolean | RootPaneCheckingEnabled | If true, add and setLayout calls will be routed to the contentPane. |
Example
Import java.awt.FlowLayout;
Import javax.swing.JButton;
Import javax.swing.JFrame;
Import javax.swing.JLabel;
Import javax.swing.JPanel;
Public class JFrameExample {
public static void main(String s[]) {
JFrame frame = new JFrame("JFrame Example");
JPanel panel = new JPanel();
panel.setLayout(new FlowLayout());
JLabel label = new JLabel("JFrame By Example");
JButton button = new JButton();
button.setText("Button");
panel.add(label);
panel.add(button);
frame.add(panel);
frame.setSize(200, 300);
frame.setLocationRelativeTo(null);
frame.setDefaultCloseOperation(JFrame.EXIT_ON_CLOSE);
frame.setVisible(true);
}
}
Output
JDialog
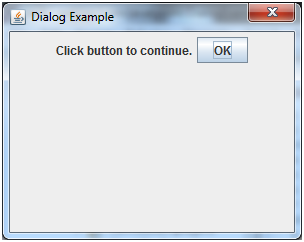
The JDialog control depicts a top-level window with a border and a title that is used to receive user input. It is a descendant of the Dialog class.
It lacks the maximize and minimize buttons found in JFrame.
JDialog class declaration
Let's look at the javax.swingjavax.swing.JDialog class. Declaration.
Public class JDialog extends Dialog implements WindowConstants, Accessible, RootPaneContainer
Constructor
Constructor | Description |
JDialog() | It's used to make a modeless dialogue with no title and no Frame owner given. |
JDialog(Frame owner) | It's used to make a modeless dialogue with an empty title and the provided Frame as its owner. |
JDialog(Frame owner, String title, boolean modal) | It's used to make a dialogue with the title, owner Frame, and modality that you specify. |
Example
Import javax.swing.*;
Import java.awt.*;
Import java.awt.event.*;
Public class DialogExample {
private static JDialog d;
DialogExample() {
JFrame f= new JFrame();
d = new JDialog(f , "Dialog Example", true);
d.setLayout( new FlowLayout() );
JButton b = new JButton ("OK");
b.addActionListener ( new ActionListener()
{
public void actionPerformed( ActionEvent e )
{
DialogExample.d.setVisible(false);
}
});
d.add( new JLabel ("Click button to continue."));
d.add(b);
d.setSize(300,300);
d.setVisible(true);
}
public static void main(String args[])
{
new DialogExample();
}
}
Output
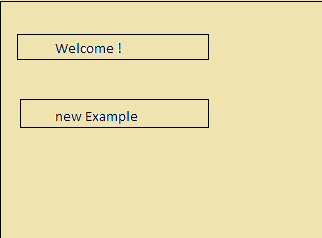
JTextField creates a single-line editable text field. In the box, a user can type unformatted content. Call the function of the text field and supply an optional integer parameter to it to initialize it. This property determines the box's width based on the number of columns. The number of characters that can be entered in the box is unrestricted.
A JTextField class object is a text component that allows you to change a single line of text. It is a descendant of the JTextComponent class.
JTextField class declaration
Public class JTextField extends JTextComponent implements SwingConstants
Constructor
This class has the following constructors:
● JTextField(): These are the constructors that are in charge of making a new TextField.
● JTextField(int columns): The parameter columns are used to indicate the column numbers in a new empty TextField, as the name implies.
● JTextField(String text): JTextField(String text): JTextField(Str The text argument is used to represent a provided string that has been initialized with a new empty text field.
● JTextField(String text, int columns): This function Object() { [native code] } is used to create an empty text field with the supplied number of columns and the string provided.
● JTextField(Document doc, String text, int columns): This is used to use the supplied storage model and number of columns.
Methods of JTextField
Let's have a look at some of the most important methods in the JTextField class in Java.
● setColumns(int n): This method is used to set the number of columns in a text field to the supplied number.
● setFont(Font f): This function displays and sets the font of the displayed text in the text field.
● addActionListener(ActionListener I): This method is used to set the action listener to the text field.
● Int getColumns(): The column numbers in the text field are obtained using the int getColumns() function.
Example
Import javax.swing.*;
Import java.io.*;
Class TextEg
{
Public static void main(String args[]) throws IOException
{
JFrame f= new JFrame("Example of TextField ");
//variable declaration
JTextField t12,t22;
t12=new JTextField("Welcome!");
t12.setBounds(10,100, 100,30);
//declaring new example
t22=new JTextField("new example");
//setting bounds
t22.setBounds(10,150, 100,30);
//adding into frames
f.add(t12); f.add(t22);
f.setSize(200,200);
f.setVisible(true);
}
}
Output
JTextArea
The JTextArea class is used to create a multi-line text box. A user can enter non-formatted text in the field, much like in the JTextField. JTextArea's additionally expects two integer parameters that define the text-height area's and width in columns. It has no limit on how many characters the user can type in the text-area.
A multi-line zone that displays text is the object of the JTextArea class. It allows you to alter numerous lines of text. It is a descendant of the JTextComponent class.
JTextArea class declaration
Public class JTextArea extends JTextComponent
Constructor
Let's take a closer look at the various sorts of constructors:
● JTextArea(): This is used to create a new text-based blank space.
● JTextArea(int row, int column): This JTextArea is similar to the unparameterized JTextArea, except it uses the rows and column arguments instead. It's used to create a new text field-based area with a set of rows and columns.
● JTextArea(String s): JTextArea(Str It's used to create a new text-based region from a provided starting text.
● JTextArea(String s, int row, int column): This generates a given initial text and a specified number of rows and column values, comparable to those having string values or those containing row and column parameterized values.
Methods
Let us read some of the primary methods that form the foundation of the JTextArea in Java after we've gone over the numerous constructors connected to JTextArea.
● Append(String s): This method is used to append one specified string to the text in the text area, as the name implies.
● setFont(Font f): This method sets the font size and type of the text area to the specified font.
● getLineCount(): Gets the number of lines in the text area text field with this function.
● setColumns(int c): This is used to set the text area's column number as well as the specified integer.
● setRows(int r): This function is used to set the text area's rows as well as the specified integer.
● getColumns(): This function returns the number of columns in addition to the text area field.
● getRows(): is a function that returns the number of rows in a specific text area.
Example
//importing basic packages and relevant classes
Import java.io.*;
Import java.awt.*;
Import javax.swing.*;
Import java.awt.event.*;//defining a class TxtEG
Class TxtEG
{
//calling a default constructor after creation
TxtEG(){
//creation of frames with the object f
JFrame f= new JFrame();
// creation of a JTextArea
JTextArea area=new JTextArea("Welcome");
//setting boundary
Area.setBounds(10,30, 200,200);
//adding properties to the frame
f.setVisible(true);
f.setSize(300,300);
f.add(area);
f.setLayout(null);
}
//declaring method main
Public static void main(String args[]) throws IOException
{
New TxtEG();
}
}
Output

JButton
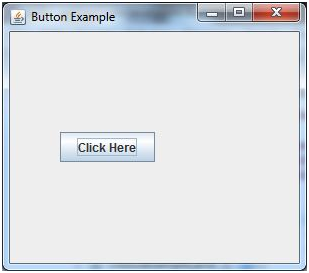
The JButton class is used to construct a UI push-button. The button can have some text or an image displayed on it. When clicked and double-clicked, it triggers an event. One of the constructors of a JButton might be called in the programme to implement it.
The JButton class is used to create a labeled button that can be implemented on any platform. When the button is pressed, the application performs some action. It is a descendant of the AbstractButton class.
JButton class declaration
Public class JButton extends AbstractButton implements Accessible
Constructor
● JButton(): It generates a button that is devoid of text and an icon.
● JButton(String s): It produces a button with the text you choose.
● JButton(Icon i): It generates a button with the icon object supplied.
Methods
The methods in JButton Class that are most regularly used are listed below:
● setText(string text): This method is used to set the specified text on the component's button.
● getText(): This function returns the text of the button in the specified component as a string.
● Void setEnabled(boolean b): method is used to enable or deactivate a button by giving the appropriate value in the parameter.
● Void setIcon(icon i): This method is used to set the specified icon "I" to the button.
● Icon getIcon(): This function returns the icon associated with the provided button.
● Void setHorizontalTextPosition(int hpos): This method is used to set the horizontal position of the button message in relation to its icon.
● Void stVerticalTextPosition(int vpos): This method sets the vertical position of the button message in relation to its icon.
Example
Import javax.swing.*;
Public class ButtonExample {
Public static void main(String[] args) {
JFrame f=new JFrame("Button Example");
JButton b=new JButton("Click Here");
b.setBounds(50,100,95,30);
f.add(b);
f.setSize(400,400);
f.setLayout(null);
f.setVisible(true);
}
}
Output
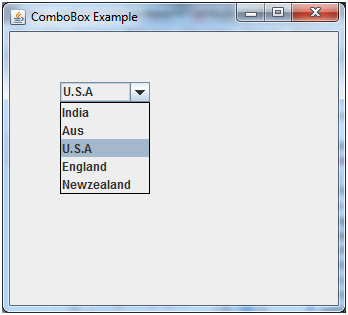
The Choice class object is used to display a popup menu of options. A user-selected option appears at the top of a menu. It is a descendant of the JComponent class.
JComboBox is a component of the Java Swing framework. It is an extension of the JComponent class. JComboBox is represented as a popup menu that contains a list of elements from which the user can choose an option or element. Depending on the necessity and the coder, it can be modifiable or not. It is not editable by default because it combines the features of a button and a drop-down list. A text box and a drop-down list are included in the JComboBox, which is not editable. Users can type or can click on the arrow button to view the drop-down list. Combo Boxes require less space and hence are very useful when size is small or limited.
JComboBox class declaration
Public class JComboBox extends JComponent implements ItemSelectable, ListDataListener, ActionLis
JComboBox Constructors
The following are some of the most regularly used constructors:
● JComboBox(): It produces a new empty JComboBox with the default data model.
● JComboBox(Object[] items): This method produces a new JComboBox containing the elements from the supplied array.
● JComboBox(Vector<?> items): It builds a new JComboBox with the elements listed in the specified vector.
● JComboBox(ComboBoxModel M): This method produces a JComboBox with the items provided in the ComboBoxModel given.
Methods
● void addItem(Object anObject): It's used to add a new item to the list of items.
● void removeItem(Object anObject): It's used to remove something from the item list.
● void removeAllItems(): It is used to clear the list of all things.
● void setEditable(boolean b): It determines whether the JComboBox can be edited.
● void addActionListener(ActionListener a): It's where you'll put the ActionListener.
● void addItemListener(ItemListener i): It's where you'll put the ItemListener.
Example
Import javax.swing.*;
Public class ComboBoxExample {
JFrame f;
ComboBoxExample(){
f=new JFrame("ComboBox Example");
String country[]={"India","Aus","U.S.A","England","Newzealand"};
JComboBox cb=new JComboBox(country);
cb.setBounds(50, 50,90,20);
f.add(cb);
f.setLayout(null);
f.setSize(400,500);
f.setVisible(true);
}
Public static void main(String[] args) {
new ComboBoxExample();
}
}
Output
JLabel
JLabel is one of the numerous Java Swing classes available. The swing package's JLabel class can display either text or a picture, or both. JLabel aligns the label and label contents displayed by it using horizontal and vertical alignments, just as other Swing classes. The alignments allow the programmer to decide where the label's contents will be shown on the label's display area.
The JLabel class object is a component for inserting text into a container. It's used to show a single line of text that can only be read. An application can update the text, but a user cannot edit it directly. It is a descendant of the JComponent class.
JLabel class declaration
Public class JLabel extends JComponent implements SwingConstants, Accessible
Constructors of JLabel
The JLabel class in Java provides multiple constructors that can be used to generate labels with various properties.
● JLabel (): This function generates a blank label with no text. This instance of the class generates a label without an image and a title consisting of an empty string or text. The text can be changed at any moment.
● JLabel (Icon Picture): This function produces a label containing only the icon or image given. You can use the icon or picture file from your own file system.
● JLabel (String Text): While declaring our function ,this instance creates a label with a specific text. We additionally have the following constructors that can be used in addition to the fundamental constructors listed above.
● JLabel (Icon Image, int horizontalAlignment): This function instance is used to make a horizontally aligned picture or icon from a given image or icon.
● JLabel(String text, int horizontalAlignment): This function instance is used to build a text with horizontal alignment that is supplied.
● JLabel (String text, Icon icon, int horizontalAlignment): This function instance is used to produce an image or icon, as well as text and a 'horizontal' alignment.
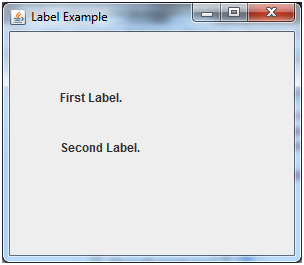
Example
Import javax.swing.*;
Class LabelExample
{
Public static void main(String args[])
{
JFrame f= new JFrame("Label Example");
JLabel l1,l2;
l1=new JLabel("First Label.");
l1.setBounds(50,50, 100,30);
l2=new JLabel("Second Label.");
l2.setBounds(50,100, 100,30);
f.add(l1); f.add(l2);
f.setSize(300,300);
f.setLayout(null);
f.setVisible(true);
}
}
Output
JList
A scrollable list of elements is rendered using the JList component. A user can choose one or more values from the list. The developer defines this select behavior in the code.
A list of text items is represented by the JList class object. The list of text items can be configured such that the user can select one or more items. It is a descendant of the JComponent class.
JList class declaration
Public class JList extends JComponent implements Scrollable, Accessible
Constructor
● JList(): Creates a JList with a read-only model that is empty.
● JList(ary[] listData): The elements in the specified array are shown in a JList.
● JList(ListModel<ary> dataModel): Creates a JList with elements from the non-null model supplied.
Methods
● Void addListSelectionListener(ListSelectionListener listener): It's used to add a listener to the list who will be notified whenever the option changes.
● int getSelectedIndex(): It's used to find the smallest cell index in a selection.
● ListModel getModel(): It's used to get the data model that holds the list of items that the JList component displays.
● void setListData(Object[] listData): It's used to turn an array of objects into a read-only ListModel.
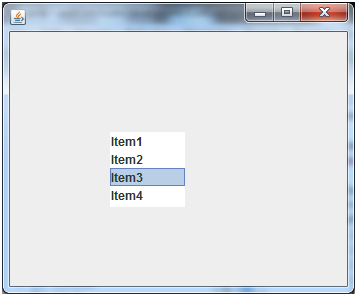
Example
Import javax.swing.*;
Public class ListExample
{
ListExample(){
JFrame f= new JFrame();
DefaultListModel<String> l1 = new DefaultListModel<>();
l1.addElement("Item1");
l1.addElement("Item2");
l1.addElement("Item3");
l1.addElement("Item4");
JList<String> list = new JList<>(l1);
list.setBounds(100,100, 75,75);
f.add(list);
f.setSize(400,400);
f.setLayout(null);
f.setVisible(true);
}
Public static void main(String args[])
{
new ListExample();
}
}
Output
JMenuBar
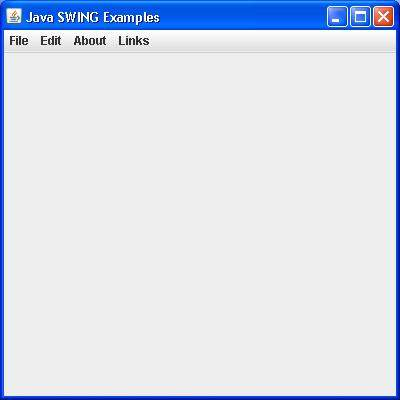
JMenuBar is a class that displays a menubar on a window or frame. It could have multiple menus.
The Java Swing package includes JMenuBar, JMenu, and JMenuItems. JMenuBar is a menu bar implementation. When one or more JMenu objects are chosen in the JMenuBar, a popup with one or more JMenuItems appears.
JMenu is a class that depicts a menu. It has multiple JMenuItem Objects in it. It could also include JMenu Objects (or submenu).
JMenuBar class declaration
Public class JMenuBar extends JComponent implements MenuElement, Accessible
Constructor
JMenuBar() - Creates a new menu bar.
Methods Inherited
This class inherits methods from the following classes −
● javax.swing.JComponent
● java.awt.Container
● java.awt.Component
● java.lang.Object
Example
Import java.awt.*;
Import java.awt.event.*;
Public class SwingMenuDemo {
private JFrame mainFrame;
private JLabel headerLabel;
private JLabel statusLabel;
private JPanel controlPanel;
public SwingMenuDemo(){
prepareGUI();
}
public static void main(String[] args){
SwingMenuDemo swingMenuDemo = new SwingMenuDemo();
swingMenuDemo.showMenuDemo();
}
private void prepareGUI(){
mainFrame = new JFrame("Java SWING Examples");
mainFrame.setSize(400,400);
mainFrame.setLayout(new GridLayout(3, 1));
headerLabel = new JLabel("",JLabel.CENTER );
statusLabel = new JLabel("",JLabel.CENTER);
statusLabel.setSize(350,100);
mainFrame.addWindowListener(new WindowAdapter() {
public void windowClosing(WindowEvent windowEvent){
System.exit(0);
}
});
controlPanel = new JPanel();
controlPanel.setLayout(new FlowLayout());
mainFrame.add(headerLabel);
mainFrame.add(controlPanel);
mainFrame.add(statusLabel);
mainFrame.setVisible(true);
}
private void showMenuDemo(){
//create a menu bar
final JMenuBar menuBar = new JMenuBar();
//create menus
JMenu fileMenu = new JMenu("File");
JMenu editMenu = new JMenu("Edit");
final JMenu aboutMenu = new JMenu("About");
final JMenu linkMenu = new JMenu("Links");
//create menu items
JMenuItem newMenuItem = new JMenuItem("New");
newMenuItem.setMnemonic(KeyEvent.VK_N);
newMenuItem.setActionCommand("New");
JMenuItem openMenuItem = new JMenuItem("Open");
openMenuItem.setActionCommand("Open");
JMenuItem saveMenuItem = new JMenuItem("Save");
saveMenuItem.setActionCommand("Save");
JMenuItem exitMenuItem = new JMenuItem("Exit");
exitMenuItem.setActionCommand("Exit");
JMenuItem cutMenuItem = new JMenuItem("Cut");
cutMenuItem.setActionCommand("Cut");
JMenuItem copyMenuItem = new JMenuItem("Copy");
copyMenuItem.setActionCommand("Copy");
JMenuItem pasteMenuItem = new JMenuItem("Paste");
pasteMenuItem.setActionCommand("Paste");
MenuItemListener menuItemListener = new MenuItemListener();
newMenuItem.addActionListener(menuItemListener);
openMenuItem.addActionListener(menuItemListener);
saveMenuItem.addActionListener(menuItemListener);
exitMenuItem.addActionListener(menuItemListener);
cutMenuItem.addActionListener(menuItemListener);
copyMenuItem.addActionListener(menuItemListener);
pasteMenuItem.addActionListener(menuItemListener);
final JCheckBoxMenuItem showWindowMenu = new JCheckBoxMenuItem("Show About", true);
showWindowMenu.addItemListener(new ItemListener() {
public void itemStateChanged(ItemEvent e) {
if(showWindowMenu.getState()){
menuBar.add(aboutMenu);
} else {
menuBar.remove(aboutMenu);
}
}
});
final JRadioButtonMenuItem showLinksMenu = new JRadioButtonMenuItem(
"Show Links", true);
showLinksMenu.addItemListener(new ItemListener() {
public void itemStateChanged(ItemEvent e) {
if(menuBar.getMenu(3)!= null){
menuBar.remove(linkMenu);
mainFrame.repaint();
} else {
menuBar.add(linkMenu);
mainFrame.repaint();
}
}
});
//add menu items to menus
fileMenu.add(newMenuItem);
fileMenu.add(openMenuItem);
fileMenu.add(saveMenuItem);
fileMenu.addSeparator();
fileMenu.add(showWindowMenu);
fileMenu.addSeparator();
fileMenu.add(showLinksMenu);
fileMenu.addSeparator();
fileMenu.add(exitMenuItem);
editMenu.add(cutMenuItem);
editMenu.add(copyMenuItem);
editMenu.add(pasteMenuItem);
//add menu to menubar
menuBar.add(fileMenu);
menuBar.add(editMenu);
menuBar.add(aboutMenu);
menuBar.add(linkMenu);
//add menubar to the frame
mainFrame.setJMenuBar(menuBar);
mainFrame.setVisible(true);
}
class MenuItemListener implements ActionListener {
public void actionPerformed(ActionEvent e) {
statusLabel.setText(e.getActionCommand() + " JMenuItem clicked.");
}
}
}
Output
JTabbedPane
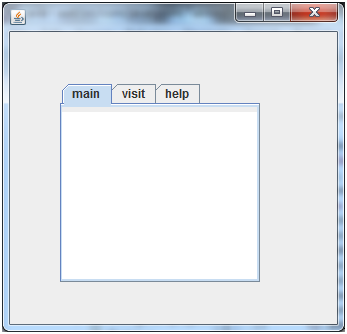
By clicking on a tab with a particular title or icon, the JTabbedPane class is used to switch between a group of components. It is a descendant of the JComponent class.
JTabbedPane class declaration
Public class JTabbedPane extends JComponent implements Serializable, Accessible, SwingConst
Constructor
● JTabbedPane() : Creates an empty TabbedPane with JTabbedPane's default tab placement. Top.
● JTabbedPane(int tabPlacement) : Creates an empty TabbedPane with the tab placement you choose.
● JTabbedPane(int tabPlacement, int tabLayoutPolicy) : Creates an empty TabbedPane with the tab placement and policy supplied.
Example
Import javax.swing.*;
Public class TabbedPaneExample {
JFrame f;
TabbedPaneExample(){
f=new JFrame();
JTextArea ta=new JTextArea(200,200);
JPanel p1=new JPanel();
p1.add(ta);
JPanel p2=new JPanel();
JPanel p3=new JPanel();
JTabbedPane tp=new JTabbedPane();
tp.setBounds(50,50,200,200);
tp.add("main",p1);
tp.add("visit",p2);
tp.add("help",p3);
f.add(tp);
f.setSize(400,400);
f.setLayout(null);
f.setVisible(true);
}
Public static void main(String[] args) {
new TabbedPaneExample();
}}
Output
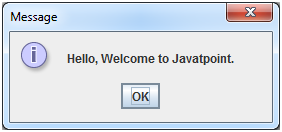
Standard dialogue boxes, such as message dialogue boxes, confirm dialogue boxes, and input dialogue boxes, are provided by the JOptionPane class. These dialogue windows are used to present information to the user or to solicit input from them. The JOptionPane class is a descendant of the JComponent class.
JOptionPane class declaration
Public class JOptionPane extends JComponent implements Accessible
Constructor
● JOptionPane(): It's used to make a JOptionPane that displays a test message.
● JOptionPane(Object message): It's used to make a JOptionPane instance for displaying a message.
● JOptionPane(Object message, int messageType: It's used to make a JOptionPane instance that displays a message with the message type and default options supplied.
Methods
● JDialog createDialog(String title): It's used to make a new parentless JDialog with the supplied title and return it.
● static void showMessageDialog(Component parentComponent, Object message): It's used to make the "Message" information-message dialogue.
● static void showMessageDialog(Component parentComponent, Object message, String title, int messageType): It's used to make a message dialogue with the title and messageType that you specify.
● static int showConfirmDialog(Component parentComponent, Object message): It's used to make a dialogue box containing the options Yes, No, and Cancel, as well as the title Select an Option.
● static String showInputDialog(Component parentComponent, Object message): It's used to display a question-message dialogue that asks the user for input and is parented to parentComponent.
● void setInputValue(Object newValue): It's used to set the input value that the user chose or typed in.
Example
Import javax.swing.*;
Public class OptionPaneExample {
JFrame f;
OptionPaneExample(){
f=new JFrame();
JOptionPane.showMessageDialog(f,"Hello, Welcome to Javatpoint.");
}
Public static void main(String[] args) {
new OptionPaneExample();
}
}
Output
JPanel
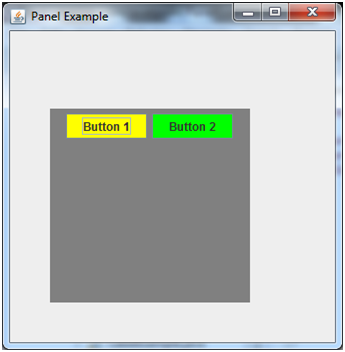
JPanel is the most basic container class. It provides a location for an application to attach any additional components. It is a descendant of the JComponents class.
It is missing a title bar.
JPanel class declaration
Public class JPanel extends JComponent implements Accessible
Constructor
● JPanel(): It's used to make a new JPanel with a flow layout and a double buffer.
● JPanel(boolean isDoubleBuffered): It's used to make a new JPanel with the specified buffering technique and FlowLayout.
● JPanel(LayoutManager layout): It's used to make a new JPanel using the layout manager given.
Example
Import java.awt.*;
Import javax.swing.*;
Public class PanelExample {
PanelExample()
{
JFrame f= new JFrame("Panel Example");
JPanel panel=new JPanel();
panel.setBounds(40,80,200,200);
panel.setBackground(Color.gray);
JButton b1=new JButton("Button 1");
b1.setBounds(50,100,80,30);
b1.setBackground(Color.yellow);
JButton b2=new JButton("Button 2");
b2.setBounds(100,100,80,30);
b2.setBackground(Color.green);
panel.add(b1); panel.add(b2);
f.add(panel);
f.setSize(400,400);
f.setLayout(null);
f.setVisible(true);
}
public static void main(String args[])
{
new PanelExample();
}
}
Output
JTree
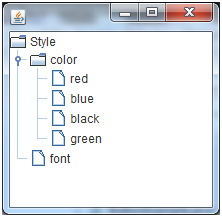
The JTree class is used to display hierarchical or tree-structured data. JTree is a sophisticated component. It has a top-most 'root node,' which serves as a parent for all nodes in the tree. It is a descendant of the JComponent class.
JTree class declaration
Public class JTree extends JComponent implements Scrollable, Accessible
Constructor
● JTree(): A JTree with an example model is created.
● JTree(Object[] value): Creates a JTree with the supplied array's elements as children of a new root node.
● JTree(TreeNode root): Creates a JTree that displays the root node and has the supplied TreeNode as its root.
Example
Import javax.swing.*;
Import javax.swing.tree.DefaultMutableTreeNode;
Public class TreeExample {
JFrame f;
TreeExample(){
f=new JFrame();
DefaultMutableTreeNode style=new DefaultMutableTreeNode("Style");
DefaultMutableTreeNode color=new DefaultMutableTreeNode("color");
DefaultMutableTreeNode font=new DefaultMutableTreeNode("font");
style.add(color);
style.add(font);
DefaultMutableTreeNode red=new DefaultMutableTreeNode("red");
DefaultMutableTreeNode blue=new DefaultMutableTreeNode("blue");
DefaultMutableTreeNode black=new DefaultMutableTreeNode("black");
DefaultMutableTreeNode green=new DefaultMutableTreeNode("green");
color.add(red); color.add(blue); color.add(black); color.add(green);
JTree jt=new JTree(style);
f.add(jt);
f.setSize(200,200);
f.setVisible(true);
}
Public static void main(String[] args) {
new TreeExample();
}
}
Output
JTable
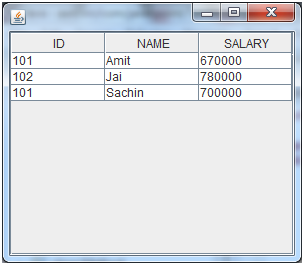
JTable is a class that displays data in a tabular format. Rows and columns make up the structure.
JTable is a Java class that allows you to change or display two-dimensional data in the form of rows and columns. It's comparable to a spreadsheet in that it displays data in a tabular format. The class javax.swing.JTable can be used to generate a JTable.
Syntax of JTable in Java:
JTable jt=new JTable();
Constructor
In Java, there are three constructors for JTable. They are as follows:
● JTable(): A new table with empty cells will be formed.
● JTable(int r, int c): A table with the size r*c will be generated.
● JTable(Object[][] d, Object []col): Creates a table with the provided data, where []col denotes the column names.
Example
Import javax.swing.*;
Public class TableExample {
JFrame f;
TableExample(){
f=new JFrame();
String data[][]={ {"101","Amit","670000"},
{"102","Jai","780000"},
{"101","Sachin","700000"}};
String column[]={"ID","NAME","SALARY"};
JTable jt=new JTable(data,column);
jt.setBounds(30,40,200,300);
JScrollPane sp=new JScrollPane(jt);
f.add(sp);
f.setSize(300,400);
f.setVisible(true);
}
Public static void main(String[] args) {
new TableExample();
}
}
Output
JMenu
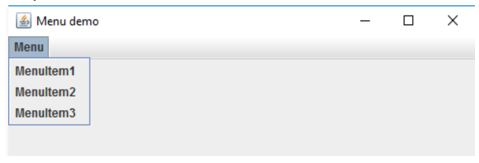
JMenu, JMenuBar, and JMenuItems are Java Swing components. JMenuBar is a menu bar implementation. At least one JMenu object is present in the JMenuBar. When these items are selected, a popup appears that shows at least one JMenuItems. It essentially communicates with a menu. It has a couple JMenuItem Objects in it. It could also include JMenu Objects (or submenu). The Menu class corresponds to the drawdown menu component of a menu bar. The JMenuItem class represents a real menu item. JMenuItem or one of its subclasses should be used for anything in a menu.
The JMenu class's object is a pull-down menu component that appears in the menu bar. It is a descendant of the JMenuItem class.
JMenu declaration
Public class JMenu extends JMenuItem implements MenuElement, Accessible
Constructor
● JMenu (): It will build a new Menu without any content.
● JMenu (String name): Creates a new Menu with the name you specify.
● JMenu (String name, Boolean b): Creates a new Menu with a predefined name and decides whether it is a remove menu or not using Boolean esteem. Open and drag a detach menu away from its parent menu bar or menu.
Example
Import java.awt.*;
Import javax.swing.*;
Import java.awt. Event. *;
Public class menu extends JFrame {
// Menu Bar declaration
Static JMenuBar xb;
// JMenu declaration
Static JMenu x;
// Menu items
Static JMenuItem x1, x2, x3;
// frame creation declaration
Static JFrame y;
Public static void main()
{
// frame creation using new keyword
y = new JFrame ("Menu Demo");
// menu bar creation using new keyword
Mb = new JMenuBar ();
// menu creation using new keyword
z = new JMenu("Menu");
// menu item creation using new keyword
x1= new JMenuItem("MenuItem1");
x2= new JMenuItem("MenuItem2");
x2= new JMenuItem("MenuItem3");
// add menu items to menu
x.add(x1);
x.add(x2);
x.add(x3);
// add menu to menu bar
Xb.add(z);
// add menubar to frame
y.setJMenuBar(xb);
// set the size of the frame
y.setSize(500, 500);
y.setVisible(true);
}
}
Output
LayoutManagers are used to organize components in a specific way. The Java LayoutManagers help us control the size and positioning of components in GUI forms. The interface LayoutManager is implemented by all kinds of layout managers. The layout managers are represented by the following classes:
- Java.awt.BorderLayout
- Java.awt.FlowLayout
- Java.awt.GridLayout
- Java.awt.CardLayout
- Java.awt.GridBagLayout
- Javax.swing.BoxLayout
- Javax.swing.GroupLayout
- Javax.swing.ScrollPaneLayout
- Javax.swing.SpringLayout etc.
BorderLayout
The BorderLayout is used to divide the components into five different regions: north, south, east, west, and middle. Only one component can be present in each region (area). That is the standard frame or window arrangement. For each field, the BorderLayout provides five constants:
- Public static final int NORTH
- Public static final int SOUTH
- Public static final int EAST
- Public static final int WEST
- Public static final int CENTER

Fig: Example of border layout
FlowLayout
The FlowLayout is used to line up the components one after another in a line (in a flow). It is the applet or panel's default layout.
Field of flowlayout class
- Public static final int LEFT
- Public static final int RIGHT
- Public static final int CENTER
- Public static final int LEADING
- Public static final int TRAILING
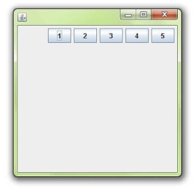
Fig: Example of flowlayout
GridLayout
The GridLayout is used to make a rectangular grid out of the components. Each rectangle displays a single part.
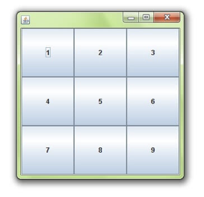
Fig: Example of grid layout
Constructor of gridlayout class
- GridLayout(): creates a grid layout in which each part in a row has one column.
- GridLayout(int rows, int columns): creates a grid layout with the defined rows and columns, but no gaps between them.
- GridLayout(int rows, int columns, int hgap, int vgap): creates a grid with the specified rows and columns, as well as the specified horizontal and vertical gaps.
CardLayout
The CardLayout class organizes the components such that only one is available at any given time. It is called CardLayout because it treats each part as a card.
Constructors of CardLayout class
- CardLayout(): creates a card layout with no vertical or horizontal gaps.
- CardLayout(int hgap, int vgap): creates a card layout with the horizontal and vertical gaps specified.
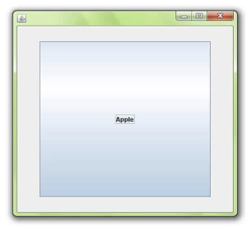
Fig: Example of cardlayout
GridbagLayout
Components may be aligned vertically, horizontally, or along their baseline using the Java GridBagLayout class.
It's possible that the components aren't all the same size. A dynamic, rectangular grid of cells is maintained by each GridBagLayout object. Each portion has a display area that consists of one or more cells. GridBagConstraints is associated with each component. We use the constraints object to organize the display area of the part on the grid. In order to decide component size, the GridBagLayout manages each component's minimum and desired sizes.
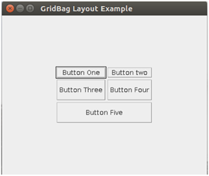
Fig: Example of Gridbaglayout
BoxLayout
The BoxLayout is used to vertically or horizontally organize the elements. BoxLayout offers four constants for this reason. The following are the details:
- Public static final int X_AXIS
- Public static final int Y_AXIS
- Public static final int LINE_AXIS
- Public static final int PAGE_AXIS
Constructor
● BoxLayout(Container c, int axis): creates a box arrangement with the specified axis that arranges the components.
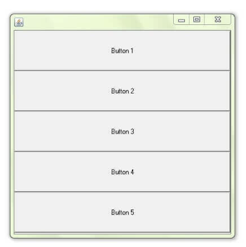
Fig: Example of boxlayout
Key takeaway
LayoutManagers are used to organize components in a specific way. The interface LayoutManager is applied for all types of layout managers.
The BorderLayout is used to divide the components into five different regions: north, south, east, west, and middle.
The FlowLayout is used to line up the components one after another in a line.
The GridLayout is used to make a rectangular grid out of the components. Each rectangle displays a single part.
Components may be aligned vertically, horizontally, or along their baseline using the Java GridBagLayout class.
The mechanism that manages the event and chooses what should happen if it occurs is known as event handling. An event handler is a piece of code that is run when an event happens in this mechanism.
The events are handled by Java using the Delegation Event Model. The standard mechanism for generating and handling events is defined by this model.
The following are the essential players in the Delegation Event Model.
Source − The source of the event is an object on which it occurs. The source is in charge of informing the handler about the event that occurred. Classes for the source object are provided by Java.
Listener − It's sometimes referred to as an event handler. The listener is in charge of coming up with a reaction to an occurrence. The listener is also an object from the standpoint of Java implementation. The listener sits and waits for an event to occur. The listener processes the event after it is received and then returns.
The advantage of this method is that the user interface logic is kept separate from the event generation logic. The user interface element has the ability to outsource event processing to another piece of code.
The listener must be registered with the source object in this model in order for the listener to receive event notifications. This is a cost-effective method of handling the event because only those listeners who want to receive them are notified.
Steps Involved in Event Handling
● Step 1: The user presses the button, which triggers the event.
● Step 2: The concerned event class object is automatically constructed, and information about the source and the event is provided within the same object.
● Step 3: The event object is passed to the registered listener class's method.
● Step 4: The method is called and executed.
Example
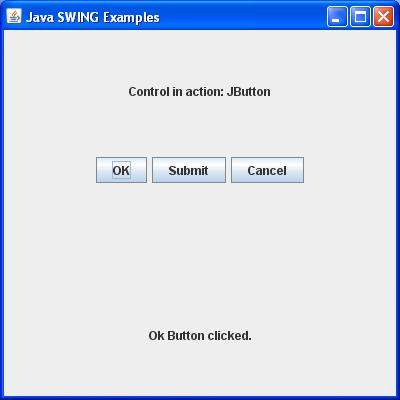
SwingControlDemo.java
Package com.tutorialspoint.gui;
Import java.awt.*;
Import java.awt.event.*;
Import javax.swing.*;
Public class SwingControlDemo {
private JFrame mainFrame;
private JLabel headerLabel;
private JLabel statusLabel;
private JPanel controlPanel;
public SwingControlDemo(){
prepareGUI();
}
public static void main(String[] args){
SwingControlDemo swingControlDemo = new SwingControlDemo();
swingControlDemo.showEventDemo();
}
private void prepareGUI(){
mainFrame = new JFrame("Java SWING Examples");
mainFrame.setSize(400,400);
mainFrame.setLayout(new GridLayout(3, 1));
headerLabel = new JLabel("",JLabel.CENTER );
statusLabel = new JLabel("",JLabel.CENTER);
statusLabel.setSize(350,100);
mainFrame.addWindowListener(new WindowAdapter() {
public void windowClosing(WindowEvent windowEvent){
System.exit(0);
}
});
controlPanel = new JPanel();
controlPanel.setLayout(new FlowLayout());
mainFrame.add(headerLabel);
mainFrame.add(controlPanel);
mainFrame.add(statusLabel);
mainFrame.setVisible(true);
}
private void showEventDemo(){
headerLabel.setText("Control in action: Button");
JButton okButton = new JButton("OK");
JButton submitButton = new JButton("Submit");
JButton cancelButton = new JButton("Cancel");
okButton.setActionCommand("OK");
submitButton.setActionCommand("Submit");
cancelButton.setActionCommand("Cancel");
okButton.addActionListener(new ButtonClickListener());
submitButton.addActionListener(new ButtonClickListener());
cancelButton.addActionListener(new ButtonClickListener());
controlPanel.add(okButton);
controlPanel.add(submitButton);
controlPanel.add(cancelButton);
mainFrame.setVisible(true);
}
private class ButtonClickListener implements ActionListener{
public void actionPerformed(ActionEvent e) {
String command = e.getActionCommand();
if( command.equals( "OK" )) {
statusLabel.setText("Ok Button clicked.");
} else if( command.equals( "Submit" ) ) {
statusLabel.setText("Submit Button clicked.");
} else {
statusLabel.setText("Cancel Button clicked.");
}
}
}
}
Output
Key takeaway
The events are handled by Java using the Delegation Event Model. The standard mechanism for generating and handling events is defined by this model.
References:
- Herbert Schildt, Java2: The Complete Reference, Tata McGraw-Hill
- Object Oriented Programming with JAVA Essentials and Applications , McGraw Hill
- Core and Advanced Java, Black Book- dreamtech
- Murach’s Java Servlets and JSP