Unit - 5
Swing (JFC) and JavaFX
Q1) What's Java Swing?
A1)
- Swing is a GUI toolkit for Java. It is one part of the Java Foundation Classes (JFC).
- Swing includes graphical user interface (GUI) widgets such as text boxes, buttons, split-panes, and tables.
- Swing widgets provide more sophisticated GUI components than the earlier Abstract Window Toolkit.
- Since they are written in pure Java, they run the same on all platforms, unlike the AWT which is tied to the underlying platform's windowing system.
- Swing supports pluggable look and feel – not by using the native platform's facilities, but by roughly emulating them.
- This means you can get any supported look and feel on any platform.
- The disadvantage of lightweight components is slower execution.
- The advantage is uniform behavior on all platforms.
Q2) What Is JFC?
A2)
JFC stands for Java Foundation Classes.
The Java Foundation Classes (JFC) are a set of Java class libraries provided as part of Java 2 Platform, Standard Edition (J2SE) to support building graphics user interface (GUI) and graphics functionality for client applications that will run on popular platforms such as Microsoft Windows, Linux, and Mac OSX.
Q3) What is an event and what are the models available for event handling?
A3)
Changing the state of an object is called an event
An event is an event object that describes a state of change. In other words, event occurs when an action is generated, like pressing a key on keyboard, clicking mouse, etc.
There different types of models for handling events are event-inheritance model and event-delegation model
Q4) What are Heavyweight Components and Lightweight Component?
A4)
A heavyweight component is one that is associated with its own native screen resource (commonly known as a peer).
A lightweight component is one that "borrows" the screen resource of an ancestor (which means it has no native resource of its own -- so it's "lighter").
Q5) What is Double Buffering?
A5)
Double buffering is the process of use of two buffers rather than one to temporarily hold data being moved to and from an I/O device.
Double buffering increases data transfer speed because one buffer can be filled while the other is being emptied.
Q6) What is new in JavaFX?
A6)
JavaFX 2 is the next step in the evolution of Java as a rich client platform. It is designed to provide a lightweight, hardware-accelerated Java UI platform for enterprise and business applications.
Feature highlights:
- Functionality exposed through Java API.
- New hardware accelerated graphics pipeline (Prism).
- FXML—a new XML-based markup language for defining user interfaces.
- Over 60 UI controls and charts with CSS styling.
- Web component (WebView) to render HTML and JavaScript content inside a Java application, with JavaScript to Java bridge.
- Support for JavaFX in Swing and SWT applications.
- Self-contained application packaging with platform-specific installers
Multi-touch support - New media engine for stable, consistent media playback, including support for H.264 video and AAC audio.
- JavaFX Scene Builder, a visual UI design tool
Q7) What is the difference between a Window and a Frame?
A7)
The Frame class extends Window to define a main application window that can have a menu bar. A window can be model.
Q8) Explain the JavaFX API?
A8)
1. Javafx.stage holds the top level container classes for JavaFX application.
2. Javafx.scene provides classes and interfaces to support the scene graph.
3. In addition, it also provides sub-packages such as canvas, chart, control, effect, image, input, layout, media, paint, shape, text, transform, web, etc.
4. There are several components that support this rich API of JavaFX.
5. Javafx.animation has classes to add transition based animations such as fill, fade, rotate, scale and translation, to the JavaFX nodes.
6. Javafx.application contains a set of classes responsible for the JavaFX application life cycle.
7. Javafx.css contains classes to add CSS?like styling to JavaFX GUI applications.
8. Javafx.event contains classes and interfaces to deliver and handle JavaFX events.
9. Javafx.geometry contains classes to define 2D objects and perform operations on them.
Q9) What type of license is JavaFX available under?
A9)
JavaFX is available under the same license and business model as Java SE. This includes the ability for third party developers to distribute the runtime libraries with their application(s), subject to the terms and conditions of the license.
Q10) What type of support is available for JavaFX?
A10)
Java SE Support: JavaFX is part of the Java SE technologies supported for Oracle commercial customers.
Community support: applications developers are encouraged to visit the JavaFX forum, or log in to JIRA to submit bug reports and request new features.
Q11) Is Javafx Open Source?
A11)
At this time, the JavaFX UI Controls source code has been contributed to the OpenJFX open-source project; other JavaFX components are expected to follow in multiple phases.
The code is available under the GPL v2 with Classpath Exception license, similar to other projects in OpenJDK.
Q12) What is a Stage in JavaFX?
A12)
A javafx.stage.Stage in JavaFX is a top-level container that hosts a Scene, which consists of visual elements. The platform creates the primary stage and pass it to the start(Stage s) method of the Application class.
Q13) Explain the basic structure of a JavaFX application.
A13)
The main class for a JavaFX application extends the javafx.application.Application class.
The start() method is the main entry point for all JavaFX applications. So your main class will override it.
A JavaFX application defines the user interface container by means of a stage and a scene. The JavaFX Stage class is the top-level JavaFX container. The JavaFX Scene class is the container for all content.
In JavaFX, the content of the scene is represented as a hierarchical scene graph of nodes.
The main() method is not required for JavaFX application, however useful to launch in IDE without JavaFX launcher.
Import javafx.application.Application;
import javafx.scene.Scene;
import javafx.scene.control.Button;
import javafx.scene.layout.StackPane;
import javafx.stage.Stage;
Public class Main extends Application {
public static void main(String[] args) {
launch(args);
}
@Override
public void start(Stage primaryStage) throws Exception {
primaryStage.setTitle(“Welcome to Javapedia.net”);
Button b = new Button(“Click”);
StackPane layout = new StackPane();
layout.getChildren().add(b);
Scene scene = new Scene(layout, 300, 300);
primaryStage.setScene(scene);
primaryStage.show();
}
}
Q14) Is JavaFX replacing swing as the new client UI Library for JavaC?
A14)
Yes. However, Swing will remain part of the Java SE specification for the foreseeable future, and therefore included in the JRE.
While we recommend developers to leverage JavaFX APIs as much as possible when building new applications, it is possible to extend a Swing application with JavaFX, allowing for a smoother transition.
Q15) Does JavaFX provide support for audio and video codecs?
A15)
JavaFX provides a common set of APIs that make it easy to include media playback within any JavaFX application. The media formats currently supported are the following:
- Audio: MP3; AIFF containing uncompressed PCM; WAV containing uncompressed PCM; MPEG-4 multimedia container with
Advanced Audio Coding (AAC) audio
- Video: FLV containing VP6 video and MP3 audio; MPEG-4 multimedia container with H.264/AVC (Advanced Video Coding) video compression.
Q16) Does JavaFX2 support JavaFX Script?
A16)
Starting with JavaFX 2.0, JavaFX Script is no longer supported. However, you can use other scripting languages that run on the JVM, such as Groovy or Scala.
Q17) How does JavaFX compare to Flash and Flex?
A17)
Flex pretty good but also started to use JavaFX. JavaFX seems to focus more on low level drawing operations and animations.
Less on creating standard UIs like Flex. On the other side JavaFX Also Supports Swing Components as Well as Data Binding, Which Makes It Appear More Like Flex.
JavaFX is one of the recent additions to the Java Platform. Its aim is to “to simplify and speed the creation and deployment of high-impact content for a wide range of devices” Let’s start with a textfield, a button and a list. Declaring the interface with JavaFX is rather simple.
Import javafx.ui*;
Frame{
Visible: true
Content :Box {
Orientation : VERTICAL
Content : [
TextField {
},
Button {
Text: “Add”
},
ListBox {
}
]
}
}
Q18) How to create JavaFX Application?
A18)
Step 1: Extend javafx.application.Application and override start()
- We have studied earlier that start() method is the starting point of constructing a JavaFX application therefore we need to first override start method of javafx.application.Application class.
- Object of the class javafx.stage.Stage is passed into the start() method therefore import this class and pass its object into start method. JavaFX.application.Application needs to be imported in order to override start method.
- Package application;
- Import javafx.application.Application;
- Import javafx.stage.Stage;
- Public class Hello_World extends Application
- {
- Public void start(Stage primaryStage) throws Exception
{ // TODO Auto-generated method stub
}
7. }
Step 2: Create a Button
A button can be created by instantiating the javafx.scene.control.Button class.
- Package application;
- Import javafx.application.Application;
- Importjavafx.scene.control.Button;
- Import javafx.stage.Stage;
- Public class Hello_World extends Application
- {
- Public void start(Stage primaryStage) throws Exception
{ // TODO Auto-generated method stub
8. Buttonbtn1=newButton("Say, Hello World");
9. }
10. }
Step 3: Create a layout and add button to it
JavaFX provides the number of layouts. We need to implement one of them in order to visualize the widgets properly. It exists at the top level of the scene graph and can be seen as a root node. All the other nodes (buttons, texts, etc.) need to be added to this layout.
In this application, we have implemented StackPane layout. It can be implemented by instantiating javafx.scene.layout.StackPane class. The code will now look like following.
- Package application;
- Import javafx.application.Application;
- Import javafx.scene.control.Button;
- Import javafx.stage.Stage;
- Import javafx.scene.layout.StackPane;
- Public class Hello_World extends Application
- {
- Public void start(Stage primaryStage) throws Exception
- { // TODO Auto-generated method stub
- Button btn1=new Button("Say, Hello World");
- StackPane root=new StackPane();
- Root.getChildren().add(btn1);
}
13. }
Step 4: Create a Scene
- The layout needs to be added to a scene. Scene remains at the higher level in the hierarchy of application structure.
- It can be created by instantiating javafx.scene.Scene class.
- We need to pass the layout object to the scene class constructor. Our application code will now look like following.
- Package application;
- Import javafx.application.Application;
- Import javafx.scene.Scene;
- Import javafx.scene.control.Button;
- Import javafx.stage.Stage;
- Import javafx.scene.layout.StackPane;
- Public class Hello_World extends Application
- {
- Public void start(Stage primaryStage) throws Exception
{ // TODO Auto-generated method stub
10. Button btn1=new Button("Say, Hello World");
11. StackPane root=new StackPane();
12. root.getChildren().add(btn1);
13. Scene scene=new Scene(root);
14. }
15. }
We can also pass the width and height of the required stage for the scene in the Scene class constructor.
Step 5: Prepare the Stage
- Javafx.stage.Stage class provides some important methods which are required to be called to set some attributes for the stage.
- We can set the title of the stage.
We also need to call show() method without which, the stage won't be shown.
- Package application;
- Import javafx.application.Application;
- Import javafx.scene.Scene;
- Import javafx.scene.control.Button;
- Import javafx.stage.Stage;
- Import javafx.scene.layout.StackPane;
- Public class Hello_World extends Application
{
8. public void start(Stage primaryStage) throws Exception
{ // TODO Auto-generated method stub
9. Button btn1=new Button("Say, Hello World");
10. StackPane root=new StackPane();
11. root.getChildren().add(btn1);
12. Scene scene=new Scene(root);
13. primaryStage.setScene(scene);
14. primaryStage.setTitle("First JavaFX Application");
15. primaryStage.show();
16. }
17. }
Step 6: Create an event for the button
- As our application prints hello world for an event on the button. We need to create an event for the button.
- For this purpose, call setOnAction() on the button and define a anonymous class Event Handler as a parameter to the method.
- Inside this anonymous class, define a method handle() which contains the code for how the event is handled. In our case, it is printing hello world on the console.
- Package application;
- Import javafx.application.Application;
- Import javafx.event.ActionEvent;
- Import javafx.event.EventHandler;
- Import javafx.scene.Scene;
- Import javafx.scene.control.Button;
- Import javafx.stage.Stage;
- Import javafx.scene.layout.StackPane;
- Public class Hello_World extends Application
- {
- Publicvoid start(Stage primaryStage) throws Exception
- { // TODO Auto-generated method stub
- Button btn1=new Button("Say, Hello World");
- Btn1.setOnAction(new EventHandler<ActionEvent>()
- {
- Publicvoid handle(ActionEvent arg0)
- { // TODO Auto-generated method stub
- System.out.println("hello world");
- }
- }}
- StackPane root=new StackPane();
- Root.getChildren().add(btn1);
- Scene scene=new Scene(root,600,400);
- PrimaryStage.setScene(scene);
- PrimaryStage.setTitle("First JavaFX Application");
- PrimaryStage.show();
- }
- }
Step 7: Create the main method
We have configured all the necessary things which are required to develop a basic JavaFX application but this application is still incomplete.
We have not created main method yet. Hence, at the last, we need to create a main method in which we will launch the application i.e. will call launch() method and pass the command line arguments (args) to it. The code will now look like following.
Package application;
Import javafx.application.Application;
Import javafx.event.ActionEvent;
Import javafx.event.EventHandler;
Import javafx.scene.Scene;
Import javafx.scene.control.Button;
Import javafx.stage.Stage;
Import javafx.scene.layout.StackPane;
Public class Hello_World extends Application{
Public void start(Stage primaryStage) throws Exception
{ // TODO Auto-generated method stub
Button btn1=new Button("Say, Hello World");
Btn1.setOnAction(new EventHandler<ActionEvent>() {
Public void handle(ActionEvent arg0) {
// TODO Auto-generated method stub
System.out.println("hello world");
}
});
StackPane root=new StackPane();
Root.getChildren().add(btn1);
Scene scene=new Scene(root,600,400);
PrimaryStage.setTitle("First JavaFX Application");
PrimaryStage.setScene(scene);
PrimaryStage.show();
}
Publicstaticvoid main (String[] args)
{ launch(args);
}
}
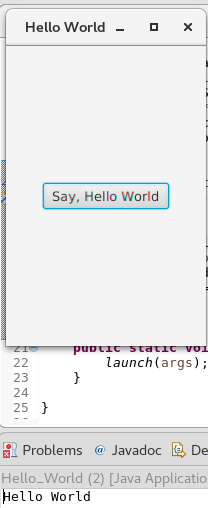
The Application will produce the following output on the screen.

Q19) What is JavaFX User Interface control? Give the example of the JavaFX Image Input?
A19)
The graphical user interface of every desktop application mainly considers UI elements, layouts and behaviour.
The package javafx.scene.control provides all the necessary classes for the UI components like Button, Label, etc.
Control | Description |
Label | Label is a component that is used to define a simple text on the screen. Typically, a label is placed with the node, it describes. |
Button | Button is a component that controls the function of the application. Button class is used to create a labelled button. |
RadioButton | The Radio Button is used to provide various options to the user. The user can only choose one option among all. A radio button is either selected or deselected. |
CheckBox | Check Box is used to get the kind of information from the user which contains various choices. User marked the checkbox either on (true) or off(false). |
TextField | Text Field is basically used to get the input from the user in the form of text. Javafx.scene.control.TextField represents TextField |
PasswordField | PasswordField is used to get the user's password. Whatever is typed in the passwordfield is not shown on the screen to anyone. |
HyperLink | HyperLink are used to refer any of the webpage through your appication. It is represented by the class javafx.scene.control.HyperLink |
Slider | Slider is used to provide a pane of options to the user in a graphical form where the user needs to move a slider over the range of values to select one of them. |
ProgressBar | Progress Bar is used to show the work progress to the user. It is represented by the class javafx.scene.control.ProgressBar. |
ProgressIndicator | Instead of showing the analogue progress to the user, it shows the digital progress so that the user may know the amount of work done in percentage. |
ScrollBar | JavaFX Scroll Bar is used to provide a scroll bar to the user so that the user can scroll down the application pages. |
Menu | JavaFX provides a Menu class to implement menus. Menu is the main component of any application. |
ToolTip | JavaFX ToolTip is used to provide hint to the user about any component. It is mainly used to provide hints about the text fields or password fields being used in the application. |
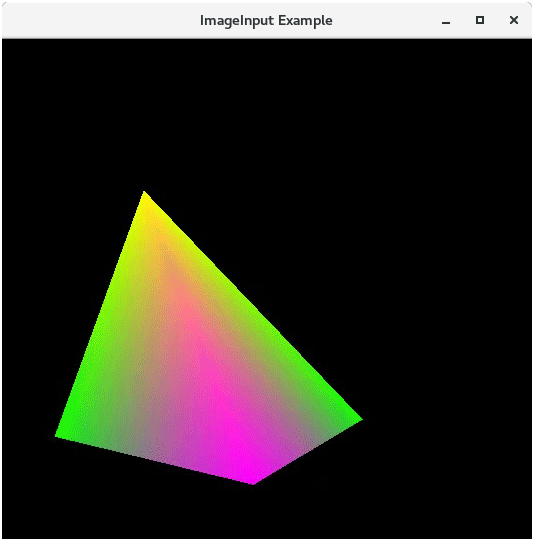
JavaFX Image Input
- This effect is mainly used to pass the unmodified image as an input for the other effects.
- The class javafx.scene.effect.ImageInput represents Image Input effect.
The class contains three constructors described below.
- ImageInput() : Instantiate Image Input class with default parameters.
- ImageInput(Image source) : Instantiate Image Input with the specified image source.
- ImageInput(Image source, Double X, Double Y) : Instantiate ImageI nput with the default image source and specified coordinates
EXAMPLE:
Package application;
Import javafx.application.Application;
Import javafx.scene.Group;
Import javafx.scene.Scene;
Import javafx.scene.effect.ImageInput;
Import javafx.scene.image.Image;
Import javafx.scene.paint.Color;
Import javafx.scene.shape.Rectangle;
Import javafx.stage.Stage;
Public class ImageInputExample extends Application
{
Public void start(Stage primaryStage) throws Exception
{ // TODO Auto-generated method stub
Image img = new Image("https://www.javatpoint.com/jogl/images/jogl-3d-triangle.gif");
ImageInput imginput = new ImageInput();
Rectangle rect = new Rectangle();
Imginput.setSource(img);
Imginput.setX(20);
Imginput.setY(100);
Group root = new Group();
Rect.setEffect(imginput);
Root.getChildren().add(rect);
Scene scene = new Scene(root,530,500,Color.BLACK);
PrimaryStage.setScene(scene);
PrimaryStage.setTitle("ImageInput Example");
PrimaryStage.show();
}
Public static void main(String[] args) {
Launch(args);
}
}

Q20) What is color progression?
A20)
a) In Computer Graphics, Gradient Colors (sometimes called Color Progression) are used to specify the position dependent colors to fill a particular region.
b) The value of the gradient color varies with the position.
c) Gradient colors produce the smooth color transitions on the region by varying the color value continuously with the position.
- Linear Gradient
- Radial Gradient these are two types of Gradient color transitions:
Linear Gradient
To apply linear gradient patterns to the shapes, we need to instantiate the Linear Gradient class.
Constructors
The Constructor of this class accepts five parameters:
New LinearGradient(startX, startY, endX, endY, Proportional, CycleMethod, stops)
(startX, startY): represents x and y coordinates of the starting point of the gradient color.
(endX, endY): represents x and y coordinates of the ending point of the gradient color.
Proportional: This is a boolean type property. If this is true then the starting and ending point of the gradient color will become proportional.
Cycle Method: This defines the cycle method applied to the gradient.
Stops: this defines the color distribution along the gradient.
Example:
Package application;
Import javafx.application.Application;
Import javafx.scene.Scene;
Import javafx.scene.layout.VBox;
Import javafx.scene.paint.Color;
Import javafx.scene.paint.CycleMethod;
Import javafx.scene.paint.LinearGradient;
Import javafx.scene.paint.Stop;
Import javafx.scene.shape.Rectangle;
Import javafx.stage.Stage;
Public class Shape_Example extends Application
{ public void start(Stage primaryStage)
{ VBox root = new VBox();
Final Scene scene = new Scene(root,300, 250);
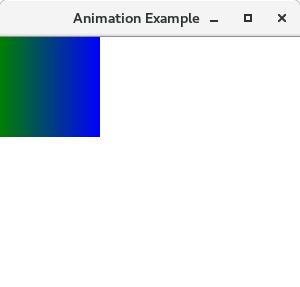
Stop[] stops = new Stop[] { new Stop(0, Color.GREEN), new Stop(1, Color.BLUE)};
LinearGradient linear = new LinearGradient(0, 0, 1, 0, true, CycleMethod.NO_CYCLE, stops);
Rectangle rect = new Rectangle(0, 0, 100, 100);
Rect.setFill(linear);
Root.getChildren().add(rect);
PrimaryStage.setScene(scene);
PrimaryStage.setTitle("Animation Example");
PrimaryStage.show();
}
Public static void main(String[] args)
{ launch(args);
} }
Output:

Radial Gradient
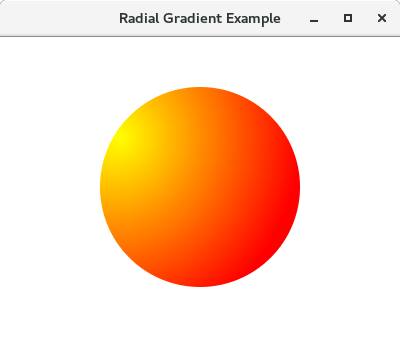
To apply Radial gradient to the shapes, we need to instantiate javafx.scene.paint.RadialGradient class.
Constructor
Public RadialGradient(double focusAngle, double focusDistance, double centerX, double centerY, double radius, boolean proportional, CycleMethod cycleMethod, Stops? stops)
Example
Package application;
Import javafx.application.Application;
Import javafx.scene.Group;
Import javafx.scene.Scene;
Import javafx.scene.paint.Color;
Import javafx.scene.paint.CycleMethod;
Import javafx.scene.paint.RadialGradient;
Import javafx.scene.paint.Stop;
Import javafx.scene.shape.Circle;
Import javafx.stage.Stage;
Public class RadialGradientClass extends Application
{
Public static void main(String[] args)
{
Application.launch(args);
}
Public void start(final Stage primaryStage) {
PrimaryStage.setTitle("Radial Gradient Example");
Group root = new Group();
Scene scene = new Scene(root, 400, 300, Color.WHITE);
PrimaryStage.setScene(scene);
AddRectangle(scene);
PrimaryStage.show();
}
Private void addRectangle(final Scene scene) {
Circle C = new Circle(200,150,100);
RadialGradient gradient1 =
NewRadialGradient(0,.1,100,100, 200, false,
CycleMethod.NO_CYCLE, new Stop(0, Color.YELLOW),
New Stop(1, Color.RED));
C.setFill(gradient1);
Final Group root = (Group) scene.getRoot();
Root.getChildren().add(C);
}
}
