Unit 3
Building Construction
1. What do you mean by building construction?
Building construction is the process of adding structure to real property. The vast majority of building construction projects are small renovations, such as addition of a room, or renovation of a bathroom. Often, the owner of the property acts as laborer, paymaster, and design team for the entire project. However, all building construction projects include some elements in common - design, financial, and legal considerations. Many projects of varying sizes reach undesirable end results, such as structure collapse, cost overruns, and/or litigation. For this reason, those with experience in the field make detailed plans and maintain careful oversight during the project to ensure a positive outcome.
Building construction is procured privately or publicly utilizing various delivery methodologies, including hard bid, negotiated price, traditional, management contracting, construction management-at-risk, design & build and design-build bridging.
Residential construction practices, technologies, and resources must conform to local building authority regulations and codes of practice. Materials readily available in the area generally dictate the construction materials used (e.g. Brick versus stone, versus timber). Cost of construction on a per square metre (or per square foot) basis for houses can vary dramatically based on site conditions, local regulations, economies of scale (custom designed homes are always more expensive to build) and the availability of skilled tradespeople. As residential (as well as all other types of construction and manufactured homes) can generate a lot of waste, careful planning again is needed here.
The most popular method of residential construction in the United States is wood framed construction. As efficiency codes have come into effect in recent years, new construction technologies and methods have emerged. University Construction Management departments are on the cutting edge of the newest methods of construction intended to improve efficiency, performance and reduce construction waste.
Components of Building Area Considerations:
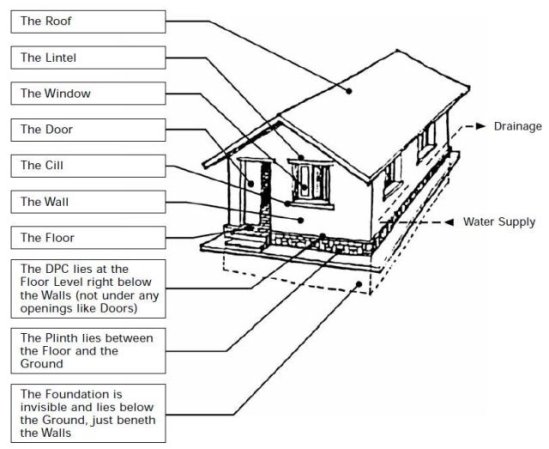
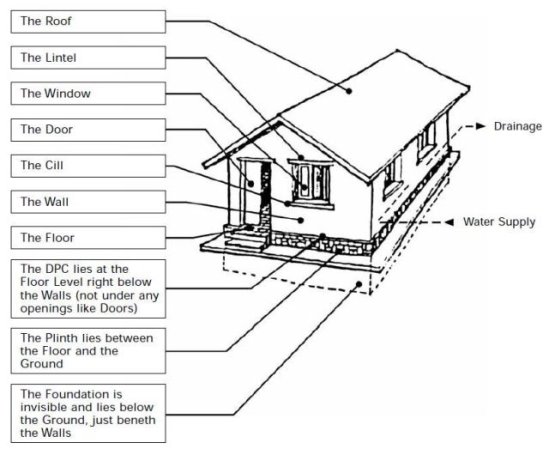
A building consists of following basic components:
2. Explain the components of building.
1. FOUNDATION
A foundation is necessary to evenly distribute the entire building load on the soil in such a manner that no damaging settlements take place. Hence, the foundations need to be constructed on good/solid ground.
2. PLINTH
A plinth is normally constructed just above the ground level and immediately after the foundation. It raises the floor above the ground level and herewith prevents surface water from entering the building.
3. DAMP PROOF COURSE (DPC)
Damp proof course is a layer of water proofing material such as asphalt or waterproof cement. Walls are constructed above the damp proof course.
Damp proof course prevents surface water from rising into the walls.
Dampness reduces the strength of the walls and creates unhealthy living conditions. Also, it affects the paint and plaster and increasing the cost of maintenance.
Damp proofing layer is not required where a plinth beam is constructed, because the plinth beam already performs like a DPC.
4. PLINTH BEAM
A plinth beam is constructed depending upon the type of the structure of the building and nature of the soil. It provides additional stability in regard to settlements of the building and earthquake damages.
5. FLOOR
This is the surface on which we do most of our activities. Floorings is laid over the filling of the plinth and on subsequent floors.
Flooring can be done with different materials, but care must be given that the ground below the floor is well compacted. Flooring is done to prevent dampness from rising to the top and to have a firm platform that can be kept hygienic and clean.
6. WALLS
Walls are the vertical elements on which the roof finally rests. They can be made of different materials like bricks, stones, mud, concrete blocks, lateritic blocks etc. If the walls are very long, columns can be provided to carry the roof.
Walls provide privacy and enclosure. Walls also provide security and protection against natural elements such as wind, rain and sunshine.
Openings are to be provided in wall for access and ventilation.
7. OPENINGS
Openings are normally provided in the walls as door, windows and ventilators.
Doors provide access; windows and ventilators provide light and ventilation.
Lintels are constructed just above the openings. It is normally a stone slab or a concrete slab.
Sill is the part of the wall that is just below the window.
Lintels are constructed to hold up the walls above the openings. In earthquake prone areas a continuous lintel beam is provided all over the walls.
8. STAIRS
A stair is a sequence of steps and it is provided to afford the means of ascent and descent between the floors and landings.
The apartment or room of a building in which stair is located is called staircase. The space or opening occupied by the stair is called a stairway.
There are different kind of stairs are used in buildings, like RCC stair, wooden stair, metal stair, brick stair etc.
9. ROOF
The roof provides protection for the building and the people living in it. The roof rests on the walls and requires proper anchoring so that wind and other mechanical impact cannot destroy it. A roof can have different shapes but it is always either flat or sloping.
Roof is typically made of RCC, stone slab, tiles etc.
10. SURFACES / FINISHES
External finishes are the outer most layer of protection, which protect the structure from weathering. Internal finishes are the layers given on internal faces. They give durability and pleasing appearance to the inside.
3. Explain the methods of building layout.
Methods for Building Layout:
For a simple building layout, such as a rectangle, the outline of the building is marked by a line tied to corner posts - a nail in the top of the post can be used to attach the line to. A theodolite, site square or builder’s square is used to turn off 90-degree angles for the remaining corners. Ranging rods may be required to establish a straight line between corner posts.
Corner posts are usually 50 x 50mm timber posts driven firmly into the ground, with a nail in the post’s centre. The outline may be marked on the ground with dry lime or similar powder. Timber profile boards can be used at the corners. Profile boards are typically between 0.6-1m in height and comprise two 50 x 50mm posts driven at least 600mm into the ground, with a 150 x 38mm crossboard.
Where the outline of a building is more complex than a simple rectangle, it may be necessary to establish a range of points in the same way as for laying out a simple rectangle. However, great care is required, as small errors are more likely to be introduced as more points are positioned. Often the easiest way of laying out an irregular building shape is to first lay out a large rectangle which will enclose the entire building or the greater part of it. Once this is done, deductions and alterations can be made to obtain the precise layout required.
Trenches
The layout of trenches establishes the excavation size, shape and direction, as well as the width and position of walls. Trenches are excavated once the building outline has been set out. The width is often marked with a line of dots of dry lime powder for accurate excavation by hand, whereas the centre line is marked for accurate machine excavation.
Outline profile boards are often used to control trench positioning, width and depth. In order that they do not obstruct the excavation work, profile boards should be set up at least 2m clear of the trench positions. The level of the profile crossboard should be related to the site datum and fixed at a convenient height above ground level, often with cords strung between two profiles at either end of the trench. Bands can be painted on the crossboard for identification purposes.
Pegs are often driven into the bottom of the trench to mark the top of the concrete strip that is subsequently poured.
The corners of walls are transferred from intersecting cord lines to mortar spots on the concrete foundations, using a spirit level for accuracy.
Th cutting of trenches needs to be undertaken with great care, especially if they are to be left open for an extended period as there is the possibility of the sides caving in.
Reduced level excavations
The overall outline of a reduced level area can be set out working from a baseline. Corner posts are fixed to the outline of the excavation area and the outline marked with dry sand or similar material. To control the depth of the excavation, sight rails are set up at a convenient height and at positions which will enable a traveller to be used.
A traveller is a profile board with a fixed height, used for controlling excavated levels between profile boards. By placing the traveller in the sightline between two level boards, it is possible to see whether or not the excavation has been carried out to correct levels. The height of the traveller is the desired level of the sight rail minus the formation level of the excavated area.
Framed building
Framed buildings are usually related to a grid, often set out from a baseline. The intersections of the grid lines mark the centre points for isolated or pad foundations.
The layout of the grid is established using a theodolite and the grid intersections marked using pegs. Once the grid has been set out, offset pegs or profiles can be fixed clear of any subsequent excavation work. Control of excavation depth can be by means of a traveller sighted between sight rails or by level and staff related to a site datum.
Damp Proofing:
Damp proofing or a Damp-Proof in construction is a type of moisture control applied to building walls and floors to prevent moisture from passing into the interior spaces. Dampness problems are among the most frequent problems encountered in residences.
Damp proofing is defined by the American Society for Testing and Materials (ASTM) as a material that resists the passage of water with no hydrostatic pressure. Waterproof is defined by the ASTM as a treatment that resists the passage of water under pressure. Generally, damp proofing keeps moisture out of a building, where vapor barriers keep interior moisture from getting into walls. Moisture resistance is not necessarily absolute; it is usually defined by a specific test method, limits, and engineering tolerances.
4. What do you mean by damp proofing?
Damp proofing is accomplished several ways including:
A damp-proof course (DPC) is a barrier through the structure designed to prevent moisture rising by capillary action such as through a phenomenon known as rising damp. Rising damp is the effect of water rising from the ground into property.[2] The damp proof course may be horizontal or vertical.[3] A DPC layer is usually laid below all masonry walls, regardless if the wall is a load bearing wall or a partition wall.
A damp-proof membrane (DPM) is a membrane material applied to prevent moisture transmission. A common example is polyethylene sheeting laid under a concrete slab to prevent the concrete from gaining moisture through capillary action.[4] A DPM may be used for the DPC.
Integral damp proofing in concrete involves adding materials to the concrete mix to make the concrete itself impermeable.
Surface suppressant coating with thin water proof materials such as epoxy resin for resistance to non-pressurized moisture such as rain water or a coating of cement sprayed on such as shotcrete which can resist water under pressure.
Cavity wall construction, such as rainscreen construction, is where the interior walls are separated from the exterior walls by a cavity.
Pressure grouting cracks and joints in masonry materials.
Materials
Materials widely used for damp proofing include:
Flexible materials like butyl rubber, hot bitumen (asphalt), plastic sheets, bituminous felts, sheets of lead, copper, etc.
Semi-rigid materials like mastic asphalt
Rigid materials, like impervious brick, stone, slate, cement mortar, or cement concrete painted with bitumen, etc.
Stones
Mortar with waterproofing compounds
Coarse sand layers under floors
Continuous plastic sheets under floors
Anti Termite Treatment in buildings:
Termites damage household articles like furniture, plywood, clothing, stationery, etc. by feeding on wood and other organic material having cellulose base
Subterranean termites make nest in soil and workers search for wood by burrowing through the ground and making tunnels of mud
They travel through masonry work, brick walls and conduits of the building to the source of food and cause damage to the property and belongings
What is the solution to the problem?
Treating the soil beneath the building and around foundations when it is still in the process of construction is a good way to prevent termite infestation.
Pre-construction anti-termite treatment is attracting attention throughout the world.
The soil in immediate contact with the foundation and floor structure of a building is treated with an insecticide which kills or repels termites thus forming a toxic barrier which is lethal to termite entry.
Pre-construction anti-termite treatment is done in the early stages of construction so as to prevent termite infestation in the constructed building.
The steps involved in Pre-construction anti termite treatment:
Inspection
Site Preparation
Rightful application
Important Points
The pre-construction anti-termite treatment is effective only against subterranean termites and does not give any protection for dry-wood termites or other pests of wood.
After completion of pre-construction anti-termite treatment, if there is any construction/ masonry work in the treated area, the chemical barrier may get disturbed.
In such a situation the concerned authority of the building should inform your Professional Pest Management company so that immediate measures are taken to restore the chemical barrier and ensure prevention of termite entry.
If the customer see any evidence of termites after the treatment, they should report this to the concerned authorities or PMP
Do’s and Don’ts
Each part of the area treated should receive the prescribed dose rate of pesticide for the treatment to be effective
Barrier should be complete and continuous under the whole of the structure to be protected
All foundations should be fully surrounded by and in close contact with the barrier or treated soil
Do not allow personnel to enter the plots where the treatment is in progress
Do not store pesticides in empty containers
5. Explain the types of staircases.
1. Straight
This one is straightforward (literally). Straight stairs feature a single linear flight with no change in direction.
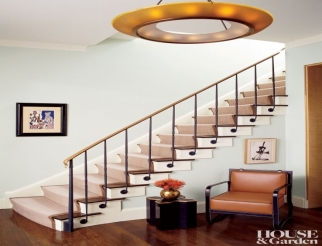
2. L-shaped (a.k.a. Quarter-turn)
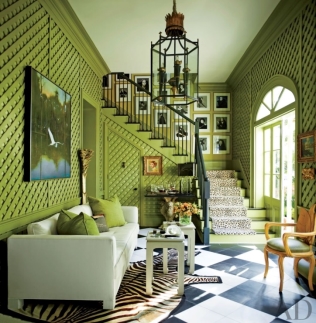
The classic straight style, zhuzhed up a little. In this design, the stairs make a 90-degree turn at some point, going left or right after a landing.
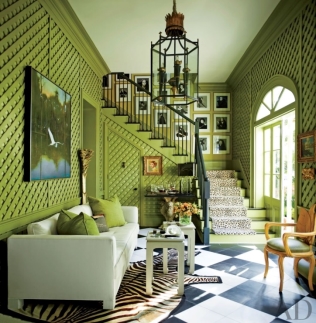
3. Winder
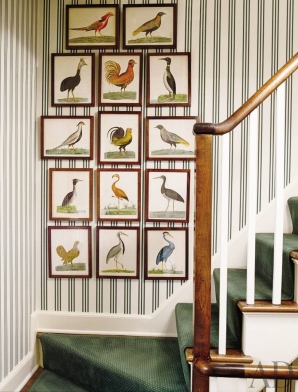
The slightly more complicated sister to the L-shaped staircase. A set of winders—treads that are wider on one side than the other—takes the place of the landing to save space.
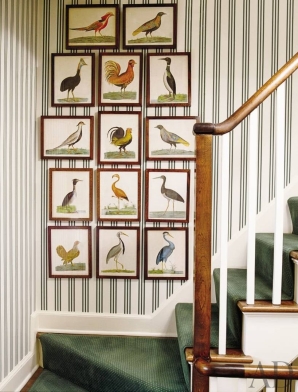
4. U-shaped (a.k.a. Half-turn)
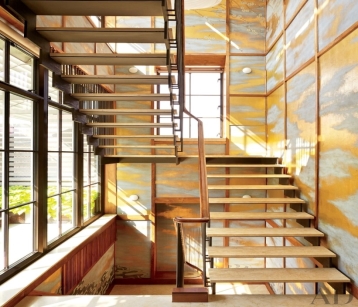
If you've ever promised yourself, you'd take the stairs every day at your office, you've seen this back-to-basics style. The bend is taken even further to form a full U shape, and similar to the L-shaped staircase, a landing separates the two parallel flights.
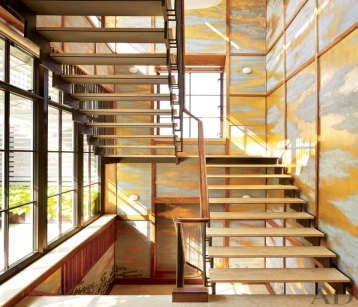
5. Spiral
A compact design centered around a single pole, so that if you looked at it from above, it would form a perfect circle. Something to consider: A spiral staircase's narrow wedge-shaped treads aren't the easiest to traverse. (Avoid them if you're clumsy.)

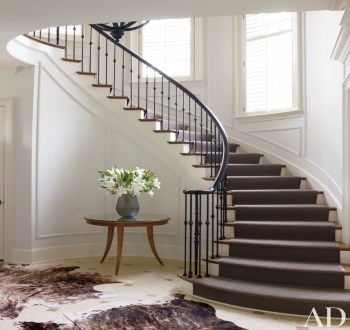
6. Curved
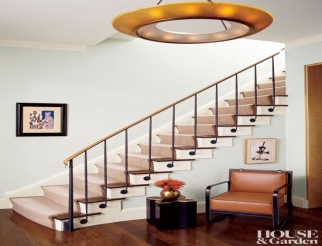
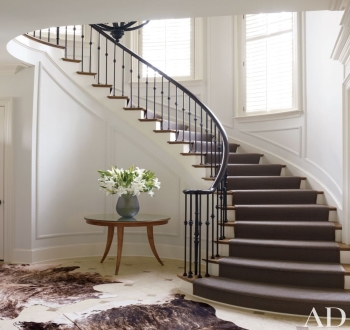
Unlike winder or L-shaped staircases, a curved style has no landings. Instead, the stairs are continuous, following the bend of the banister to make a striking architectural statement.
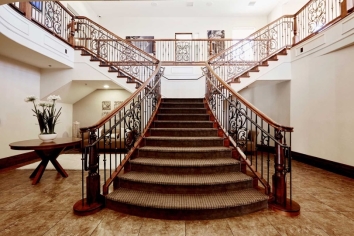
7. Bifurcated
The grandest of them all—this is the style of the iconic Titanic staircase—bifurcated stairs include one sweeping set of steps that splits off into two smaller flights going in opposite directions.
8. Ladder
No explanation needed here. Small-home owners desperate for even the tiniest extra sliver of square footage could go this route.

6. Explain different types of floor.
Timber
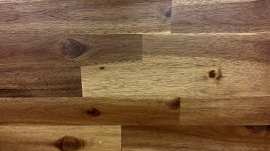
Given that each piece is different, the unique aesthetic of timber is one of the main appeals for its use as flooring. It can also be very durable although it may scratch and is prone to movement. As timber is hygroscopic (sponge-like), it can unsuitable for use in rooms that may be exposed to humidity or moisture, although treatment of the timber can make it resistant to moisture.
There are several options for finishing timber, such as wax, oil or lacquer. The two main types of timber flooring are:
Solid: Each board is made from a single piece of wood, typically 18-20mm thick, usually fitted using tongue-and-groove.
Engineered: Each board consists of three or four layers of laminated timber, held together at right angles by glue to create a plank typically of around 14mm thickness.
Laminate
Laminate flooring is a compressed fiberboard plank covered with an image of a material such as timber, stone, tiles and so on that is then given a protective coating. Laminates can be suitable for rooms that wish to benefit from the aesthetics of a ‘natural’ floor but at a lower cost, with easier installation, and without the risk of being damaged by scratching. Good quality laminates are durable and may have a 20-year warranty. They require minimal maintenance and may be installed with under-floor heating.
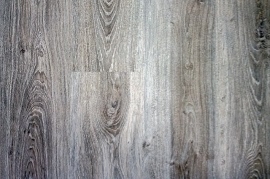
Vinyl
Vinyl flooring can be supplied in rolls or tiles and is generally fixed by gluing. It can be manufactured in a very wide range of colours and profiles (for example studded) and as with laminate flooring can simulate the appearance of other materials.
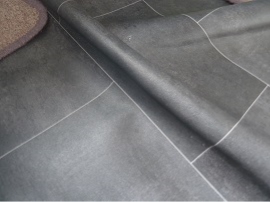
The advantages of using vinyl flooring include:
It is durable.
It is easy to maintain and keep clean.
It is capable of getting wet without buckling, making it suitable for use in bathrooms, kitchens, and so on.
It is easy to install.
It can be relatively inexpensive.
For more information, see Vinyl flooring
7. Explain various types of flooring materials.
Bamboo
Rather than being wood, this is grass that has been compressed into a floor material, and is nailed down or glued together. It has the advantage of being a renewable resource and water resistant.
Cork
Cork is a water-resistant, renewable material that is suitable for a range of spaces, including basement and bathroom installations. Cork can be clicked together in the same way as laminates or can be glued. Cork floors are warm and flexible although they can be damaged easily by sharp objects.
Tile (porcelain or ceramic)
There are many options in terms of colour, texture, shape and finishes of tiles. Because of their hardness they are difficult to scratch or dent, and are also suited to wet environments. However, they are difficult to instal and can break if there is a lack of support beneath the tiles.
Tile (natural stone)
These are generally more expensive than porcelain or ceramic options, but can be more aesthetically pleasing. They need to be properly sealed when installed, a process that will need repeating occasionally to keep the tiles protected.
Carpet
Carpet is made of an upper layer of pile attached to a backing. The pile is usually wool or fibres such as nylon, polyester or polypropylene that are heat-treated after having been twisted together into tufts or woven. There are many varieties of texture, style and colour available and generally carpet is both durable and easy to maintain. Carpet also has insulating properties in terms of both heat and sound. However, carpets can stain quite easily and can be damaged by water and damp.
Rubber
Rubber flooring is made from natural or synthetic materials, including recycled rubber tyres. It is categorised as a type of resilient flooring, since it exhibits characteristics of elasticity or ‘bounce’. This also makes it suitable for dance floors, restaurants or other high traffic areas where foot fatigue and slippage can occur.
Rubber flooring is also becoming a popular option for domestic installations. It’s being used for children’s playrooms, shower and bath rooms, garages, home gymnasiums and other applications that tend to require moisture and stain resistance, sound absorption, durability, elasticity and temperature stability.
Poured floors (mastic asphalt and polymeric)
Mastic asphalt and polymeric floors are poured as liquids and spread out across surfaces to harden and cure. This creates a finish without seams. While asphalt and polymer flooring options are not especially common, they do have advantages in both commercial (especially industrial) and domestic applications where water protection and durability are high priorities.
8. Explain with diagram brick masonry.
Brick Masonry Construction:
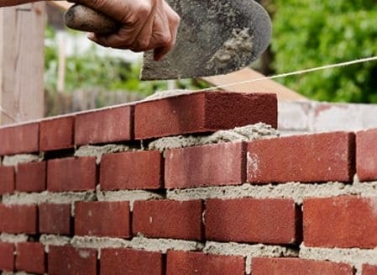
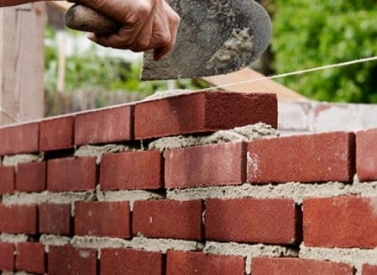
A good masonry should utilize bricks which are sound hard, well burnt, and tough with uniform color, shape, and size.
The bricks should be compact, homogeneous, free from holes, cracks, flaws, air-bubbles, and stone lumps. These bricks should be properly soaked in water for at least two hours before use.
In the brickwork, the bricks should be laid on their beds with the frogs pointing upwards.
The bricks courses should be laid truly horizontal and should have truly vertical joints.
As far as possible the use of bricks-bats should be discouraged.
As far as possible the brick walls should be raised uniformly with proper bond. Generally, the height of brick masonry construction in a day should be less than 1.5 m. The maximum difference in the rising of the walls between the different portions should not be more than one meter.
When the mortar is green, the facet joints should rake to a depth of 12 to 19 mm in order to have a proper key for plastering or pointing. The mortar joints should stuck finish if no plastering or pointing is to do.
In order to ensure a continuous bond between the old and the new, the walls should be stopped with a toothed end.
Finished brickwork in lime mortar should cure for a period of 2 to 3 weeks. This period can reduce to 1 to 2 weeks in the case of brickwork with cement mortar.
In order to carry out the brickwork at a higher level, a single scaffolding is used.
8.What do you mean by stone masonry?
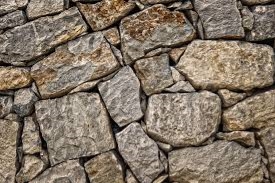
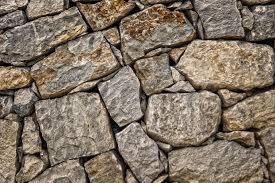
The headers in the heart of the wall are the same size as in the face and extend at least 12 into the core of backing.
Headers in “Walls of feet (600mm) or less in thickness” extend entirely through the wall. The headers shall occupy at least 20% of the face of the wall.
Lay the courses with leaning beds parallel to the natural bed of the material.
Regularly diminish the thicknesses of the courses, if varied, from the bottom of the top of the wall, keep a surplus supply of stones at the site in select from.
Before laying the stone in the wall, shape and dress it so that it will not loosen after it is the place. No dressing of hammering which will loosen the stone will be permitted after it is placed.
Clean each stone and saturated it with water before setting it. Clean and moisten the bed that will receive it.
Bed the stones in a freshly made mortar with full joints. Carefully settle that stones in place before the mortar sets. The joints and beds have an average thickness of not more than 1 inch. (25 mm).
The complete process of working stones masonry construction:
The vertical joints in each course brack with the adjoining course at least 6 inches. (150 mm). If a stone is more or if the joints are breaking after the mortar has set, take the stone up and thoroughly clean the mortar from the bed and joints. Reset the stone in fresh mortar.
Whenever possible, properly point the face joints before the mortar sets. If joints cannot be the point, rake them out to a depth of 1 inch (25mm) before the mortar sets.
Do not smear the stone face surfaces with the mortar forced out of the joints of the mortar used in pointed. Drive the mortar into the joints and finish with an approved pointing tool.
Keep the wall wet while pointing. In hot or dry weather, protect the point masonry from the sun and keep it wet for at least three days after the pointing is finish.
Cavity wall construction:
The use of cavity walls is common in cold countries. However, one should know how they are constructed, and why.
The normal 275 mm (11 inches) cavity wall which is suitable for buildings not exceeding two stories in height, consists of two half brick (4 – 1/2-inch walls with 2 inches cavity).
Cavity Walls are useful in two ways. Firstly, the cavity prevents the dampness from the outer leaf percolating into the inner leaf.
Secondly, they provide excellent insulation from heat and sound.
However, when used in tropical countries, sufficient precautions must be taken to see that they do not become breeding places for lizards and insects.
The inner leaf is found to take a greater portion of the imposed load transmitted by floor and roof.
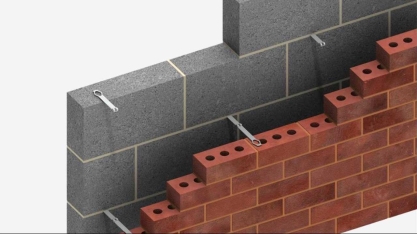
Hence, the two leaves of the wall are bonded together with ties (wall ties) usually placed 900 mm apart vertically and 450 mm horizontally in every 6th course staggered.
This gives more than two ties per square meter.
These wall ties are made from mild steel wires of 3 to 4 mm diameter or MS bars and fabricated to shapes as shown in the below Figure.
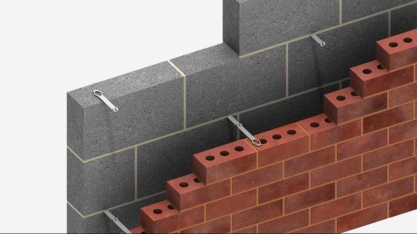
They are dipped in hot tar and sanded or made from galvanized steel to prevent rusting.
In very important works, copper may be used.
Wire ties are placed with their twisted end down to allow water, that may seep inside, to drip down in the cavity.
The bond to be used for both the leaves, when the thickness is half brick, is the stretcher bond.
Where the inner leaves are made thicker for carrying heavy loads. English bond can be used for that part.
Cavity walls require considerable care in design and supervision. Otherwise, their efficiency as insulators against driving rain, heat and cold will be seriously impaired.
Particular care is required at the top and bottom of the walls and around openings in the cavity wall construction.
9. Explain hollow block construction.
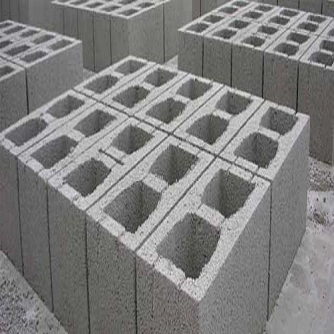
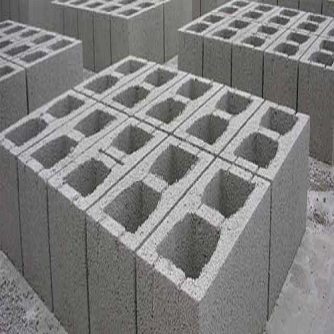
Hollow concrete blocks are substitutes for conventional bricks and stones in building construction. They are lighter than bricks, easier to place and also confer economics in foundation cost and consumption of cement.
Advantage:
-It can withstand heat thus giving fire protection to the house or buildings
-It has better sound performance where it able to block the sound from outside.
-It also offers lower utility cost. Energy efficient homes its inherent mass qualities help keep a home cooler in the summer and warmer in the winter.
-It reduces the nation’s energy needs and produce a cleaner environment
-It offers wide range of non-fade colors.
-It does not require painting for protection from being destroyed like woods.
-It is a load bearing material which is it also help to support the building.
-It is virtually maintenance-free. It never needs painting, caulking or staining.
-It won't burn or rot like other finish materials
Disadvantage:
-During extreme weather, it may cause degradation of the surface due to frost damage.
-It adds a lot of weight to the foundation. Therefore, it increases the stress of the foundation which stronger foundation needed to support these bricks.
- When the brick shows some damage, it is unable to repair that part only but to remove the entire wall section which very costly. Plus, material used are largely related.
- Poorly made bricks such as clinkers and older recycled bricks might be pitted, irregularly shaped, worn or prone to chipping.
- In humid climates, porous brick invites mold. It suffers damage as water and ice expand and contract in its pores.
- Brick is not cost-effective for many home builders. It can be damaged by vines.
The disadvantage of block is not insulated for northern climates because the frame wall is not being insulated. Therefore, the cold air from the outside will transfer into the house. Besides, block is not vulnerable to fire, mold and termites.
10. Explain anti termite treatment in building.
Anti Termite Treatment in buildings:
Termites damage household articles like furniture, plywood, clothing, stationery, etc. by feeding on wood and other organic material having cellulose base
Subterranean termites make nest in soil and workers search for wood by burrowing through the ground and making tunnels of mud
They travel through masonry work, brick walls and conduits of the building to the source of food and cause damage to the property and belongings
What is the solution to the problem?
Treating the soil beneath the building and around foundations when it is still in the process of construction is a good way to prevent termite infestation.
Pre-construction anti-termite treatment is attracting attention throughout the world.
The soil in immediate contact with the foundation and floor structure of a building is treated with an insecticide which kills or repels termites thus forming a toxic barrier which is lethal to termite entry.
Pre-construction anti-termite treatment is done in the early stages of construction so as to prevent termite infestation in the constructed building.
The steps involved in Pre-construction anti termite treatment:
Inspection
Site Preparation
Rightful application
Important Points
The pre-construction anti-termite treatment is effective only against subterranean termites and does not give any protection for dry-wood termites or other pests of wood.
After completion of pre-construction anti-termite treatment, if there is any construction/ masonry work in the treated area, the chemical barrier may get disturbed.
In such a situation the concerned authority of the building should inform your Professional Pest Management company so that immediate measures are taken to restore the chemical barrier and ensure prevention of termite entry.
If the customer sees any evidence of termites after the treatment, they should report this to the concerned authorities or PMP.
Unit 3
Building Construction
1. What do you mean by building construction?
Building construction is the process of adding structure to real property. The vast majority of building construction projects are small renovations, such as addition of a room, or renovation of a bathroom. Often, the owner of the property acts as laborer, paymaster, and design team for the entire project. However, all building construction projects include some elements in common - design, financial, and legal considerations. Many projects of varying sizes reach undesirable end results, such as structure collapse, cost overruns, and/or litigation. For this reason, those with experience in the field make detailed plans and maintain careful oversight during the project to ensure a positive outcome.
Building construction is procured privately or publicly utilizing various delivery methodologies, including hard bid, negotiated price, traditional, management contracting, construction management-at-risk, design & build and design-build bridging.
Residential construction practices, technologies, and resources must conform to local building authority regulations and codes of practice. Materials readily available in the area generally dictate the construction materials used (e.g. Brick versus stone, versus timber). Cost of construction on a per square metre (or per square foot) basis for houses can vary dramatically based on site conditions, local regulations, economies of scale (custom designed homes are always more expensive to build) and the availability of skilled tradespeople. As residential (as well as all other types of construction and manufactured homes) can generate a lot of waste, careful planning again is needed here.
The most popular method of residential construction in the United States is wood framed construction. As efficiency codes have come into effect in recent years, new construction technologies and methods have emerged. University Construction Management departments are on the cutting edge of the newest methods of construction intended to improve efficiency, performance and reduce construction waste.
Components of Building Area Considerations:
A building consists of following basic components:
2. Explain the components of building.
1. FOUNDATION
A foundation is necessary to evenly distribute the entire building load on the soil in such a manner that no damaging settlements take place. Hence, the foundations need to be constructed on good/solid ground.
2. PLINTH
A plinth is normally constructed just above the ground level and immediately after the foundation. It raises the floor above the ground level and herewith prevents surface water from entering the building.
3. DAMP PROOF COURSE (DPC)
Damp proof course is a layer of water proofing material such as asphalt or waterproof cement. Walls are constructed above the damp proof course.
Damp proof course prevents surface water from rising into the walls.
Dampness reduces the strength of the walls and creates unhealthy living conditions. Also, it affects the paint and plaster and increasing the cost of maintenance.
Damp proofing layer is not required where a plinth beam is constructed, because the plinth beam already performs like a DPC.
4. PLINTH BEAM
A plinth beam is constructed depending upon the type of the structure of the building and nature of the soil. It provides additional stability in regard to settlements of the building and earthquake damages.
5. FLOOR
This is the surface on which we do most of our activities. Floorings is laid over the filling of the plinth and on subsequent floors.
Flooring can be done with different materials, but care must be given that the ground below the floor is well compacted. Flooring is done to prevent dampness from rising to the top and to have a firm platform that can be kept hygienic and clean.
6. WALLS
Walls are the vertical elements on which the roof finally rests. They can be made of different materials like bricks, stones, mud, concrete blocks, lateritic blocks etc. If the walls are very long, columns can be provided to carry the roof.
Walls provide privacy and enclosure. Walls also provide security and protection against natural elements such as wind, rain and sunshine.
Openings are to be provided in wall for access and ventilation.
7. OPENINGS
Openings are normally provided in the walls as door, windows and ventilators.
Doors provide access; windows and ventilators provide light and ventilation.
Lintels are constructed just above the openings. It is normally a stone slab or a concrete slab.
Sill is the part of the wall that is just below the window.
Lintels are constructed to hold up the walls above the openings. In earthquake prone areas a continuous lintel beam is provided all over the walls.
8. STAIRS
A stair is a sequence of steps and it is provided to afford the means of ascent and descent between the floors and landings.
The apartment or room of a building in which stair is located is called staircase. The space or opening occupied by the stair is called a stairway.
There are different kind of stairs are used in buildings, like RCC stair, wooden stair, metal stair, brick stair etc.
9. ROOF
The roof provides protection for the building and the people living in it. The roof rests on the walls and requires proper anchoring so that wind and other mechanical impact cannot destroy it. A roof can have different shapes but it is always either flat or sloping.
Roof is typically made of RCC, stone slab, tiles etc.
10. SURFACES / FINISHES
External finishes are the outer most layer of protection, which protect the structure from weathering. Internal finishes are the layers given on internal faces. They give durability and pleasing appearance to the inside.
3. Explain the methods of building layout.
Methods for Building Layout:
For a simple building layout, such as a rectangle, the outline of the building is marked by a line tied to corner posts - a nail in the top of the post can be used to attach the line to. A theodolite, site square or builder’s square is used to turn off 90-degree angles for the remaining corners. Ranging rods may be required to establish a straight line between corner posts.
Corner posts are usually 50 x 50mm timber posts driven firmly into the ground, with a nail in the post’s centre. The outline may be marked on the ground with dry lime or similar powder. Timber profile boards can be used at the corners. Profile boards are typically between 0.6-1m in height and comprise two 50 x 50mm posts driven at least 600mm into the ground, with a 150 x 38mm crossboard.
Where the outline of a building is more complex than a simple rectangle, it may be necessary to establish a range of points in the same way as for laying out a simple rectangle. However, great care is required, as small errors are more likely to be introduced as more points are positioned. Often the easiest way of laying out an irregular building shape is to first lay out a large rectangle which will enclose the entire building or the greater part of it. Once this is done, deductions and alterations can be made to obtain the precise layout required.
Trenches
The layout of trenches establishes the excavation size, shape and direction, as well as the width and position of walls. Trenches are excavated once the building outline has been set out. The width is often marked with a line of dots of dry lime powder for accurate excavation by hand, whereas the centre line is marked for accurate machine excavation.
Outline profile boards are often used to control trench positioning, width and depth. In order that they do not obstruct the excavation work, profile boards should be set up at least 2m clear of the trench positions. The level of the profile crossboard should be related to the site datum and fixed at a convenient height above ground level, often with cords strung between two profiles at either end of the trench. Bands can be painted on the crossboard for identification purposes.
Pegs are often driven into the bottom of the trench to mark the top of the concrete strip that is subsequently poured.
The corners of walls are transferred from intersecting cord lines to mortar spots on the concrete foundations, using a spirit level for accuracy.
Th cutting of trenches needs to be undertaken with great care, especially if they are to be left open for an extended period as there is the possibility of the sides caving in.
Reduced level excavations
The overall outline of a reduced level area can be set out working from a baseline. Corner posts are fixed to the outline of the excavation area and the outline marked with dry sand or similar material. To control the depth of the excavation, sight rails are set up at a convenient height and at positions which will enable a traveller to be used.
A traveller is a profile board with a fixed height, used for controlling excavated levels between profile boards. By placing the traveller in the sightline between two level boards, it is possible to see whether or not the excavation has been carried out to correct levels. The height of the traveller is the desired level of the sight rail minus the formation level of the excavated area.
Framed building
Framed buildings are usually related to a grid, often set out from a baseline. The intersections of the grid lines mark the centre points for isolated or pad foundations.
The layout of the grid is established using a theodolite and the grid intersections marked using pegs. Once the grid has been set out, offset pegs or profiles can be fixed clear of any subsequent excavation work. Control of excavation depth can be by means of a traveller sighted between sight rails or by level and staff related to a site datum.
Damp Proofing:
Damp proofing or a Damp-Proof in construction is a type of moisture control applied to building walls and floors to prevent moisture from passing into the interior spaces. Dampness problems are among the most frequent problems encountered in residences.
Damp proofing is defined by the American Society for Testing and Materials (ASTM) as a material that resists the passage of water with no hydrostatic pressure. Waterproof is defined by the ASTM as a treatment that resists the passage of water under pressure. Generally, damp proofing keeps moisture out of a building, where vapor barriers keep interior moisture from getting into walls. Moisture resistance is not necessarily absolute; it is usually defined by a specific test method, limits, and engineering tolerances.
4. What do you mean by damp proofing?
Damp proofing is accomplished several ways including:
A damp-proof course (DPC) is a barrier through the structure designed to prevent moisture rising by capillary action such as through a phenomenon known as rising damp. Rising damp is the effect of water rising from the ground into property.[2] The damp proof course may be horizontal or vertical.[3] A DPC layer is usually laid below all masonry walls, regardless if the wall is a load bearing wall or a partition wall.
A damp-proof membrane (DPM) is a membrane material applied to prevent moisture transmission. A common example is polyethylene sheeting laid under a concrete slab to prevent the concrete from gaining moisture through capillary action.[4] A DPM may be used for the DPC.
Integral damp proofing in concrete involves adding materials to the concrete mix to make the concrete itself impermeable.
Surface suppressant coating with thin water proof materials such as epoxy resin for resistance to non-pressurized moisture such as rain water or a coating of cement sprayed on such as shotcrete which can resist water under pressure.
Cavity wall construction, such as rainscreen construction, is where the interior walls are separated from the exterior walls by a cavity.
Pressure grouting cracks and joints in masonry materials.
Materials
Materials widely used for damp proofing include:
Flexible materials like butyl rubber, hot bitumen (asphalt), plastic sheets, bituminous felts, sheets of lead, copper, etc.
Semi-rigid materials like mastic asphalt
Rigid materials, like impervious brick, stone, slate, cement mortar, or cement concrete painted with bitumen, etc.
Stones
Mortar with waterproofing compounds
Coarse sand layers under floors
Continuous plastic sheets under floors
Anti Termite Treatment in buildings:
Termites damage household articles like furniture, plywood, clothing, stationery, etc. by feeding on wood and other organic material having cellulose base
Subterranean termites make nest in soil and workers search for wood by burrowing through the ground and making tunnels of mud
They travel through masonry work, brick walls and conduits of the building to the source of food and cause damage to the property and belongings
What is the solution to the problem?
Treating the soil beneath the building and around foundations when it is still in the process of construction is a good way to prevent termite infestation.
Pre-construction anti-termite treatment is attracting attention throughout the world.
The soil in immediate contact with the foundation and floor structure of a building is treated with an insecticide which kills or repels termites thus forming a toxic barrier which is lethal to termite entry.
Pre-construction anti-termite treatment is done in the early stages of construction so as to prevent termite infestation in the constructed building.
The steps involved in Pre-construction anti termite treatment:
Inspection
Site Preparation
Rightful application
Important Points
The pre-construction anti-termite treatment is effective only against subterranean termites and does not give any protection for dry-wood termites or other pests of wood.
After completion of pre-construction anti-termite treatment, if there is any construction/ masonry work in the treated area, the chemical barrier may get disturbed.
In such a situation the concerned authority of the building should inform your Professional Pest Management company so that immediate measures are taken to restore the chemical barrier and ensure prevention of termite entry.
If the customer see any evidence of termites after the treatment, they should report this to the concerned authorities or PMP
Do’s and Don’ts
Each part of the area treated should receive the prescribed dose rate of pesticide for the treatment to be effective
Barrier should be complete and continuous under the whole of the structure to be protected
All foundations should be fully surrounded by and in close contact with the barrier or treated soil
Do not allow personnel to enter the plots where the treatment is in progress
Do not store pesticides in empty containers
5. Explain the types of staircases.
1. Straight
This one is straightforward (literally). Straight stairs feature a single linear flight with no change in direction.
2. L-shaped (a.k.a. Quarter-turn)
The classic straight style, zhuzhed up a little. In this design, the stairs make a 90-degree turn at some point, going left or right after a landing.
3. Winder
The slightly more complicated sister to the L-shaped staircase. A set of winders—treads that are wider on one side than the other—takes the place of the landing to save space.
4. U-shaped (a.k.a. Half-turn)
If you've ever promised yourself, you'd take the stairs every day at your office, you've seen this back-to-basics style. The bend is taken even further to form a full U shape, and similar to the L-shaped staircase, a landing separates the two parallel flights.
5. Spiral
A compact design centered around a single pole, so that if you looked at it from above, it would form a perfect circle. Something to consider: A spiral staircase's narrow wedge-shaped treads aren't the easiest to traverse. (Avoid them if you're clumsy.)

6. Curved
Unlike winder or L-shaped staircases, a curved style has no landings. Instead, the stairs are continuous, following the bend of the banister to make a striking architectural statement.
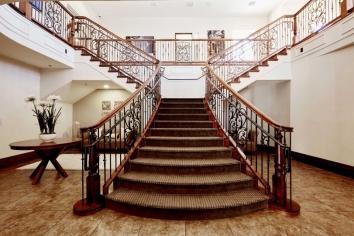
7. Bifurcated
The grandest of them all—this is the style of the iconic Titanic staircase—bifurcated stairs include one sweeping set of steps that splits off into two smaller flights going in opposite directions.
8. Ladder
No explanation needed here. Small-home owners desperate for even the tiniest extra sliver of square footage could go this route.

6. Explain different types of floor.
Timber
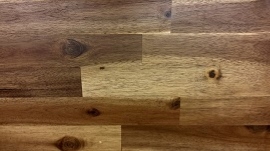
Given that each piece is different, the unique aesthetic of timber is one of the main appeals for its use as flooring. It can also be very durable although it may scratch and is prone to movement. As timber is hygroscopic (sponge-like), it can unsuitable for use in rooms that may be exposed to humidity or moisture, although treatment of the timber can make it resistant to moisture.
There are several options for finishing timber, such as wax, oil or lacquer. The two main types of timber flooring are:
Solid: Each board is made from a single piece of wood, typically 18-20mm thick, usually fitted using tongue-and-groove.
Engineered: Each board consists of three or four layers of laminated timber, held together at right angles by glue to create a plank typically of around 14mm thickness.
Laminate
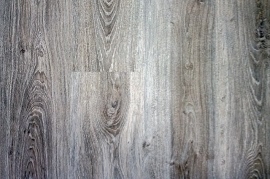
Laminate flooring is a compressed fiberboard plank covered with an image of a material such as timber, stone, tiles and so on that is then given a protective coating. Laminates can be suitable for rooms that wish to benefit from the aesthetics of a ‘natural’ floor but at a lower cost, with easier installation, and without the risk of being damaged by scratching. Good quality laminates are durable and may have a 20-year warranty. They require minimal maintenance and may be installed with under-floor heating.
Vinyl
Vinyl flooring can be supplied in rolls or tiles and is generally fixed by gluing. It can be manufactured in a very wide range of colours and profiles (for example studded) and as with laminate flooring can simulate the appearance of other materials.
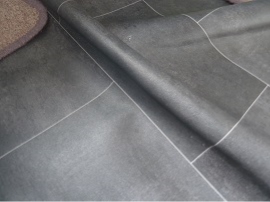
The advantages of using vinyl flooring include:
It is durable.
It is easy to maintain and keep clean.
It is capable of getting wet without buckling, making it suitable for use in bathrooms, kitchens, and so on.
It is easy to install.
It can be relatively inexpensive.
For more information, see Vinyl flooring
7. Explain various types of flooring materials.
Bamboo
Rather than being wood, this is grass that has been compressed into a floor material, and is nailed down or glued together. It has the advantage of being a renewable resource and water resistant.
Cork
Cork is a water-resistant, renewable material that is suitable for a range of spaces, including basement and bathroom installations. Cork can be clicked together in the same way as laminates or can be glued. Cork floors are warm and flexible although they can be damaged easily by sharp objects.
Tile (porcelain or ceramic)
There are many options in terms of colour, texture, shape and finishes of tiles. Because of their hardness they are difficult to scratch or dent, and are also suited to wet environments. However, they are difficult to instal and can break if there is a lack of support beneath the tiles.
Tile (natural stone)
These are generally more expensive than porcelain or ceramic options, but can be more aesthetically pleasing. They need to be properly sealed when installed, a process that will need repeating occasionally to keep the tiles protected.
Carpet
Carpet is made of an upper layer of pile attached to a backing. The pile is usually wool or fibres such as nylon, polyester or polypropylene that are heat-treated after having been twisted together into tufts or woven. There are many varieties of texture, style and colour available and generally carpet is both durable and easy to maintain. Carpet also has insulating properties in terms of both heat and sound. However, carpets can stain quite easily and can be damaged by water and damp.
Rubber
Rubber flooring is made from natural or synthetic materials, including recycled rubber tyres. It is categorised as a type of resilient flooring, since it exhibits characteristics of elasticity or ‘bounce’. This also makes it suitable for dance floors, restaurants or other high traffic areas where foot fatigue and slippage can occur.
Rubber flooring is also becoming a popular option for domestic installations. It’s being used for children’s playrooms, shower and bath rooms, garages, home gymnasiums and other applications that tend to require moisture and stain resistance, sound absorption, durability, elasticity and temperature stability.
Poured floors (mastic asphalt and polymeric)
Mastic asphalt and polymeric floors are poured as liquids and spread out across surfaces to harden and cure. This creates a finish without seams. While asphalt and polymer flooring options are not especially common, they do have advantages in both commercial (especially industrial) and domestic applications where water protection and durability are high priorities.
8. Explain with diagram brick masonry.
Brick Masonry Construction:
A good masonry should utilize bricks which are sound hard, well burnt, and tough with uniform color, shape, and size.
The bricks should be compact, homogeneous, free from holes, cracks, flaws, air-bubbles, and stone lumps. These bricks should be properly soaked in water for at least two hours before use.
In the brickwork, the bricks should be laid on their beds with the frogs pointing upwards.
The bricks courses should be laid truly horizontal and should have truly vertical joints.
As far as possible the use of bricks-bats should be discouraged.
As far as possible the brick walls should be raised uniformly with proper bond. Generally, the height of brick masonry construction in a day should be less than 1.5 m. The maximum difference in the rising of the walls between the different portions should not be more than one meter.
When the mortar is green, the facet joints should rake to a depth of 12 to 19 mm in order to have a proper key for plastering or pointing. The mortar joints should stuck finish if no plastering or pointing is to do.
In order to ensure a continuous bond between the old and the new, the walls should be stopped with a toothed end.
Finished brickwork in lime mortar should cure for a period of 2 to 3 weeks. This period can reduce to 1 to 2 weeks in the case of brickwork with cement mortar.
In order to carry out the brickwork at a higher level, a single scaffolding is used.
8.What do you mean by stone masonry?
The headers in the heart of the wall are the same size as in the face and extend at least 12 into the core of backing.
Headers in “Walls of feet (600mm) or less in thickness” extend entirely through the wall. The headers shall occupy at least 20% of the face of the wall.
Lay the courses with leaning beds parallel to the natural bed of the material.
Regularly diminish the thicknesses of the courses, if varied, from the bottom of the top of the wall, keep a surplus supply of stones at the site in select from.
Before laying the stone in the wall, shape and dress it so that it will not loosen after it is the place. No dressing of hammering which will loosen the stone will be permitted after it is placed.
Clean each stone and saturated it with water before setting it. Clean and moisten the bed that will receive it.
Bed the stones in a freshly made mortar with full joints. Carefully settle that stones in place before the mortar sets. The joints and beds have an average thickness of not more than 1 inch. (25 mm).
The complete process of working stones masonry construction:
The vertical joints in each course brack with the adjoining course at least 6 inches. (150 mm). If a stone is more or if the joints are breaking after the mortar has set, take the stone up and thoroughly clean the mortar from the bed and joints. Reset the stone in fresh mortar.
Whenever possible, properly point the face joints before the mortar sets. If joints cannot be the point, rake them out to a depth of 1 inch (25mm) before the mortar sets.
Do not smear the stone face surfaces with the mortar forced out of the joints of the mortar used in pointed. Drive the mortar into the joints and finish with an approved pointing tool.
Keep the wall wet while pointing. In hot or dry weather, protect the point masonry from the sun and keep it wet for at least three days after the pointing is finish.
Cavity wall construction:
The use of cavity walls is common in cold countries. However, one should know how they are constructed, and why.
The normal 275 mm (11 inches) cavity wall which is suitable for buildings not exceeding two stories in height, consists of two half brick (4 – 1/2-inch walls with 2 inches cavity).
Cavity Walls are useful in two ways. Firstly, the cavity prevents the dampness from the outer leaf percolating into the inner leaf.
Secondly, they provide excellent insulation from heat and sound.
However, when used in tropical countries, sufficient precautions must be taken to see that they do not become breeding places for lizards and insects.
The inner leaf is found to take a greater portion of the imposed load transmitted by floor and roof.
Hence, the two leaves of the wall are bonded together with ties (wall ties) usually placed 900 mm apart vertically and 450 mm horizontally in every 6th course staggered.
This gives more than two ties per square meter.
These wall ties are made from mild steel wires of 3 to 4 mm diameter or MS bars and fabricated to shapes as shown in the below Figure.
They are dipped in hot tar and sanded or made from galvanized steel to prevent rusting.
In very important works, copper may be used.
Wire ties are placed with their twisted end down to allow water, that may seep inside, to drip down in the cavity.
The bond to be used for both the leaves, when the thickness is half brick, is the stretcher bond.
Where the inner leaves are made thicker for carrying heavy loads. English bond can be used for that part.
Cavity walls require considerable care in design and supervision. Otherwise, their efficiency as insulators against driving rain, heat and cold will be seriously impaired.
Particular care is required at the top and bottom of the walls and around openings in the cavity wall construction.
9. Explain hollow block construction.
Hollow concrete blocks are substitutes for conventional bricks and stones in building construction. They are lighter than bricks, easier to place and also confer economics in foundation cost and consumption of cement.
Advantage:
-It can withstand heat thus giving fire protection to the house or buildings
-It has better sound performance where it able to block the sound from outside.
-It also offers lower utility cost. Energy efficient homes its inherent mass qualities help keep a home cooler in the summer and warmer in the winter.
-It reduces the nation’s energy needs and produce a cleaner environment
-It offers wide range of non-fade colors.
-It does not require painting for protection from being destroyed like woods.
-It is a load bearing material which is it also help to support the building.
-It is virtually maintenance-free. It never needs painting, caulking or staining.
-It won't burn or rot like other finish materials
Disadvantage:
-During extreme weather, it may cause degradation of the surface due to frost damage.
-It adds a lot of weight to the foundation. Therefore, it increases the stress of the foundation which stronger foundation needed to support these bricks.
- When the brick shows some damage, it is unable to repair that part only but to remove the entire wall section which very costly. Plus, material used are largely related.
- Poorly made bricks such as clinkers and older recycled bricks might be pitted, irregularly shaped, worn or prone to chipping.
- In humid climates, porous brick invites mold. It suffers damage as water and ice expand and contract in its pores.
- Brick is not cost-effective for many home builders. It can be damaged by vines.
The disadvantage of block is not insulated for northern climates because the frame wall is not being insulated. Therefore, the cold air from the outside will transfer into the house. Besides, block is not vulnerable to fire, mold and termites.
10. Explain anti termite treatment in building.
Anti Termite Treatment in buildings:
Termites damage household articles like furniture, plywood, clothing, stationery, etc. by feeding on wood and other organic material having cellulose base
Subterranean termites make nest in soil and workers search for wood by burrowing through the ground and making tunnels of mud
They travel through masonry work, brick walls and conduits of the building to the source of food and cause damage to the property and belongings
What is the solution to the problem?
Treating the soil beneath the building and around foundations when it is still in the process of construction is a good way to prevent termite infestation.
Pre-construction anti-termite treatment is attracting attention throughout the world.
The soil in immediate contact with the foundation and floor structure of a building is treated with an insecticide which kills or repels termites thus forming a toxic barrier which is lethal to termite entry.
Pre-construction anti-termite treatment is done in the early stages of construction so as to prevent termite infestation in the constructed building.
The steps involved in Pre-construction anti termite treatment:
Inspection
Site Preparation
Rightful application
Important Points
The pre-construction anti-termite treatment is effective only against subterranean termites and does not give any protection for dry-wood termites or other pests of wood.
After completion of pre-construction anti-termite treatment, if there is any construction/ masonry work in the treated area, the chemical barrier may get disturbed.
In such a situation the concerned authority of the building should inform your Professional Pest Management company so that immediate measures are taken to restore the chemical barrier and ensure prevention of termite entry.
If the customer sees any evidence of termites after the treatment, they should report this to the concerned authorities or PMP.