UNIT 3
MS-office
- Explain Saving New Document
Once you are done with typing in your new Word document, it is time to save your document to avoid losing work you have done on a Word document. Following are the steps to save an edited Word document −
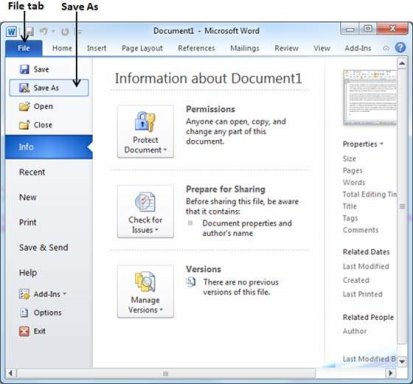
Step 1− Click the File tab and select the Save As option.
Step 2− Select a folder where you will like to save the document, Enter the file name which you want to give to your document and Select the Save As option, by default it is the .docx format.
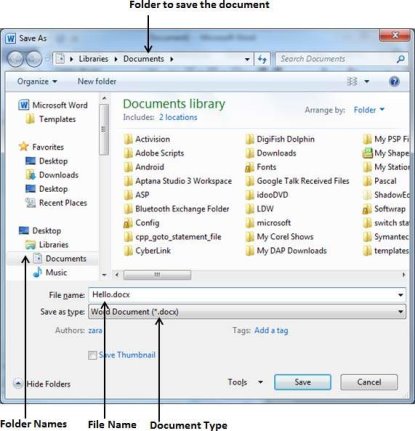
Step 3−Finally, click on the Save button and your document will be saved with the entered name in the selected folder.
2. Explain Saving New Changes
There may be an instance when you open an existing document and edit it partially or completely, or an instance where you may like to save the changes in between editing of the document. If you want to save this document with the same name, then you can use either of the following simple options −
- Just press the Ctrl + S keys to save the changes.
- Optionally you can click on the floppy icon available at the top left corner and just above the File tab. This option will also help you save the changes.
- You can also use the third method to save the changes, which is the Save option available just above the Save As option as shown in the above screenshot.
If your document is new and it was never saved so far, then with either of the three options, Word will display a dialogue box to let you select a folder, and enter the document name as explained in case of saving new document.
3. Explain Opening New Document
A new, blank document always opens when you start Microsoft Word. Suppose you want to start another new document while you are working on another document, or you closed an already opened document and want to start a new document. Here are the steps to open a new document −
Step 1− Click the File tab and select the New option.
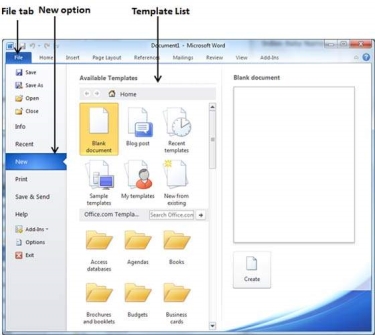
Step 2− When you select the New option from the first column, it will display a list of templates in the second column. Double-click on the Blank document; this is the first option in the template list. We will discuss the other templates available in the list in the following chapters.
You should have your blank document as shown below. The document is now ready for you to start typing your text.
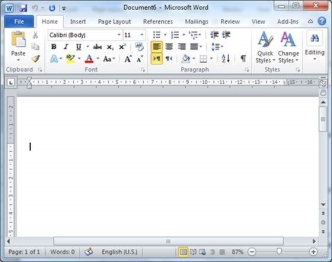
You can use a shortcut to open a blank document anytime. Try using the Ctrl + N keys and you will see a new blank document similar to the one in the above screenshot.
4. Explain Opening Existing Document
There may be a situation when you open an existing document and edit it partially or completely. Follow the steps given below to open an existing document −
Step 1− Click the File tab and select the Open option.
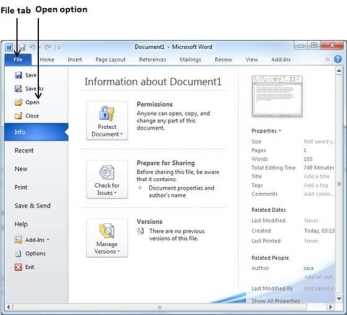
Step 2−This will display the following file Open dialog box. This lets you navigate through different folders and files, and also lets you select a file which you want to open.
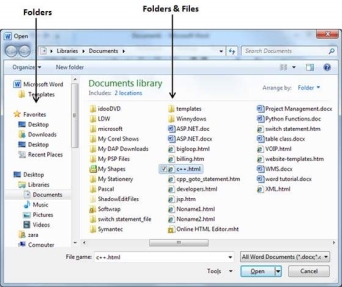
Step 3−Finally, locate and select a file which you want to open and click the small triangle available on the Open button to open the file. You will have different options to open the file, but simply use the Open option.
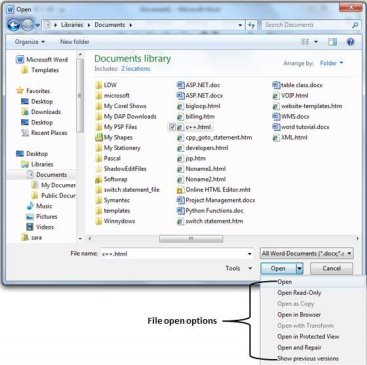
This will open your selected file. You can use the Open Read-Onlyoption if you are willing just to read the file and you have no intention to modify, i.e., edit the file. Other options can be used for advanced usage.
5. Explain Closing a Document
Closing a document removes it from your computer screen and if you had other documents open, Word displays the last document you used otherwise, you see a blank Word window. Here are simple steps to close an opened document −
Step 1− Click the File tab and select the Close option.
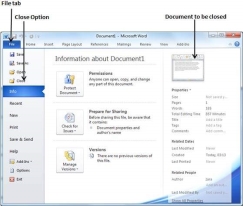
Step 2− When you select the Close option and if the document is not saved before closing, it will display the following Warning box asking whether the document should be saved or not.
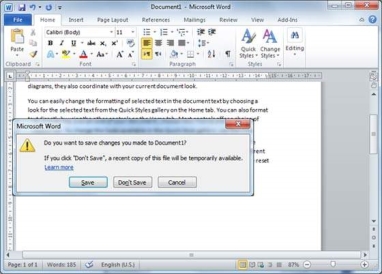
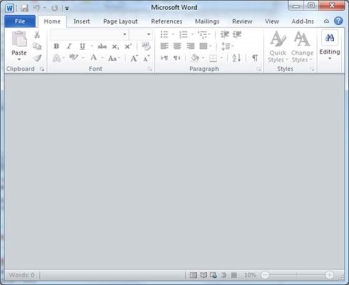
Step 3−To save the changes, click Save, otherwise click Don't Save. To go back to the document, click Cancel. This will close the document and if you have other documents open, Word displays the last document you used, otherwise, you see a blank Word window as shown below −
6. Explain Insert and Add Text
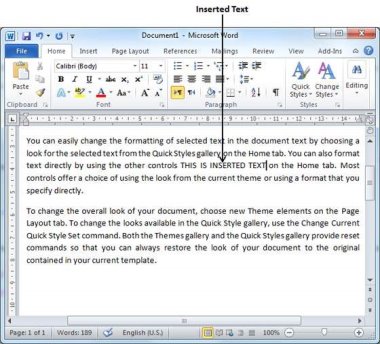
First we will see how inserted text will be added into the existing content without replacing any existing content.
Step 1− Click the location where you wish to insert text; you can also use the keyboard arrows to locate the place where the text needs to be inserted.
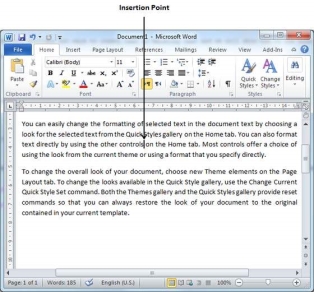
Step 2− Start typing the text that needs to be inserted. Word inserts the text to the left of the insertion point, moving the existing text to the right
7. Explain Insert and Replace Text
In the Insertion mode, text will be added into the existing content but same time it will over write all the content which comes in its way.
Step 1− Right-click the status bar and select the Overtype option from the displayed menu.
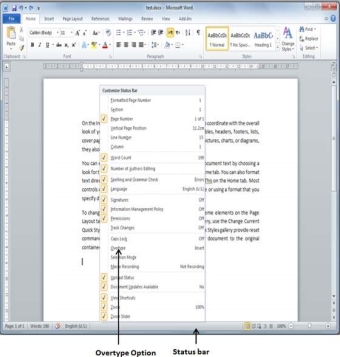
When you select the Overtype option, the status bar will show the insert mode as shown below −
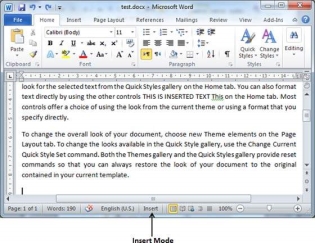
Step 2− Click on the Insert text available at the status bar and it will switch to the Overtype mode as shown below −
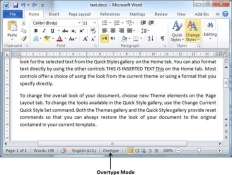
Step 3− Now click the location where the text needs to be inserted or you can use the keyboard arrows to locate the place where the text needs to be inserted.
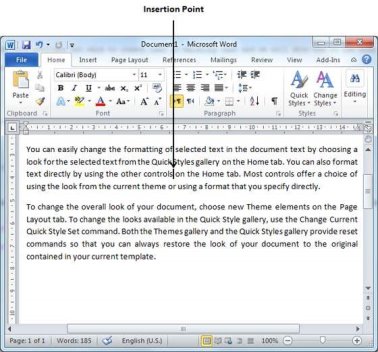
Step 4− Start typing the text that needs to be inserted. Word will replace the existing text with the newly typed text without moving the position of the exiting test.
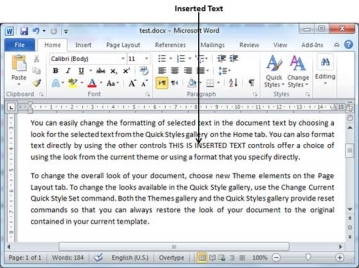
Note− Microsoft Word 2010 disabled the functionality of the Insert key and it does nothing, so you will have to follow-up with the above mentioned procedure to turn-on or turn-off the Insert mode.
8. Explain Create a Table
A table is a structure of vertical columns and horizontal rows with a cell at every intersection. Each cell can contain text or graphics, and you can format the table in any way you want. Usually the top row in the table is kept as a table header and can be used to put some informative instruction.
Create a Table
The following steps will help you understand how to create a table in a Word document.
Step 1− Click the Insert tab followed by the Table button. This will display a simple grid as shown below. When you move your mouse over the grid cells, it makes a table in the table that appears in the document. You can make your table having the desired number of rows and columns.
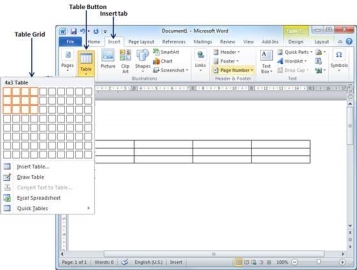
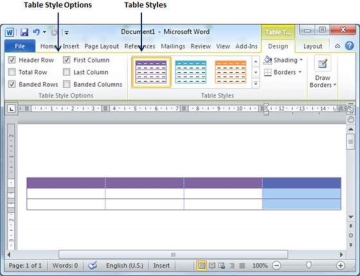
Step 2− Click the square representing the lower-right corner of your table, which will create an actual table in your document and Word goes in the table design mode. The table design mode has many options to work with as shown below.
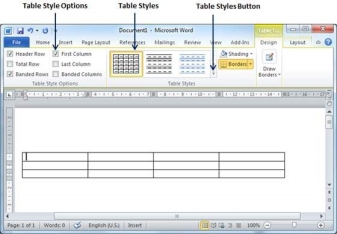
Step 3−This is an optional step that can be worked out if you want to have a fancy table. Click the Table Styles button to display a gallery of table styles. When you move your mouse over any of the styles, it shows real time preview of your actual table.
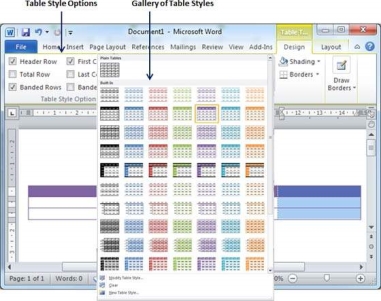
Step 4−To select any of the styles, just click the built-in table style and you will see that the selected style has been applied on your table.
9. Explain Delete a Table
Following are the simple steps to delete an existing table from a word document.
Step 1− Click anywhere in the table you want to delete.
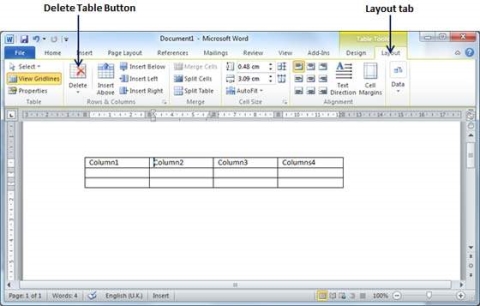
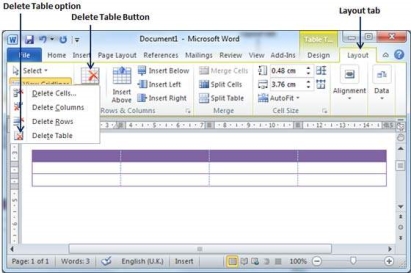
Step 2− Click the Layout tab, and click the Delete Table option under the Delete Table Button to delete the complete table from the document along with its content.
Rows & Columns
A table is a structure of vertical columns and horizontal rows with a cell at every intersection. A Word table can contain as many as 63 columns but the number of rows is unlimited. This chapter will teach you how to add and delete rows and columns in a table.
Add a Row
Following are the simple steps to add rows in a table of a word document.
Step 1− Click a row where you want to add an additional row and then click the Layout tab; it will show the following screen.
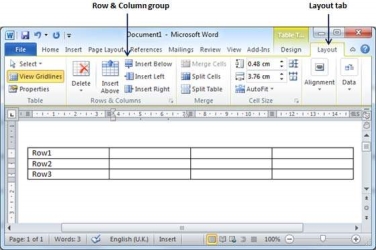
Step 2− Now use the Row & Column group of buttons to add any row below or above to the selected row. If you click the Insert Below button, it will add a row just below the selected row as follows.
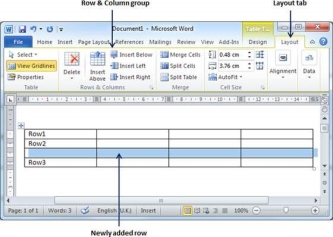
If you click the Insert Above button, it will add a row just above the selected row.
Delete a Row
The following steps will help you delete rows from a table of a Word document.
Step 1− Click a row which you want to delete from the table and then click the Layout tab; it will show the following screen.
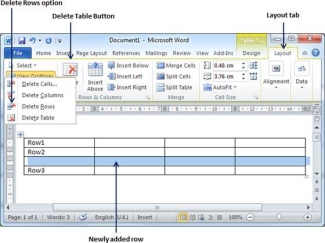
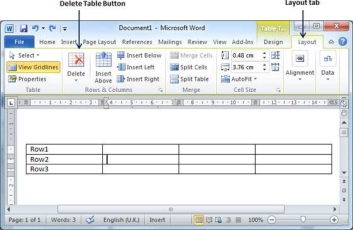
Step 2− Click the Layout tab, and then click the Delete Rows option under the Delete Table Button to delete the selected row.
10. Explain Add a Column
The following steps will help you add columns in a table of a Word document.
Step 1− Click a column where you want to add an additional column and then click the Layout tab; it will show the following screen.
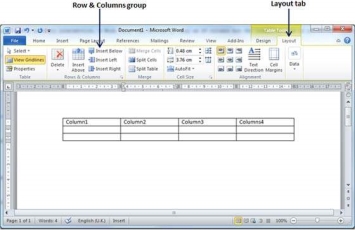
Step 2− Now use the Row & Column group of buttons to add any column to the left or right of the selected column. If you click the Insert Left button, it will add a column just left to the selected column as follows.
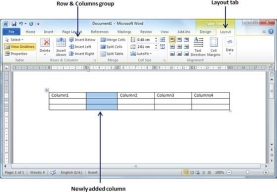
If you click the Insert Right button, it will add a column just next to the selected column.
Delete a Column
Following are the simple steps to delete columns from a table of a word document.
Step 1− Click a column which you want to delete from the table and then click the Layout tab; it will show the following screen.
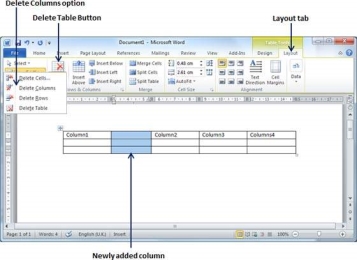
Step 2− Click the Layout tab, and click the Delete Column option under the Delete Table Button to delete the selected column.
