EG
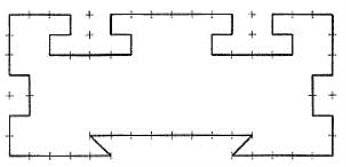
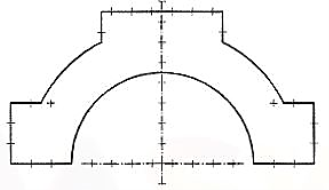
UNIT 1FUNDAMENTAL OF ENGINEERING DRAWING1. Draw a circle of 75 mm diameter. With the aid of T-square and set-squaresonly, draw lines passing through its center, dividing it into(i) eight, (ii) twelve and (iii) twenty-four equal parts. 2.Without using a protractor, draw triangles having following base angles on a75 mm long line as base:(i) 75° and 15°, (ii) 60° and 75°, (iii) 135° and 15°, (iv) 105° and 45°. 3. Draw a line 125 mm long and divide it into seven equal parts by means of a divider. 4. Draw lines (using the protractor) meeting at the end A of a line AB and makingwith it the angles: (1) 27°, (2) 49°, (3) 115°, (4) 151°. 5. Draw a straight-line AB of any length. Mark any point O on it. Through 0, drawall possible angles in multiples of 15°, with the aid of the T-square and set-squares 6. Prepare, giving all details, a neat sketch of a simple title block provided in adrawing sheet. What is its size, as recommended by the B.I.S.? 7. Make a sketch of an A 1 size drawing sheet, showing in it, the border lines, marginlines, folding marks, zones and the title block. Give the untrimmed and trimmedsizes of this sheet. 8. Differentiate clearly production drawing and installation drawing. 9. What are the different types of machine drawings? 10. Prepare freehand sketches of the views given in below figures. Assume eachunit to be of 10 mm length. Insert all dimensions.
|
0 matching results found

